Not sure how to turn your kitchen scraps into healthy garden soil? A simple DIY compost bin is all you need—just match its size to your waste and start layering browns and greens.
With some regular turning and mindful maintenance, you’ll soon have rich compost to feed your plants.
Keep reading to learn the easy steps to composting at home.
Understand Bin Composting Basics
Bin composting speeds up decomposition by keeping waste contained, so you get nutrient-rich soil faster while avoiding mess. The enclosed space retains heat generated by microbial activity, which increases compost temperatures and accelerates the breakdown of materials like kitchen scraps and yard waste. You simply layer browns, such as dry leaves, with greens, like vegetable peels, to maintain an ideal carbon-to-nitrogen ratio. The bin’s walls prevent scattering, ensuring you don’t lose valuable matter. Consistent heat and moisture inside the bin support faster composting without odors. You can easily add materials whenever needed and harvest finished compost whenever you’re ready. It’s a straightforward system: you manage the inputs, and the microbes do the heavy lifting, turning waste into garden gold. No fuss, just results. For optimal aeration and to prevent anaerobic conditions, begin with a base layer of sticks or shredded cardboard. To maintain consistent moisture levels, you can use a 2 gallon watering can for precise and even watering without over-saturating the pile. Consider that the bin’s enclosed design mimics the principles of a secure chicken coop by protecting materials from wind and scavengers.
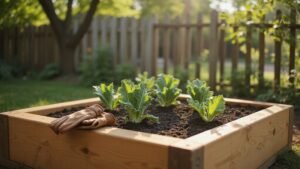
Choose Your Compost Bin for Any Space
Choose your compost bin size based on your waste output. A container of 1 to 10 gallons is suitable for a few days’ worth of kitchen scraps, making it ideal for small households or indoor use. For larger garden needs, an 80-gallon or bigger system can handle significant volumes of yard waste and compostables. For those wanting to compare the best options, reviewing top compost bins can help you find the right fit for your space.
For small spaces, opt for a 1.2- to 1.5-gallon countertop bin that can fit under your sink, or consider a worm bin on your balcony. Be sure the container’s height allows for proper airflow and easy access in your chosen location. Homesteaders with a decorative preference might also consider a Rae Dunn watering can to store compost tea. A well-made watering can with a long spout can also help you efficiently apply diluted compost tea to garden beds.
The size you select should match how much organic waste you generate to prevent overflow or frequent emptying, which can be inconvenient and discourage composting.
Know Which Green and Brown Materials to Compost
A good compost mix includes twice as much brown material as green, by volume, with a ratio of about 2:1 or 3:1. Brown materials like dry leaves, shredded cardboard, and straw supply carbon, which helps structure the compost and retain heat. Green materials such as grass clippings, coffee grounds, and vegetable scraps provide nitrogen and moisture, speeding up decomposition. Aim for a balanced blend, focusing on the right proportions rather than exact measurements, to promote healthy microbial activity. Avoid adding meat, dairy, oily foods, diseased plants, or pet waste, as these can attract pests or introduce contaminants. When incorporating weeds, only add pre-seeded annuals or leaves you’re certain are free of seeds, especially if hot composting is not used. Proper balancing of greens and browns ensures your compost breaks down efficiently and stays odor-free. For building durable structures in your garden, pressure treated lumber offers long-lasting rot resistance ideal for outdoor projects. For long-term success, consider learning about the construction details of wood duck nesting boxes, which require similar care in selecting proper materials.
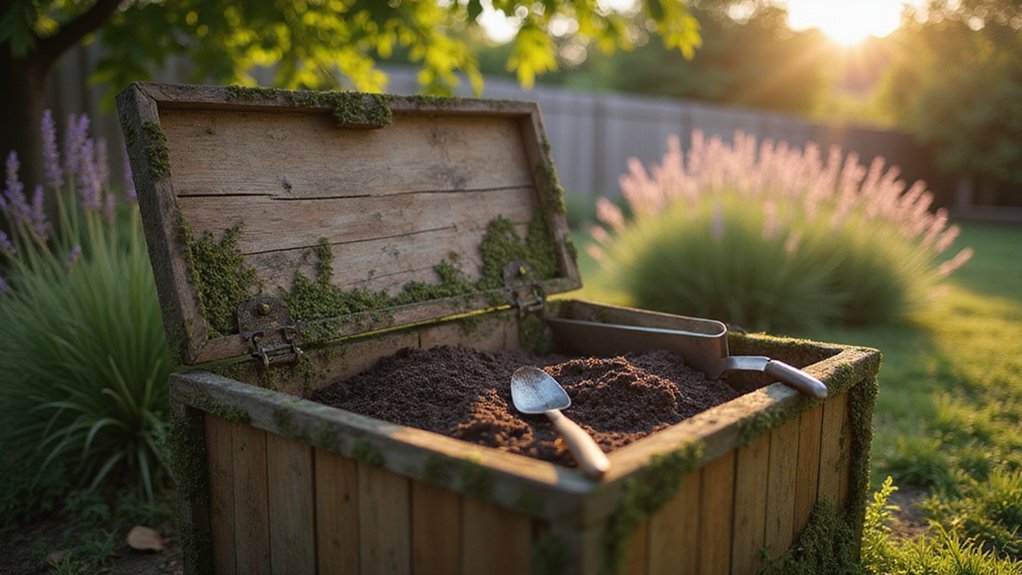
Layer Your Compost Bin for Fast Breakdown
To set up your compost bin for rapid decomposition, start with a 4- to 6-inch layer of coarse material such as twigs or wood chips. This coarse base acts as an underground ventilation system that prevents waterlogging and maintains steady oxygen flow beneath the pile. This base prevents the pile from becoming compacted and helps improve air circulation. For comparison, the same principle applies to automatic chicken feeders, which also rely on consistent airflow to keep feed dry and fresh. Next, alternate green and brown layers in a lasagna fashion. Keep green layers about 1-2 inches thick, and brown layers two to three times thicker. Shape each brown layer as a saucer around green layers to help contain the greens and deter pests. Water each pair of layers until it feels like a wrung-out sponge, ensuring consistent moisture. Sprinkle an inch of garden soil between layers to introduce beneficial microbes that accelerate composting. Finish with a deep 4- to 8-inch brown cover to control odors. Every one to two weeks, turn the pile inside-out to evenly distribute heat and microbes, promoting faster breakdown. For a similar layered approach in building, you can follow a step-by-step build guide to ensure proper structural order. Homesteaders can also benefit from this guide on mastering compost bins to refine their daily management techniques.
Nail Moisture and Airflow Every Time
Maintaining proper moisture and airflow requires regular monitoring and adjustments. Keep moisture levels such that when you grab a handful of compost, it releases just a drop or two—no excess water. If it feels too wet, incorporate dry browns like shredded paper or straw to absorb moisture. If it’s too dry, rewet with a hose until it feels like a damp sponge.
For airflow, turn your pile every 2 to 3 weeks using a pitchfork. Break up any matted top layers to promote air movement. Installing vertical wooden stakes or perforated PVC pipes creates permanent air channels, preventing pockets of stagnant air that cause foul odors. During rainy seasons, add more dry browns and increase turning frequency. When the weather is sunny and dry, water more often to keep moisture levels balanced. Consistent monitoring and adjustments will help you manage both moisture and airflow effectively.
Place Your Bin in the Ideal Spot
Placing your bin in the right spot is key to successful composting. Choose a location with partial shade for most climates, as full sun can cause it to dry out quickly, while deep shade may keep it too wet. Position the bin at least 10 feet away from your house to help prevent odors from lingering indoors. Keep it between 6 and 10 feet from patios or doors for easy access and to avoid disturbances. Leave at least 12 inches of space around the bin for proper airflow, and in front, provide 24 to 36 inches of clear area for daily turning or mixing. Additionally, place the bin near a water source for convenient hydration of moisture levels, but avoid spots with tree roots or exposed windy areas that can disturb the environment inside the bin. Consider storing a chef preserve vacuum sealer nearby to quickly seal and store compostable kitchen scraps without attracting pests. For a durable and rust-resistant watering tool, you might also keep a copper watering can nearby to gently hydrate the pile. To ensure a healthy pile, also avoid adding meat, dairy, and diseased plants, which can attract pests and spread pathogens.
Fix Smells, Pests, and Other Common Issues
To prevent pests, you should bury all food scraps immediately, covering them with four to eight inches of dry leaves. This depth keeps pests from accessing the waste and reduces odors that attract flies and rodents. Keep your bin lid tightly secured to prevent entry, and add mesh underneath the lid to block mice from crawling in. If your compost is overly wet and smelly, increasing browns helps absorb excess moisture. When using a similar system, you can also use heated waterer technology to maintain consistent temperatures for beneficial microbes in cold weather.
Avoid adding dog or cat manure, as it can spread pathogens and attract unwanted pests. If your compost bin gets too hot, provide shade to keep temperatures down. If it’s too cold, add insulation to maintain active composting. Use wood ash to balance the pH level, and aim for a carbon-to-nitrogen ratio of two to three parts browns (like leaves, cardboard) to one part greens (kitchen scraps, grass clippings). Proper management of these factors helps keep pests away and maintains healthy composting conditions.
Harvest and Use Your Finished Compost
Once your compost has turned a medium brown, is crumbly, and smells earthy with no visible food scraps, it is considered finished. This usually takes at least four weeks of curing after the pile no longer heats up during mixing. Use a circular sieve to sift the compost and separate out larger pieces, which should be returned to a new compost bin for further decomposition. Check the pH of the finished compost; it should be near neutral, around 6.5 to 7.0. Keep track of the origin of your materials, known as compost provenance, to better understand its nutrient content. Store the compost in upright bags in a cool, dry, and well-ventilated space for a few weeks to stabilize it. When ready to use, mix one-third compost with soil and sand for potting mixes or apply it directly as a top dressing, mulch, or to amend planting holes. Finished compost can also be loaded into a wheelbarrow for transport to garden beds. Your garden will benefit from this rich, ready-to-use compost. For homesteaders who also preserve food, using a pressure canner ensures low-acid foods are safely processed at the correct temperature.