DIY Raised Garden Bed on Legs for Homesteaders
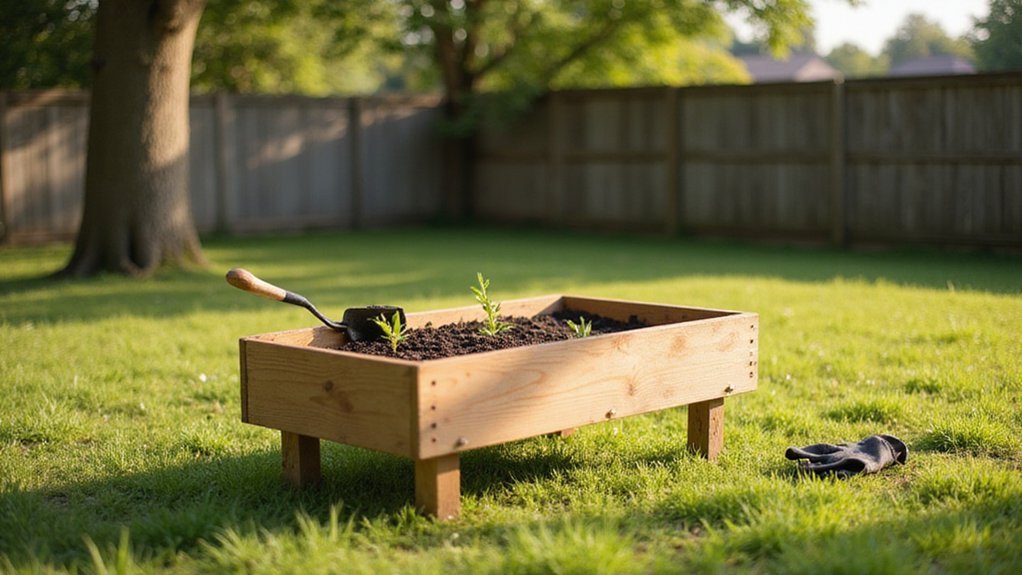
Wondering how to create a comfortable, back-friendly gardening space? Building a raised garden bed on legs can raise your planting height to 24 to 36 inches, making gardening easier on your back.
Using durable materials like cedar or redwood can help your planter last for 15 to 20 years.
Keep reading for a step-by-step guide to bring your garden bed to life.
Why Build a Raised Garden Bed on Legs for Your Homestead
Building a raised garden bed on legs that are 24 to 36 inches high enhances accessibility and reduces strain. At this height, you can plant and harvest comfortably without bending or kneeling, which helps protect your lower back and decreases recovery time. Additionally, the elevated position improves soil health by preventing ground moisture from saturating the bed, leading to better aeration, faster drainage, and lower chances of root rot. For homesteaders who also keep chickens, the same ergonomic principle applies when determining the right height for roosting bars. Just as a proper lid seal prevents air from ruining stored food, sealing mason jars with a similar attention to airtight closure keeps crops fresh for months. To further protect your yield, selecting the right garden bed cover can shield plants from frost and pests.
Raising the bed also acts as an effective pest barrier—slugs and cutworms have a harder time climbing or reaching plants, and weed seed intrusion from surrounding soil is minimized. This elevation lets you notice crawling insects early, catching potential damage before it spreads. Furthermore, a raised bed on legs reduces fungal diseases by promoting better airflow around plants, resulting in healthier growth and higher yields with less effort.
Choose the Right Lumber for a Durable DIY Planter
Cedar is one of the best choices for a durable DIY planter because it naturally resists rot and pests, lasting 15 to 20 years without chemical treatment. Redwood is similarly reliable, with a lifespan of 10 to 20 years, and black locust exceeds 20 years of rot resistance. These woods are ideal for outdoor planters since they handle moisture well and do not require chemical treatments that could leach into food plants. Avoid pressure-treated lumber, as it contains chemicals that can be harmful to edible plants. Instead, opt for untreated, food-safe woods like cypress or juniper, which resist decay for about 8 to 12 years. Use 2-inch-thick boards, such as 2×6 or 2×12, for added durability. Sourcing locally can reduce costs and environmental impact. Naturally rot-resistant woods can often handle moisture and drainage without additional liners or special drainage holes, making your planter both safer and longer-lasting. For efficient watering, consider a Squirtle watering can for precise moisture control in your raised beds. For managing kitchen scraps, a compost bin can complement your planter by recycling waste into nutrient-rich soil. This selection of rot-resistant softwoods can even outperform farmed pine, which typically lasts only 3 to 5 years in moist soil. Adding a chicken coop run near your garden can help integrate pest control and natural fertilizer.
Assemble the Planter Box Base With Drainage Spacing
To guarantee your raised planter drains properly without waterlogging the soil, drill four to six evenly spaced drainage holes across the bottom panel surface, approximately six inches apart. Use a drill bit between 3/4 inch and 1 inch in diameter to allow adequate water flow. Avoid clustering all holes in one corner to ensure even drainage across the entire base. This method ensures the soil drains as effectively as an automatic door prevents moisture buildup inside a coop. For rabbits, a similar principle applies when selecting a nesting box to prevent damp bedding and promote healthy kits.
Next, cut a piece of landscape fabric to fit the interior dimensions of the bottom and line it inside the planter box. Secure the fabric edges with staples to prevent shifting. Cut small holes in the fabric directly over each drainage opening to prevent soil from clogging the drainage holes. To reinforce the base, attach vertical support strips evenly along the inside perimeter. Finally, install angle brackets at each corner using pre-drilled exterior screws to create a sturdy foundation. This combination ensures your planter drains freely, preventing water accumulation and supporting healthy plant growth. For this project, select a rot-resistant wood species like cedar or redwood to prolong the bed’s lifespan against moisture and soil contact.
For a more robust and hidden water management system, a PVC downspout can be integrated into the bottom shelf to channel excess water away rather than relying solely on simple holes.
Layering Landscape Fabric and Chicken Wire for Drainage
To effectively layer landscape fabric and chicken wire for drainage, start by placing the chicken wire directly over the drainage holes. This acts as a critter barrier, preventing pests from reaching the soil while letting water pass through. Next, cut the landscape fabric with at least 12 to 18 inches of overlap beyond the edges of the bed. This excess prevents soil from slipping into the drainage system and clogging it. This gravel and fabric layering strategy mirrors the rapid water flow design used in professional French drains to prevent pooling. For homesteaders managing multiple beds, understanding the compost bin completion timeline helps schedule soil replenishment and bed maintenance cycles. A watering can cartoon can offer simple visual guidance for testing your drainage flow before adding soil. For cutting the chicken wire to size, use tin snips for clean cuts and wear gloves to avoid sharp edges.
Ensure the fabric extends all around the sides of the bed and is secured with staples to prevent shifting. The chicken wire supports the fabric, helping it resist tearing and preventing it from collapsing into the drainage holes over time. Water should flow freely through this layered setup, with soil kept out of the drainage system.
Before adding soil, test the setup with water to confirm there are no blockages and that water drains smoothly. Proper installation and secure layering are essential for long-lasting, effective drainage that maintains soil health and pest control.
Build Sturdy H-Shaped Leg Supports for Stability
To build the H-shaped leg supports for stability, start by cutting four 2×4 boards to 4-foot lengths for the vertical posts. Drill a ½-inch hole 2 feet up from the bottom of each post to accommodate bolts later. Use pressure-treated lumber to resist fungal decay and prevent warping from soil weight, which helps avoid soil erosion around your garden site.
Next, cut two 36-inch plywood crossbars and seal their edges with waterproof varnish for durability. Attach these crossbars horizontally between pairs of posts at the 2-foot mark using 3-inch deck screws and ½-inch bolts. This creates a balanced H-frame, with each leg supporting approximately 150 pounds and a total capacity of about 600 pounds for all four legs. Use galvanized fasteners to resist rust, ensuring the support remains sturdy through rain and pest control activities. Confirm that each post stands perfectly perpendicular to the ground for maximum stability. To enhance the roosting area for your chickens, consider adding sandpaper grip strips to each vertical post for better footing. Pre-drill holes at stakes and assemble brace to connect the back frame to the main structure with 2.5-inch screws for added support. For long-term weather resistance, ensure your H-frame uses pressure-treated lumber and galvanized fasteners to match the durability of quality wood duck nesting boxes. For enriching the garden soil inside the bed, consider adding composted chicken manure to boost nutrient levels.
Attach the Leg Frames to the Planter Box Securely
To securely attach the leg frames to the planter box, clamp each leg tightly to the edge before fastening. This ensures a perfect perpendicular alignment and prevents shifting during assembly. Drill 1/8-inch pilot holes at each corner to prevent splitting of the wood, then drive 2-3 inch deck screws through the inside corners. This method keeps the fasteners hidden and maintains a clean look.
Apply construction adhesive to each joint before screwing to enhance stability and prevent gaps. This creates a stronger bond and helps keep the legs in place over time, especially with exposure to moisture. Make sure the tops of the legs are flush with the top slat’s tongue to distribute the load evenly. Ensure the chosen watering can has a proper grip design for easy handling during garden maintenance.
Sand all attachment surfaces first using 150-grit sandpaper to improve screw grip and prevent splinters. Drive at least four screws into each leg corner for torsional resistance, creating a water-resistant and robust connection. Confirm ledge side of planter box faces down during assembly to ensure proper support for the bottom slats. Using a plastic watering can with a comfortable handle reduces hand fatigue during repeated watering tasks. If you also store lids in the garden shed, choose mason jar lids that seal tightly to keep out moisture and pests. This approach ensures the legs stay securely attached, even under wet soil loads, and helps prevent loosening over time.
Cost-Saving Hacks for Sourcing and Cutting Your Lumber
Source reclaimed or discounted lumber to save money. Look for fencing materials at demolition sites or online classifieds, where old fence boards or barn siding are often free or inexpensive. Check local lumber yards for mis-cut wood, which can be discounted by 50 to 70 percent. Big-box stores sell pressure-treated 2x4s for around $1.20 per foot, a good deal for sturdy framing. When measuring each board for cutting, use a tape measure and account for the blade kerf to prevent waste. Cut short pieces first, then use leftover scraps for longer sections. Rip 5.5-inch boards into 1.25-inch strips for rails to maximize material use and reduce costs. Use a circular saw with a square guide for straight, accurate cuts. Many hardware stores offer free cut services on larger orders, helping to save both time and money. Building with modern treated lumber provides superior control over soil and is considered safe, as prior concerns from the 1980s are no longer relevant. For those also housing chickens, a well-designed coop can protect your flock from predators and weather. A set of best mason jars for salads can store harvested greens and dressings conveniently from garden to table.
Protect Your Raised Bed From Weather and Wear
Protecting your raised bed from weather and wear involves several practical steps to ensure it remains durable and your plants stay healthy year-round. Start by applying a 3-inch layer of shredded leaves or grass clippings as mulch. This layer helps prevent soil erosion, insulates roots during cold weather, and discourages surface-dwelling pests. During heavy rain, verify that your bed has drainage holes or add gravel at the bottom to prevent water from pooling and causing waterlogging. Covering compost with dark plastic absorbs heat and promotes faster decomposition, while using row covers during frost protects delicate plants from cold damage.
In heatwaves, shade cloth can prevent overheating and dehydration, keeping your plants comfortable. To safeguard the wood from pests and moisture damage, seal wooden legs annually with waterproof oils, and opt for rot-resistant materials like cedar or galvanized metal for the bed’s frame. Improving soil drainage with amendments such as coarse sand can also reduce damage from excess water. During heavy rain, use tarps to shield the bed, but ensure the bottom remains open to allow natural drainage and airflow. Never seal the base completely, as proper ventilation and drainage are crucial to maintaining the bed’s structural integrity and preventing wear over time.
Annual Maintenance Checklist for Long-Lasting Garden Beds
Regular maintenance is essential to keep your garden beds healthy and productive over the years. Start by inspecting leaf undersides weekly for pests like aphids and slugs, and remove any infestations immediately to prevent spread. To maintain soil fertility, add 1 to 2 inches of compost every spring and fall, then cover with organic mulch to retain moisture and suppress weeds. Every six months, check the structural integrity of your raised beds—tighten loose screws, replace rotted boards, and reinforce corners to ensure stability. Rotate crops annually to different sections of your garden to prevent disease buildup and nutrient depletion. Turning the top two inches of soil with a spade each year enriches aeration and helps break up soil compaction. Clearing all debris at the start of each season keeps pathways open, reducing hiding spots for pests and weeds. Following this routine ensures your garden beds stay durable and productive for many seasons.