Thinking about building your own raised garden beds but not sure where to start? You can create sturdy, cost-effective beds for under $100 by choosing the right site and materials.
With some planning and basic tools, you’ll be planting your garden in no time. Keep reading to learn how to build durable beds that will serve your homestead for years.
Pick the Best Location for Maximum Sunlight
The best location for maximum sunlight is an open, unobstructed spot that receives at least six hours of direct sunlight daily. Start by scouting a site that gets full sun from spring through early fall, prioritizing morning sunlight exposure over the harsher afternoon rays, especially in hot climates. Avoid areas near trees or buildings that cast shadows, as shading reduces yield potential and delays maturity. To ensure easy movement and maintenance, the site must also provide at least 2 feet of walkway clearance between garden beds. Choosing adequate insulation for nearby structures can further protect your plants from temperature extremes. If your garden also houses poultry, consider that predator-resistant designs from high-quality coops can keep your flock safe while you tend nearby beds. Reviewing wood duck nesting boxes can also offer insights into vertical habitat placement that maximizes sun exposure for nearby structures.
For optimal sunlight exposure, orient your long beds north to south. This alignment ensures even distribution of light across both sides as the sun moves from east to west. If you’re growing tall crops like pole beans, an east-west orientation works well. Position beds on the south side of your home or garage to escape north-facing shadows. Check for nearby heat-reflective surfaces, such as concrete or metal, which can dry soil quickly, and choose flat ground to reduce leveling effort. A well-sited bed will boost production and minimize maintenance.
Prep the Ground by Marking Utilities and Leveling
To prepare the ground by marking utilities and leveling, start by calling 811 at least three days before digging. This free service will mark your public utilities—gas, water, electricity, and broadband—on your property. Keep in mind that private lines, such as shed feeds, require a separate survey. Once utilities are marked, maintain a safe distance by keeping power tools at least 50 centimeters from the markings. When working near service lines, opt for a rounded shovel instead of a pointed spade to prevent damage. Using a tumbler for compost can help recycle organic waste into nutrient-rich material for your garden beds.
Dig parallel to the utility lines rather than straight down to reduce the risk of hitting them. Before leveling, clear all vegetation from your bed’s footprint. Use a shovel to flatten the soil along both the length and width of the area. Check the level with a carpenter’s level to ensure both axes are even. Improve drainage and soil pH by adding compost and lime, then lightly tamp the soil to create a stable surface. Use string and line level to ensure the surface is straight and level across the entire garden layout. With these steps, your site is fully prepared and ready for construction.
Choose Rot-Resistant Lumber That Saves Money
Cedar and black locust are among the most rot-resistant lumber options. Cedar typically lasts 10 to 20 years in ground contact without the use of chemicals, making it a good natural choice for many projects. Black locust surpasses this with a lifespan of over 30 years. While premium woods like redwood come with a higher initial cost, they can significantly reduce long-term replacement expenses. If you prefer avoiding chemicals, untreated cedar or hemlock are ideal because they won’t leach into your soil, unlike pressure-treated options. Douglas fir offers a practical middle ground with about 10 or more years of durability at a moderate price. Prioritizing locally sourced, sustainably harvested species can lower transportation costs and support forest replanting efforts. Regional availability influences your choice: cypress is well-suited for humid Southern areas, while redwood thrives in the West. Selecting naturally durable species not only saves money over time but also helps protect your soil and harvests. For instance, white oak’s exceptional density provides superior resistance to rot, fungi, and insects, offering a strong, durable alternative to cedar. To maximize the longevity of your garden tools, you can also store them with consistent moisture control to prevent rust and deterioration.
Cut and Assemble Your Raised Bed Frame
To cut and assemble your raised bed frame, you will need four pieces of lumber: two 4-foot and two 10-foot sections of 2×10 cedar. These dimensions create the desired frame size and provide sturdy support for your soil. Use a circular saw to make 45-degree miter cuts on the 2×4 cap pieces, ensuring a clean, finished look at the corners. Drill pilot holes before screwing to prevent the wood from splitting. To further prevent bowing and ensure lasting stability, incorporate corner and center bracing flush with the top of the frame.
Position the short sides (4-foot pieces) against the long edges (10-foot pieces) to form a rectangular frame. Secure each corner with three-inch exterior screws, driving them through both sides for maximum stability. Attach the legs at each corner by screwing through both the short and long sides, which offers solid support and stability for the entire structure.
Before filling your raised bed with soil, conduct a soil test to check pH and nutrient levels. Adjust the soil accordingly to create an optimal environment for your crops. Install landscape fabric inside the frame to block weeds and deter burrowing insects, saving you time and effort later on. For added stability, drive stakes every 2.5 feet along the long sides of the frame, sinking them 18 inches into the ground, then screw them to the frame. For chickens that will forage near the beds, ensure their roosting bars are positioned at a height that keeps them safe from nighttime predators. Choosing cedar or pine shavings for the coop floor can also help absorb moisture and control odors near the garden area. Rotating crop families each season in your raised beds can help prevent soil depletion and reduce pest buildup.
Layer Soil, Compost, and Mulch for Drainage
Layering organic matter, compost, and mulch creates a well-draining and fertile raised bed. Start with a 5–6 inch base of organic matter like well-rotted manure. This enhances aeration and prevents water from pooling. Then add a 10–15 cm layer of compost to improve soil structure and provide essential nutrients directly to plant roots. Finish with a 2–3 inch layer of mulch, such as wood chips or straw. Ensure the mulch does not contact plant stems to prevent rot, and apply it evenly across the surface. Mulch helps reduce evaporation and surface runoff, breaking down gradually to enrich the soil over time. Regularly fill in any bare spots to maintain consistent drainage. For heavy clay soils, mixing in coarse sand or perlite can further improve drainage and prevent waterlogging. This method of filling the bed is similar to building a soil profile that mimics natural forest floors. If you notice unpleasant odors from the lower compost layer, add more dry brown materials like straw or cardboard to absorb excess moisture and balance the carbon-to-nitrogen ratio. This layering method, much like the practical solutions for understanding historical naming, focuses on addressing root causes for optimal results.
Plant Seedlings Correctly for Strong Root Growth
Transplant seedlings on a cloudy day or late afternoon to reduce heat stress and prevent wilting. Ensure overnight temperatures stay above 55°F before moving them outdoors. Water your bed thoroughly beforehand to soften the soil, making it easier for roots to establish. Incorporate 2–3 inches of compost into the top 4–6 inches of soil to meet the seedlings’ nutrient needs. Dig holes twice the size of each root ball and keep them free of debris. Sink the root plug 0.5–1 inch below the soil surface, but avoid compacting the soil around it, which can hinder root growth.
Handle seedlings by their leaves, not the stem, to prevent damage. If a plant is pot-bound, tilt the container sideways to gently remove it. Use root pruning by teasing apart circling roots before planting to encourage outward growth. Cover the root ball with just ¼ inch of soil, then water deeply to eliminate air pockets and ensure good soil contact. Water your seedlings daily for the first 2–3 days to keep the soil moist, then switch to deeper, less frequent watering to promote strong root development.
Install Hardware Cloth and Plastic Liners for Protection
Installing hardware cloth and plastic liners provides essential protection for your planting bed. Start by cutting a sheet of hardware cloth larger than your bed dimensions using tin snips. This extra size ensures full coverage and easy overlap. Place the sheet underneath the frame, flipping it upside down so that the edges extend up the sides.
Secure the hardware cloth to the frame by stapling every 3 to 4 inches. Overlap the edges of the mesh by two inches to prevent gaps where pests could enter. Fold the excess mesh 4 to 6 inches up the interior sides of the frame to block rodents that might climb in. These steps prevent tunneling pests while allowing water drainage.
Next, lay a food-grade plastic liner over the hardware cloth. Perforate the plastic to facilitate drainage and prevent water buildup. Overlap the edges of the liner and seal them with waterproof tape. This barrier keeps soil from rotting the wood and also acts as a weed barrier. Combining both layers—hardware cloth and plastic liner—ensures dual protection against pests, moisture damage, and weeds, without trapping excess water inside.
Add Mitered Caps and Braces for a Finished Look
Add mitered caps and braces to give your project a polished, finished appearance. Start by cutting cap boards to length using a miter saw set to a 45-degree angle for precise corners. Stack 2×4 pressure-treated boards for durability and align them on the bed rim, making sure gaps are even. Fasten the corners with 2-inch trim screws, then sand all edges smoothly to prevent splinters.
For added strength, install vertical 4×4 corner posts inside the frame, anchoring panels securely. Attach horizontal braces at the midpoint of each long side, pre-drilling screw holes to avoid splitting the wood. Use 3-inch galvanized screws driven from the inside for a clean exterior look. Reinforce outside corners with 1×4 flat boards to increase stability. Before screwing, apply wood glue to all joints for extra bonding. Finally, consider adding decorative molding along the caps and braces to enhance the aesthetic appeal while maintaining structural integrity. For long-term durability, use treated lumber to resist moisture and decay, as noted in construction principles. Regular maintenance, including cleaning the bin and layering green and brown materials, ensures proper decomposition for healthy soil.
Applying the same attention to detail as a wheelbarrow tire repair prevents future breakdowns and keeps your equipment ready for use.
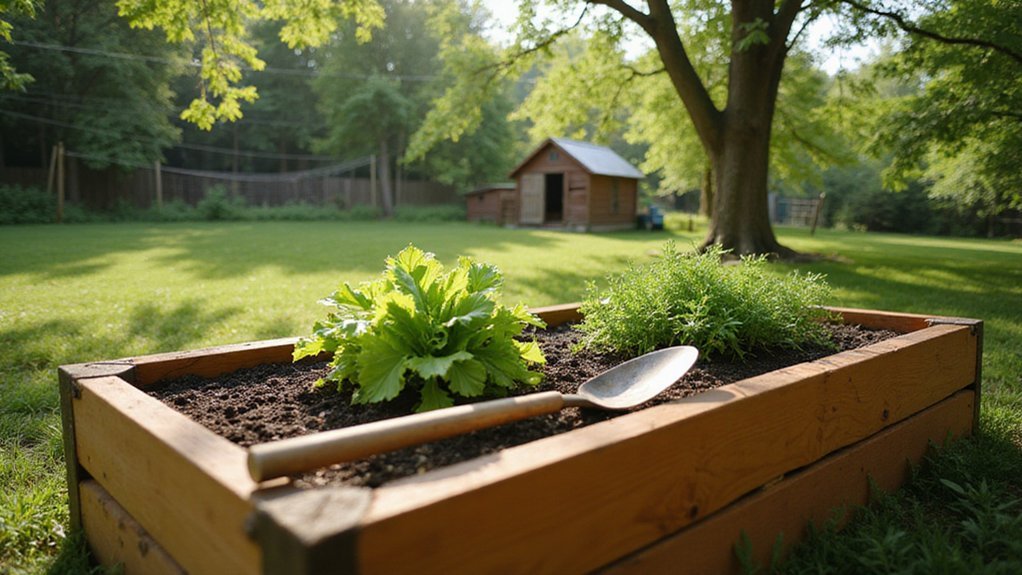
Build Raised Garden Beds for Under $100 With Scrap Wood
You can build a raised garden bed for under $100 using scrap wood. Begin by sourcing free pallets or reclaimed lumber from Facebook Marketplace or local salvage sources. Look for boards that have minimal knots and straight edges, which makes assembly easier. Each 6-foot board works well for constructing a 3×3 foot bed, providing enough length for sides and manageable cuts. Consider using a Lego watering can for gentle irrigation of your new beds. Sourcing metal from Facebook Marketplace and Craigslist can also keep costs low, with metal panels costing about $1 per foot.
Use 2x4s to create the framing posts at each corner for stability. For the side panels, opt for 2x8s to give the bed height and durability. Attach the boards with 1.5 to 2.5 inch screws, pre-drilling diagonal holes to prevent splitting and ensure sturdy joints. This method reduces costs and makes use of recycled materials, keeping the build under your $100 budget.