How to Speed Up Your Compost Bin
Feeling frustrated that your compost takes forever to finish? You can speed things up by creating a smaller, heat-retaining pile and managing it carefully.
With some simple tweaks, you might have rich compost in just a few weeks instead of months. Keep reading for easy tips to turbocharge your composting process.
Build a 3x3x3-Foot Pile to Trap Heat Fast
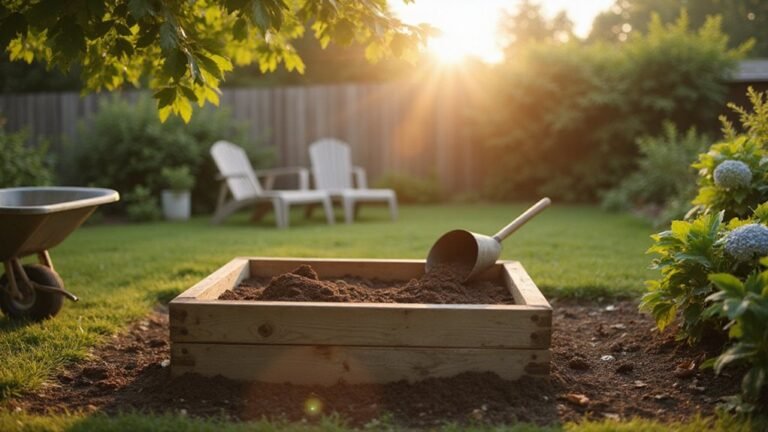
Build a 3x3x3-foot pile to trap heat quickly. This size—three feet tall, wide, and deep—creates enough volume to generate self-insulating heat and jump-start microbial activity. Achieving this minimum dimension ensures the pile reaches temperatures of 130 to 150°F, which is hot enough to suppress weed seeds and encourage thermophilic bacteria to break down tough woody materials. If you have more space, a 4×4-foot pile works even better, maintaining heat levels for faster composting. For more guidance on managing hot piles, refer to wood duck nesting box designs for inspiration on creating sheltered environments.
Place your pile in a sheltered location away from wind and direct sunlight to help conserve heat. Start with a six-inch base layer of coarse browns, such as twigs or shredded cardboard. This provides essential airflow that fuels microbial heat production. Without this foundational layer, the pile won’t trap heat effectively, and decomposition will slow down significantly. To further accelerate the process, incorporate inoculated compost at the top of the brown layer to spread microbiology throughout the pile. For optimal results, consider positioning the pile near a well-ventilated chicken coop to benefit from the heat and activity.
Mix Browns and Greens in a 3-to-1 Ratio
You should aim for three parts browns to one part greens by volume. This ratio hits the ideal carbon-to-nitrogen balance for microbes, ensuring rapid breakdown without unpleasant odors. For every green scrap bucket, cover it with three buckets of dry leaves or shredded paper. Always cap each green layer with an equal volume of browns to bury food scraps and block odors. The mixture should feel like a damp, wrung-out sponge—moist but not soggy. Keeping this ratio precise helps your compost pile heat up quickly and compost in just a few weeks instead of several months. Too many greens can make your pile slimy and smelly from ammonia, while too many browns can make the pile inert and dry. Regular turning of the pile maintains aeration and microbial efficiency. For homesteaders seeking faster results, a simple watering can can be used to lightly moisten dry browns as you build the pile, ensuring proper moisture without soaking. For those raising chickens, the roosting bar height influences how easily you collect nitrogen-rich manure to feed the compost.
Shred Scraps to 1-Inch for Quick Decomposition
Shredding scraps to 1-inch pieces or smaller significantly increases the surface area available for microbes to attack, accelerating compost breakdown. For tougher stems and woody bits, go even smaller—aim for 1/2-inch chunks—to promote rapid decomposition. Soft kitchen scraps also benefit from shredding to 1/2-inch pieces, which helps prevent clogs and speeds up decay. Before adding dried leaves, run your lawnmower over them until they’re chopped into 1-inch fragments. Cut cardboard and paper into 1-inch strips or squares to optimize their breakdown. To keep the pile adequately moist, use a Dollar Tree watering can to apply water evenly across the layers. Use hedge shears, loppers, or a box cutter for pre-processing tougher materials. For an outdoor setup, consider installing a chicken wire fence to contain loose scraps and aerate the pile. Aim for pieces between 0.5 and 1.5 inches to balance quick digestion with ease of handling. For fruit, vegetable, and herb scraps, chop them into 1/2 to 1-inch bits to facilitate fast nitrogen release. Brassica stems and citrus rinds need to be chopped into pieces smaller than 1/2 inch for optimal decomposition. A food processor can also be used to create uniform 1/2-inch pieces, making the shredding process faster and more consistent. Similar to using an airtight seal for mason jars, ensuring your pile has proper moisture levels will prevent it from drying out too quickly.
Aim for Damp-Sponge Moisture, Not Soggy
Keeping your compost damp but not soggy is essential. Excess moisture replaces the oxygen your microbes need, which can stop decomposition altogether. This often results in a foul smell rather than the earthy aroma you want. To prevent waterlogging, turn the pile regularly to introduce air and mix in dry carbon materials like leaves or shredded cardboard. If your compost is too dry—below 40% moisture—spray water gradually while turning it to evenly distribute moisture. Check the moisture level every 48 hours after making adjustments. Aim for a damp consistency that feels like a wrung-out sponge, avoiding pooling or dripping. Using a top compost tumbler can make turning the pile easier and improve aeration. Solar watering cans can help you apply water precisely and avoid oversaturating the pile. Maintaining this balance keeps microbes active and speeds up composting efficiently. For long-term storage of dry carbon materials, an airtight seal from a vacuum sealer can prevent moisture absorption and preserve their quality.
Turn Your Pile Weekly to Feed the Microbes
Turning your pile every 7 days ensures microbes have continuous access to oxygen without over-aerating and cooling it down. This weekly practice replenishes microbial oxygen reserves and prevents anaerobic zones that cause foul odors and slow decomposition. When you mix the outer, cooler layers with the hot core, you boost microbial diversity and feed thermophilic bacteria with consistent heat and nutrients. For a similar aeration approach, you can build your own system using a DIY worm compost bin to recycle kitchen scraps effectively. Using a pitchfork to fully invert the pile breaks up clumps and exposes more surface area for microbial action. This process maintains the temperature between 130-160°F, crucial for destroying pathogens and weed seeds. Regular turning also raises oxygen levels, keeping aerobic microbes active and preventing the pile from dropping below 104°F, which would halt rapid breakdown. Studies show that doing this weekly can increase microbial population density by 20-30% compared to leaving the pile static. Expect to see finished compost in approximately 6 to 8 weeks. Homesteaders who follow a weekly turning schedule also benefit from reduced fly and pest problems.
Cover the Bin After Turning to Lock in Heat
After turning your pile, immediately cover it to lock in heat and prevent significant heat loss to the surrounding air. An uncovered compost can shed 15–20°F within the first hour, dropping below the critical 130°F threshold needed for rapid decomposition. To maintain optimal temperature, use breathable yet insulating materials like heavy tarps, old carpets, or thick cardboard. These options trap heat effectively while allowing enough airflow to avoid creating anaerobic conditions that can cause odors or spoilage. For moisture retention without waterlogging, place a layer of burlap or fabric beneath the cover. Avoid plastic sheeting directly on the compost, as it traps too much heat and moisture, resulting in a soggy, smelly pile. Instead, leave a 2–3 inch air gap between the cover and the compost to promote insulation and prevent condensation. For finer control, a precise vacuum seal can be applied to lock in heat and moisture with minimal air loss. Referencing the top options reviewed can help you select a bin that naturally retains heat more efficiently. Following a step-by-step build guide ensures your bin is constructed with proper insulation and airflow for optimal heat retention.
Watch for 160°F and Turn More Often to Cool It
When your compost pile reaches temperatures between 150°F and 160°F, you need to turn it more frequently—every three to four days instead of weekly. This helps release excess heat, introduces fresh oxygen, and prevents the temperature from climbing above 163°F. Temperatures above the 160°F threshold cause microbial activity to stall, slowing down decomposition and risking the death of beneficial bacteria. Turning more often keeps the microbes thriving, maintains an optimal temperature range of 130°F to 160°F, and ensures steady, rapid composting. Regularly monitor the temperature daily to catch the moment it approaches 150°F–160°F, so immediate action can be taken before overheating occurs. Selecting equipment like top ghost with chicken wire can help with aeration and heat management in your compost system. Following a step-by-step guide for building a simple wooden frame can improve structure and airflow around your pile. Just as with raised bed depth, the compost pile’s depth directly influences how well heat is retained and oxygen circulates during the process.
Add High-Nitrogen Greens Like Grass to Accelerate
Adding high-nitrogen greens like grass clippings significantly speeds up compost decomposition. Fresh grass breaks down faster than dried browns, providing an immediate boost to microbial activity. Shredding the grass first increases surface area, leading to quicker breakdown. Mixing the greens with dry materials such as leaves or straw prevents slimy, oxygen-starved mats from forming. A single bucket of grass clippings supplies enough nitrogen to reactivate inert or dry piles. To maintain even decomposition, turn the compost weekly after adding greens and keep it moist, similar to a wrung-out sponge. This approach results in more efficient composting without unpleasant odors. For optimal aeration, consider building a roll-away nesting box to easily separate finished compost from the active pile. Using a watering can to maintain consistent moisture levels can further accelerate microbial activity in the pile.
Jumpstart New Piles With Finished Compost
Adding finished compost to your new pile boosts microbial activity quickly. For a three-foot-tall pile, add only one to two cups of finished compost. Using too much introduces cold bulk that lowers the pile’s temperature and slows decomposition. Layer the compost thinly over the exposed interior and cover with browns to trap heat. For an extra nitrogen boost, mix finished compost with spent coffee grounds, which shifts your carbon-to-nitrogen ratio toward 25:1. During turn intervals every five to seven days, pulse a small handful into the center of the pile to keep heat levels steady. Repeated activation of microbes helps maintain high microbial activity without cooling the pile down. Crushing thicker stems like sunflower or garlic stems speeds decomposition by providing more surface area for microbes to work on.
Boost Airflow With PVC Pipes or Pitchfork Holes
Installing a PVC pipe with holes is an effective way to boost airflow in your compost pile. Use a 2-inch diameter pipe cut to match your bin’s internal height, and drill 6–10mm holes every 2–3 inches along its length. Insert the pipe vertically into the center of the pile and turn it clockwise with a stick (or similar tool) if you’re in the northern hemisphere. This PVC ventilation system pulls oxygen deep into the core, helping to prevent foul, anaerobic zones and encouraging faster composting. For a quicker alternative, you can use pitchfork aeration by inserting a metal stake or broom handle all the way to the bottom of the pile and wiggling it to create channels for fresh air. Repeating this every few days keeps the oxygen flowing. Combining both methods can significantly accelerate compost heating, turning it from weeks into just days. This passive aeration setup reduces the need for frequent turning while maintaining aerobic conditions.