DIY Pallet Compost Bin: A Simple Homestead Guide
Are you wondering how to create a reliable, budget-friendly compost bin using simple materials? With just a few sturdy pallets and some basic tools, you can build an efficient composting station in a weekend.
Proper placement, layering greens and browns, and regular turning will help your compost heat up quickly and break down faster.
Keep reading to learn each step in this straightforward DIY project.
Build a Pallet Compost Bin in One Weekend
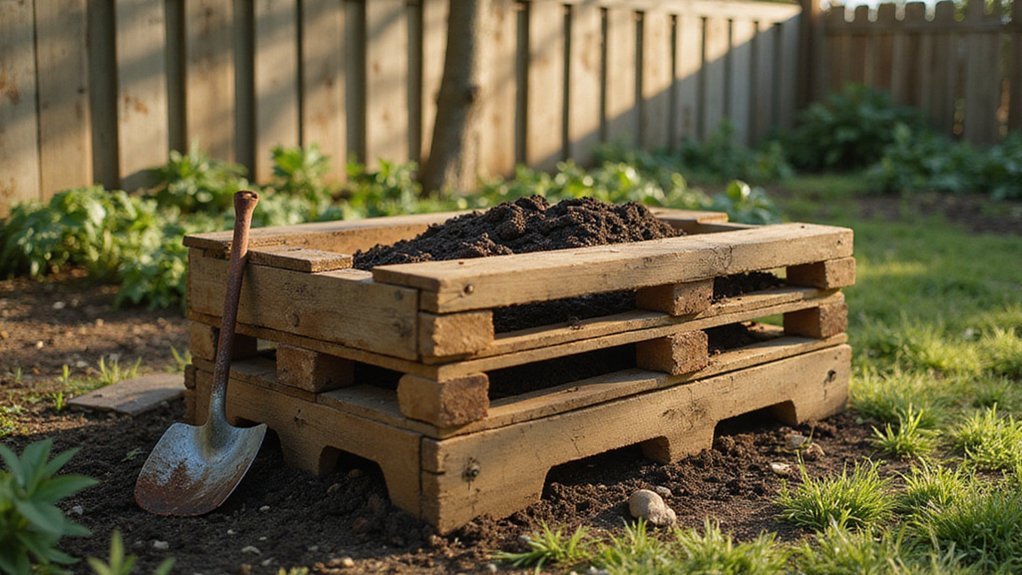
To build a simple compost bin in one weekend, start by gathering four to seven standard 4×4-foot wooden pallets. Place two pallets on edge to form an L shape, then secure the joint with corner braces for stability. Attach a third pallet at the back, screwing through the top and bottom corners to complete the walls. Inside, staple hardware cloth to the pallets to create a lining that prevents compost from leaking out and helps control moisture. This mesh allows excess water to drain while keeping materials in. It also acts as a barrier against pests such as rodents by blocking their tunneling routes. To further support local wildlife, consider installing wood duck nesting boxes in nearby trees. Set the assembled bin directly on level soil rather than concrete to ensure proper drainage and access for beneficial microbes. Always select pallets with safe stamps like EPAL or HT logos to confirm they are untreated and heat-treated, preventing toxin leaching. For an airtight seal on your finished compost, consider using mason jar sealers to properly store the final product. Once you have these basic materials ready, the construction goes quickly, requiring only a drill and staples. No specialized skills are needed, making it a straightforward weekend project. For those also raising chickens, consider building a top-rated chicken coop to house your flock.
Choose the Right Pallets for Your Bin
To choose the best pallets for your compost bin, start with chemical safety. Look for pallets labeled with the “HT” stamp, which indicates they’ve been heat-treated and are safe for garden use. Avoid pallets marked “MB” or “EP,” as these often contain toxic chemicals that could leach into your compost and harm your plants. For an even easier approach, you might consider purchasing a top compost tumbler to simplify your organic waste recycling. For long-lasting structures, pressure treated lumber offers similar rot resistance, though it requires careful sourcing to avoid chemicals harmful to gardens.
Material matters just as much as chemical treatment. Durable hardwoods like oak are ideal because they resist rot and can withstand the weight and moisture of compost. Before using, inspect each board closely for cracks, warping, or loose nails. Weak wood will break down faster and may pose safety hazards with protruding hardware. Monitoring the pile’s moisture level with a hygrometer for incubator can help maintain ideal conditions.
Always source your pallets from food or agricultural facilities to reduce the risk of chemical contamination. Stay away from pallets that come from paint or chemical plants. Ensure the wood is dry, free from sticky residues, and free of oil stains. Consistent dimensions, around 40 inches long and between 24 and 32 inches wide, make assembly easier. Whenever possible, choose new or lightly used pallets for better longevity and safety.
Pick the Perfect Spot for Your Compost Bin
The best location for your compost bin is one that balances shade, drainage, and accessibility. Aim for a spot that offers partial shade to maintain consistent temperatures — it keeps the compost damp and prevents overheating. Full sun is acceptable if you cover the bin with a lid or tarp. Avoid deep shade, as it can slow down the composting process significantly. Look for well-drained ground—avoid low spots that tend to collect water—and choose bare soil rather than concrete or gravel to facilitate aeration and moisture exchange.
Ensure the bin sits on a level patch, making it easier to turn and mix the compost regularly. Position it at least 10 feet away from your house to minimize odors and any potential pests. Make sure two sides of the bin have unrestricted airflow to provide proper aeration, which is crucial for microbial activity. Accessibility is key—place the bin where you can easily add kitchen scraps and garden waste throughout the year without hassle.
Finally, avoid windy spots that could dry out your materials prematurely. Aim for about three to four hours of daily sun exposure, which keeps microbes active and speeds up composting. Choosing the right location makes your composting routine more straightforward and efficient.
Assemble the Frame With Three Pallets
To assemble the frame with three pallets, start by forming an L-shaped base using two heat-treated pallets—one for the side wall and one for the back. Position them with their longer edges resting on the ground, ensuring each corner forms a 90-degree angle with the help of a square tool. Secure the inside corner with two 12-inch corner braces, placing one at the top and one at the bottom for stability. Reinforce the outside corner with galvanized strapping for additional strength.
Next, add the third pallet to extend the back wall. Align its top and bottom corners with the existing back pallet and connect them using exterior deck screws. Make sure the center boards of both pallets are flush to create a seamless surface. Using rot-resistant hardwood such as oak or cedar for these pallets increases the outdoor durability of your frame, protecting it from moisture and decay over time, which is vital since composting enriches garden soil by recycling organic waste. You can also use a food vacuum bag sealer to store your finished compost for later use or to seal fresh produce. For temporary support and to keep everything upright during assembly, tap rebar stakes between the slats. For optimal flock health, ensure the finished bin is placed where chickens can access roosting bars set at the correct height for nighttime perching.
Add Dividers to Create Three Bins
To add dividers and create three bins, you need two vertical pallet dividers that run parallel to the side walls, stretching from the front edge to the back wall. These dividers separate the bins and must be positioned accurately to ensure proper functionality. Place each divider flush with the back wall edges, aligning them with the corners using corner squares to maintain 90-degree angles. The first divider creates the boundary between bins one and two, while the second separates bins two and three. For optimal performance, choose a bin style that offers durability and pest resistance like top-rated commercial models.
Secure the dividers by driving rebar anchors 2 feet into the ground at each end, then tie them to the pallet faces with 3-inch galvanized strapping. Use L-brackets on the inside corners of the dividers for extra stability, and reinforce the outside corners with galvanized strapping. Drive screws through the top and bottom of each divider pallet to keep them firmly in place. When attaching the dividers, ensure you fill gaps to prevent dirt from falling through in the compost area. Following a precise alignment method, similar to how you square off a coop door frame, helps keep the structure true and stable. For long-term durability, consider using a pressure canner approach for sealing wood joints against moisture.
To prevent compost from leaking through, line the interior of all three bins—including the dividers—with ¼-inch hardware cloth. This mesh prevents debris from falling out and keeps pests from entering. Proper placement and secure fastening of the dividers are essential for an effective and durable three-bin composting system.
Secure the Bin and Add a Swinging Door
To secure the compost bin and add a swinging door, start by reinforcing each corner with three exterior-grade screws and corner brackets—place one near the top, middle, and bottom for maximum stability. Pre-drill pilot holes to prevent the wood from splitting, which ensures a clean fit and longer-lasting joints. Align the side pallets so they sit flush with the back panel, creating tight 90-degree corners. Test the structure’s firmness by applying gentle pressure from multiple angles; it should hold steady without wobbling. If the pallets get creaky or sweat, this is a normal characteristic of the recycled wood being used. For an even more efficient setup, consider how vacuum sealer performance compares when storing finished compost for long-term use. Reviewing top-rated options like FoodSaver bags can help ensure your compost stays fresh and pest-free. For best results, also consider protecting the bin with a raised garden bed cover to shield it from excess rain and debris.
For the swinging door, attach two strap hinges vertically on one side of the gate pallet, leaving a 1–2 centimeter gap at the bottom to prevent dragging. Use stainless steel or galvanized hardware to resist rust and make future hinge adjustments easier. Install a bolt lock or pin latch on the opposite side of the hinges to keep the gate securely closed. Make sure the gate swings freely without binding against adjacent slats or the frame. Properly finishing the pallet now ensures durable and hassle-free operation later.
Fill Gaps and Contain the Compost
Fill gaps and contain the compost by securing the bin fully. To prevent compost from spilling out, fill any gaps between the side pallets and the back panel with oak or cedar slats. Cut each slat to the exact width of the gap and drive screws perpendicular to the grain for best durability. Avoid using pressure-treated softwoods, as they may introduce chemicals into your compost. For extra containment, additional boards removed from one pallet can be used to fill smaller gaps along the sides.
For effective containment, staple chicken wire to the inside walls of your pallet bin. Attach hardware cloth to the base pallet using U-shaped nails, ensuring the wire spacing allows good airflow while preventing the compost from collapsing or escaping. On the front of the bin, measure the distance between the side pallets and cut 1×6 inch slats to fit in those gaps. Install these slats in the slots between front stakes, making them removable for easy turning of the compost. Keep these slats in place to deter pests while allowing ventilation.
Finally, line the base of the bin with straw or cardboard to insulate the compost and prevent direct contact with the ground. This layer helps retain heat and moisture, promoting faster composting and reducing odors.
Layer Browns and Greens for Fast Results
Layer browns and greens in alternating thin layers to promote rapid decomposition. Use a ratio of about 3:1 to 4:1 browns to greens by volume, with roughly two-thirds browns and one-third greens. Begin with a 6-inch brown layer made of twigs and sticks for drainage. Add a 2- to 4-inch green layer on top. Bury kitchen scraps in a shallow bowl of brown material, then cover immediately with a thick brown layer to contain odors. Keep each layer moist to a sponge-like consistency; water dry browns before adding them and mix overly wet greens with dry material. Mastering Compost Bins stresses that this balanced carbon-to-nitrogen ratio is essential for thermophilic activity. This layering approach prevents odors and anaerobic zones, allowing microbes to breakdown material quickly and efficiently. For a stationary pile that cannot be turned regularly, proper layering is especially crucial to maintain the breakdown process.
A Few Simple Steps to Keep Your Bin Going Strong
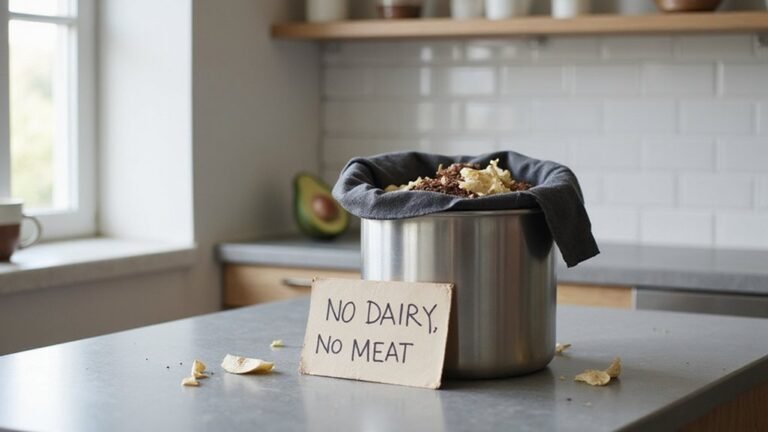
To keep your compost bin functioning efficiently, follow these key practices. Line the inner walls with hardware cloth to prevent rodents from gaining entry. Bury the bottom edges into the ground to reduce pest access and facilitate aeration. Never add meat, bones, or dairy products to avoid attracting pests and creating foul odors. Turn the pile every 2 to 3 weeks using a pitchfork, lifting and flipping materials from deep layers to promote airflow and even decomposition.
Maintain the correct moisture level by keeping your compost similar to a wrung-out sponge. Use a moisture meter weekly to monitor levels and add water sparingly if the top layers look dry. Check internal temperature monthly with a compost thermometer, targeting 130°F to 150°F to kill pathogens. If the temperature drops below 120°F, increase turning frequency to boost heat and decomposition. Cover new additions with dry leaves or straw to suppress odors and retain moisture. Also, install ventilation gaps to reduce gas buildup and create an environment that supports healthy composting.