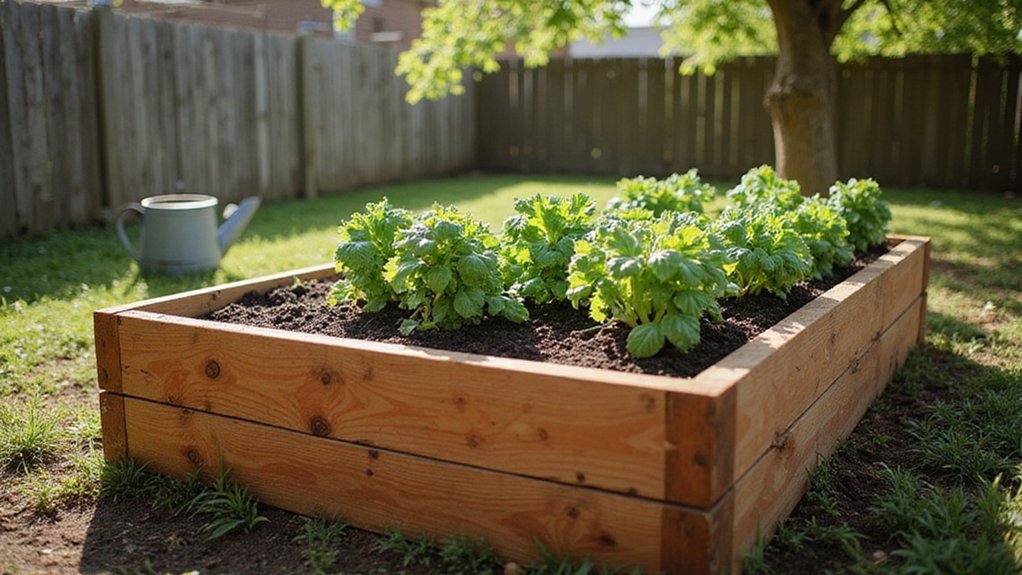
DIY Cedar Raised Garden Bed for Your Homestead
Thinking about building a garden bed that lasts for years without rotting? A cedar raised bed is a solid, rot-resistant choice that can stay durable for 10 to 20 years with proper construction.
If you’re ready to create a sturdy, pest-resistant garden space, keep reading for a simple step-by-step guide to building your own DIY cedar garden bed.
Materials and Tools for Your Cedar Raised Bed
To build your cedar raised bed, assemble the following materials and tools. For a 4×8-foot bed, you’ll need four 8-foot cedar boards and corner braces cut from 2×2 stock. Use GRK construction screws and wood glue for structural strength, and pocket hole screws to attach trim pieces. Internal supports can be made from scrap 2x4s, and six 11-inch base pieces provide stability at the bottom. To prevent pests, staple hardware cloth or chicken wire to the frame’s underside. Lay weed barrier fabric on top to help retain moisture and control weeds. Seal the outside of each box with water sealant for weather resistance before assembly. While finishing is optional, letting cedar weather naturally extends its lifespan. For optimal chicken integration, ensure that roosting bar heights are set between two and four feet off the ground to allow birds to perch safely above the garden. A drill is essential for pre-drilling holes, and clamps help ensure flush assembly. Secure the fabric using a staple gun with 5/16-inch staples. For an even more resilient setup, consider attaching a predator-proof coop design to protect your plants from burrowing animals. For those who also want to support local wildlife, you can install wood duck nesting boxes nearby to provide secure cavity nests.
How to Cut Cedar Raised Bed Boards to Size
Start by marking your cedar boards to the correct lengths. Use a speed square to draw a line below the dog-eared end of each board, then measure to the desired length. For the side planks, cut four pieces exactly 8 feet long with a circular saw guided along a straight edge. Label these as “long sides.” For the end pieces, cut four pieces to 46 inches using a miter saw to ensure accurate 90-degree cuts, with a 2-inch overhang included for the top trim. Rip two cedar deck boards in half lengthwise to create 8-foot top trim pieces. For corner supports, cut four pieces to 12 inches, and cut 2x4s to 8 and 4 feet as needed, maintaining consistent dimensions throughout. For pest protection, consider staining the wood after cutting but before assembly to enhance durability. For storing leftover stain or tools, you might also consider a set of glass jars with lids to protect your supplies from moisture.
How to Assemble the Long and Short Sides
Start assembling the long sides by cutting two 6-foot cedar fence pickets for the main panels. Then, install three 11-inch 2×4 support braces between them—one in the center and one near each end. Secure each joint with three 2-inch screws, making sure the pickets stay parallel to each other. Join the two long sides with the two short sides, forming an L-shape with the supports facing down, and align all pre-drilled holes before inserting any bolts. For the short sides, cut two 2- or 3-foot pickets and attach them perpendicular to the ends of the long sides’ braces, forming an L-shape. Drive screws through the short pickets into the braces to ensure a flush fit. This technique mirrors the cross-flow airflow used in DIY food dehydrators to ensure even drying and structural balance. Selecting cedar fence pickets is ideal because they naturally resist rot and pests, offering a reliable raised bed garden kit solution for long-lasting use.
Next, join all four sides to form a rectangular frame. Use a carpenter’s square to check for 90-degree angles at each corner and adjust as needed to keep the frame square. This creates a sturdy base that can support decorative edging around the bed and accommodate multiple planting techniques. Before proceeding, double-check that the entire structure is level and symmetrical to ensure stability and aesthetic appeal.
How to Build L-Shaped Corner Braces and the Bottom Frame
To build the L-shaped corner braces, you need 18-gauge galvanized steel pieces that match the height of your lumber thickness. Position each brace at the corners so they reinforce the connection between side panels effectively. Pre-drill holes in each brace, aligning them with the existing lumber holes, using a drill and a bit suitable for metal. Space the holes consistently, typically about 1 to 2 inches apart, to ensure strong attachment. Use zinc-plated bolts measuring at least 1.5 inches long for securing the braces, which provides high shear strength and resists rust over time. Countersink the bolts while tightening with a wrench until they sit flush against the brace, preventing snagging or interference with other components. For an alternative, heavy-duty stainless steel corner brackets with a black textured finish offer robust corrosion resistance for long-term use. For optimal durability, choose materials with high thermal resistance to protect the frame from temperature extremes. A countertop compost bin similarly uses durable materials to withstand daily kitchen use without degrading. Cedar is naturally rot-resistant, making it a top choice for garden beds exposed to moisture.
For the bottom frame, cut four 4×4 cedar posts to match your bed width, ensuring a snug fit. Cross these with 2x cedar lumber to form a sturdy rectangle that supports the structure. Bury each post at least 12 inches deep into the ground for maximum stability and to prevent shifting. Fasten all connections with zinc-plated nuts, which resist corrosion from moisture exposure. The assembled frame forms a solid foundation, supporting your garden bed securely and maintaining its shape over time.
Final Assembly, Soil Fill, and Sealing Your Cedar Bed
After assembling the bottom frame and securing the L-shaped braces, the next step is final assembly. Align each side panel so the bolt holes match up precisely. Insert bolts through the holes and tighten all nuts evenly with a wrench to prevent warping of the box. Once assembled, flip the cedar bed upright onto stable ground. Staple hardware cloth across the bottom to prevent burrowing pests from entering. Add base slats with approximately half-inch drainage gaps to promote proper airflow and drainage. Line the interior walls with landscape fabric, pressing it firmly into the corners to block weed growth. Fill the bed with high-quality potting soil, leaving two inches of space below the rim to support plant roots and ease watering. Finish by applying a cedar-specific water repellent to all exterior surfaces using a brush. Allow it to dry for 24 hours before planting to ensure proper absorption and protection against moisture. This unfinished cedar will naturally develop a desirable gray patina over a single season from sun exposure if left unsealed.
Maintenance Tips That Make Your Cedar Raised Bed Last
To keep your cedar raised bed in good condition, regular cleaning and surface maintenance are essential. Use a mild soap solution to wipe off dirt, mildew, and moss, and re-stain every 1 to 2 years to preserve the wood’s appearance and durability. Inspect the wood annually for signs of rot or cracks by probing the soil line with a screwdriver; soft spots indicate decay that needs addressing before it worsens.
Manage water carefully to prevent damage: ensure drainage clears within a few hours after rain or watering, avoid stacking mulch directly against the walls, and employ drip irrigation to keep the cedar dry and reduce surface moisture. Tighten screws and replace any rusted hardware at least once a year to maintain structural stability. For longer beds, add corner braces or stakes to reinforce the structure and prevent warping or shifting over time.
Amending the soil each planting season is vital. Mix compost into the soil at a ratio of 40-40-20 (by volume—carbon, nitrogen, and minerals) to promote healthy plant growth. Weekly, clear debris from the base of the bed to improve airflow and reduce pest harborage. Also, rotate crops each season to prevent soilborne diseases and naturally minimize pest issues by diversifying plantings.
Why Cedar Raised Beds Save You Money Over Time
Cedar raised beds generally last between 10 and 20 years without needing chemical treatments. This means you won’t have to replace your beds as frequently as with cheaper woods like pine or fir, which often need replacing every 5 to 7 years. The longer lifespan reduces the costs of materials over time and minimizes the frequency of repairs. Since the structure stays intact longer, you save money on soil preparation each season because there’s less risk of rotting boards causing soil loss. Additionally, cedar’s natural pest resistance means you can skip costly sealants or liners, further lowering your expenses. Over the years, this durability results in fewer replacements, less maintenance, and ultimately a higher yield per square foot, making cedar a cost-effective choice for your garden. Unlike heat lamps that require the best light bulb for efficient warmth, cedar’s natural properties ensure consistent, low-maintenance performance. For gardeners who also manage kitchen scraps, pairing this bed with worm compost bins can further reduce waste and enrich the soil naturally. Similarly, a well-constructed chicken coop protects your flock from predators and weather, providing long-term savings through reduced replacement and maintenance costs.