Wondering how to turn your kitchen scraps into rich compost without buying fancy equipment? A simple DIY worm bin can do the trick using just two five-gallon containers.
With a few basic supplies and the right setup, you can start composting worm magic in no time.
Keep reading to learn how to create your own easy and effective worm bin.
Why Build a Worm Compost Bin? See the Benefits of Vermicomposting
Vermicomposting can produce finished compost in under two weeks. Worms naturally accelerate the decomposition of food scraps, turning waste into nutrient-rich castings rapidly. This quick turnaround not only allows you to recycle kitchen waste more efficiently but also reduces odors and the attraction of pests commonly associated with traditional composting methods. As a result, you transform organic waste into valuable soil amendments in a fraction of the time compared to conventional compost bins, making it a practical solution for active gardening and waste reduction. For optimal results, store your worm castings in resealable vacuum bags to maintain their moisture and freshness. For those with a flock, these worm castings can be added to chicken coops to enhance soil health and reduce waste odors. For gardeners also attracting cavity-nesting birds, using wood duck nesting boxes near compost areas can further support local wildlife and ecosystem balance.
Gather Materials and Tools for Your Worm Compost Bin
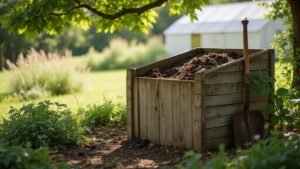
To assemble your worm compost bin, you will need two 5-gallon plastic storage containers. One acts as the inner bin for food scraps and worms, while the other serves as a solid outer container to catch leachate. Drill a minimum of 10 drainage holes in the bottom of the inner bin using a 1/8-inch drill bit, spaced about 2 inches apart to ensure proper airflow and fluid drainage. For ventilation, punch holes along the sides with a 1/4-inch drill bit, also spaced 2 inches apart. Cover each hole with 1/4-inch vinyl screening glued with waterproof adhesive to prevent worms from escaping. Allow the glue to dry completely before proceeding. You will also need shredded newspaper for bedding, a spray bottle to keep the bedding moist, a trowel for handling materials, and a tray to catch any drips or excess moisture. These tools and materials help create an environment conducive to worm activity, ensuring efficient composting and easy maintenance. When selecting your containers, consider a commercial bin designed for optimal airflow and durability. A healthier environment for the worms results from topping the bedding with a handful of worm castings for a microbial boost.
Prepare the Bedding for a Healthy Worm Habitat
To prepare the bedding for your worm habitat, start by selecting your materials: shredded brown cardboard, coco coir, or shredded newspaper. Combine these to create a loose, breathable base that promotes good airflow and drainage. Moisture control is essential; add non-chlorinated water gradually, mixing continuously until the bedding feels like a damp sponge—wet enough to hold together but without any dripping when squeezed. Fluff the bedding thoroughly to evenly distribute moisture and create air pockets, which help maintain oxygen flow. Adding garden soil or sand provides grit to aid in food processing and microbial activity. For worms to thrive, maintaining consistent conditions is similar to how a precision temperature dehydrator ensures even drying in jerky production. A plastic watering can is ideal for gently and evenly moistening the bedding without disturbing its structure. Choosing the best materials for your bin ensures a long-lasting and productive worm habitat.
Next, balance the carbon-to-nitrogen ratio by adding roughly three parts carbon (cardboard or paper) to one part nitrogen (food scraps or grass clippings). A good mixture to start with is about 40 percent cardboard, 40 percent coco coir, and 20 percent hemp tow. Fill your container to approximately three-quarters full with this mixture. Cover it and let it sit undisturbed for 24 to 48 hours. This resting period helps stabilize moisture levels and temperature, ensuring your bedding is a welcoming environment for your worms.
Meet the Stars: Choosing Red Wigglers for Your Bin
Red Wigglers, or Eisenia fetida, are the ideal composting worms for your bin. They are small, averaging about 1 to 2 inches in length, making them perfect for handling waste in confined spaces. Their distinctive reddish-purple color and striped pattern help you identify them easily, setting them apart from earthworms. These surface dwellers stay in the upper layers of your bin, efficiently processing organic material as they move quickly through the bedding. When selecting wood for a worm bin, untreated cedar or redwood offers natural resistance to decay and pests. For homesteaders repurposing a trash can, drilling ventilation holes ensures adequate airflow for the worm population.
Red Wigglers thrive at temperatures between 60 and 80°F. Maintaining this range is crucial for their health and activity levels. To keep them comfortable, you’ll want to manage the bedding so that it stays moist—around 80 percent—mimicking their natural environment. They can tolerate ammonia from decomposing waste, which makes them particularly resilient in a composting setting. Their castings are significantly nutrient-rich, containing 7 times more phosphates than average lawn soil. A similar attention to consistent airflow and moisture is important when using a food dehydrator for sun-dried tomatoes.
Starting with a population of about 250 to 2,000 worms from reputable sources like Uncle Jim’s Worm Farm or your local garden center is recommended. Their population can double approximately every 90 days under optimal conditions, providing a robust workforce for your composting efforts. Introducing these worms properly sets a solid foundation for successful vermicomposting.
Feed Your Worms: Safe Foods vs. No-Go Items
Safe plant-based scraps, such as banana peels, lettuce, coffee grounds, crushed eggshells, and plain grains like oatmeal or bread, are ideal foods for your worms. These items provide essential nutrients and help maintain a healthy, odor-free worm bin. Conversely, avoid adding meat, dairy, oily foods, citrus, onions, and spicy seasonings because they rot quickly, cause foul smells, and attract pests. Pet waste, treated wood, and bleached paper should also stay out, as they can introduce harmful substances or disrupt the worms’ environment. To support optimal conditions, mix in bedding materials like shredded cardboard or coconut coir, which replicate their natural habitat and help balance moisture and aeration. Sticking to these safe options ensures your worms stay happy and your composting process remains efficient. For best results, store your worm food in mason jars with lids to maintain freshness and prevent contamination from pests. For moving your bin or harvesting compost, consider using a dual-wheel wheelbarrow to reduce strain and improve stability. You can further enhance your bin by adding a thin layer of soil to mimic the natural earthworm habitat and boost microbial activity.
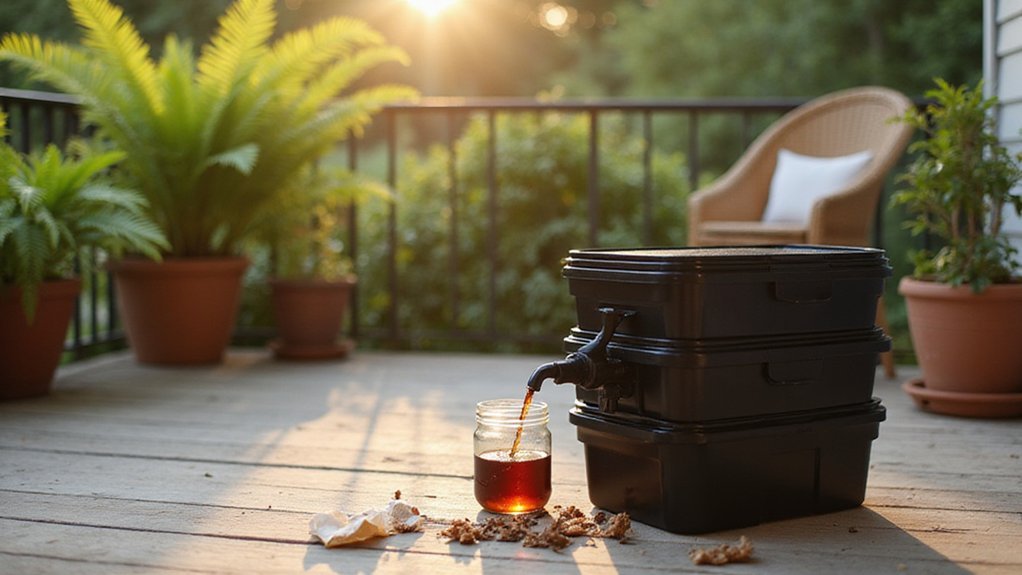
Control Moisture, Drain Liquid, and Harvest Your Compost
Checking moisture levels in your compost is essential, and the squeeze test is a simple method. Grab a handful of bedding and squeeze it tightly; it should release only a few drops of water and feel like a wrung-out sponge at about 80% moisture. If it’s too wet, add dry shredded paper or cardboard to absorb excess moisture. Conversely, if it feels dry and crumbly, mist it lightly with water to restore the right balance. Avoid adding high-moisture foods like fruits if your compost is already too wet, as they can make conditions moldy and smelly. Ensure adequate drainage holes are clear and functional to prevent waterlogging from blocked outlets.
Drilling 1/8-inch holes in the lid and bottom of your compost bin helps manage excess liquid. Keep the spigot open to allow leachate—liquid that drains from the compost—to flow into a collection tray. Regularly check this liquid; it can be diluted and used as a nutrient-rich fertilizer, but avoid letting the tray overflow. Proper drainage prevents waterlogging and anaerobic conditions that can harm your worms and slow composting.
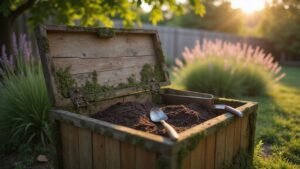
To harvest your compost, wait about 3 to 6 months until most of the material has broken down into dark, crumbly soil. Push the contents to one side of the bin, then scoop out the finished compost from the cleared area. Leave the worms behind in the feeding side to continue processing new scraps. Fluff the remaining material frequently to aerate it, bury new food scraps into the bedding, and mist dry sections with water to keep everything moist and active. Proper moisture and liquid management keep your worms thriving and your compost healthy.
Pick the Perfect Spot: Location Tips for Year-Round Success
Choose a spot that keeps your compost bin productive year-round. Indoors, place it in an area that avoids direct sunlight—shade from eaves or overhangs helps prevent overheating the bedding. Keep the bin 6 to 12 inches away from radiant heat sources such as pavement to maintain stable temperatures. Aim for a temperature range between 40°F and 80°F to support decomposition. A similar approach to insulating bedding with fluffed newspaper helps prevent moisture loss and temperature swings. Outdoors, position the bin in full shade, preferably on the north side of your house. Elevate it 6 to 12 inches off the ground for predator protection, which also helps keep rodents and birds at bay. Cover the bin with a dark cloth at night for added safety. During extreme cold, add fluffed newspaper on top to insulate. Place the bin within 3 feet of a sink for easy access and maintenance, and ensure there is good airflow around it. Check the temperature daily with a thermometer to keep conditions optimal. For consistent moisture levels, use a 2 gallon watering can designed for precise pouring.