DIY Roll Away Nesting Boxes: A Simple Guide
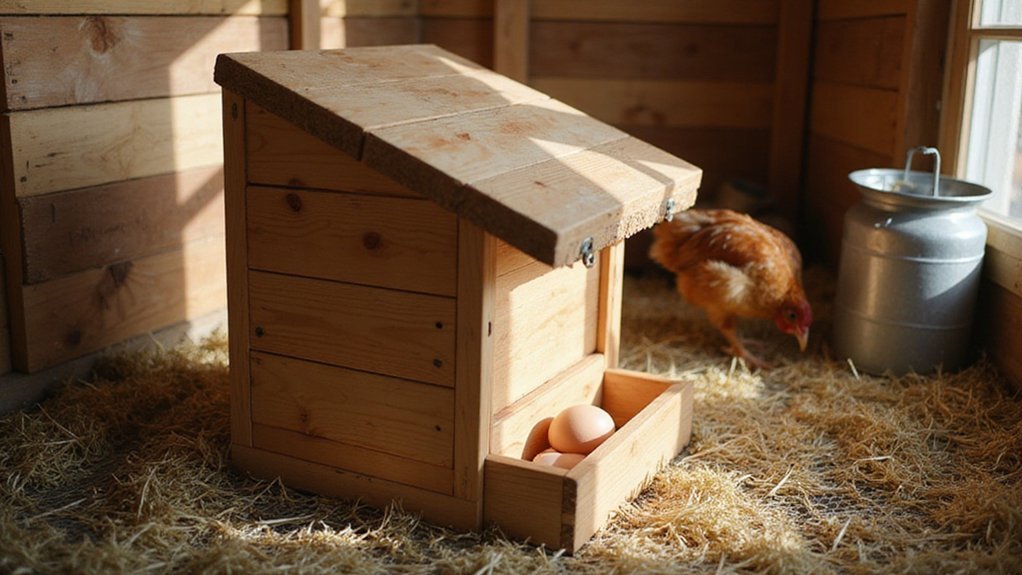
Tired of dirty or cracked eggs? A roll away nesting box might be just what you need. By using a gentle 7-degree slope, it automatically rolls eggs out of reach, helping keep your coop cleaner and safer.
In this article, you’ll learn how to build one step by step, choosing the right materials and testing the design for smooth operation.
Let’s get started on creating a simple, effective solution for better egg collection.
Why a Roll Away Nesting Box Prevents Dirty Eggs
A roll away nesting box keeps your eggs so clean by immediately moving them out of the hen’s contact zone. As soon as a hen lays an egg, it gently rolls away from her, preventing contact with her feet, droppings, or bedding material. This minimizes the risk of eggs cracking or breaking from accidental stepping. Models from top reviewed coops already integrate this rolling feature to simplify egg collection. Once inside the sealed compartment, the eggs are protected from coop debris, feather dust, and moisture-trapping nesting materials. This process significantly reduces microbial and parasitic contamination, resulting in cleaner, safer eggs. You’ll notice fewer eggs need cleaning or are discarded due to dirt or cracks. Additionally, the design provides a more comfortable laying environment for hens, allowing them to lay eggs without contamination concerns, which leads to cleaner eggs at harvest and less need for post-collection cleaning. This system also prevents egg-eating habits by instantly rolling eggs away from the hens. For those selecting a new setup, comparing the top options helps ensure you choose a durable roll-away design.
What You’ll Need to Build the Box
To build a durable, functional roll-away nesting box, you will need specific materials and tools. Use 16mm plywood or 20mm solid cedar for the main structure, as these materials resist rot and withstand outdoor conditions. For the floor, select a 25mm by 50mm welded wire mesh to allow for ventilation and easy cleaning. Incorporate a sloped angle of 10° to 15° to help eggs roll smoothly to the collection point. A sturdy collection tray made of sheet metal or plastic ensures easy cleanup. Using a thin, smooth material like reptile turf for the liner can greatly improve the ease of egg roll-out. For those wanting to match their setup with a trusted container, consider using a standard mason jar for storing collected eggs or nesting materials. Ensure the roosting bar is placed at the correct height to prevent hens from sleeping in the nesting box. Place the entire nesting box on a stable rain barrel stand to elevate it for easy access and to protect it from ground moisture.
Tools required include a drill for making pilot holes, which prevents cracking, and a saw for cutting panels precisely. Use galvanized screws for rust resistance and at least three hinges to attach the collection lid securely. For ventilation, install small side vents to promote airflow and keep the nesting environment comfortable. Cut an oval entrance opening, measuring 3 inches up from the bottom and 8 inches wide by 5 inches high, rounded edges to prevent hen injuries, and ensure easy access for hens and maintenance.
Build the Frame From Storage Boxes
To build the frame from storage boxes, start by cutting cardboard strips from the removed flaps. These strips will serve as the foundational support for your structure. Use flap strips about half the width of the main support pieces to ensure proper stability.
Next, create 12 corner accents by rolling newspaper strips into spirals. Cut each newspaper into squares measuring 3.5 inches by 1.5 inches before rolling. Wrap each square into a spiral and secure the end with packing tape. To make the twirly corner structures, tack each spiral into a loose coil with hot glue, attaching one end of a flat strip to the frame and the other end on top. This assembly mirrors the structural stability achieved by using glue and screws for separators in hardwood box construction. Homesteaders can adapt this water management technique by using a similar funnel-shaped cardboard base to guide liquids away from stored materials.
For each circular corner piece, place two spiral strips on either side and glue each strip onto itself eight times to reinforce the shape. Secure all the corner accents by pressing them with a heavy weight or clamps until the glue dries completely. This process results in a sturdy, durable frame tailored to your nesting box dimensions.
What Slope Prevents Egg Jams?
A slope between 5 and 8 degrees prevents egg jams effectively. This range allows eggs to roll gently without cracking or sticking. Steeper than 8 degrees, and eggs tend to roll too fast, increasing breakage risk; flatter angles make eggs sluggish or stop altogether. Maintaining this precise angle ensures eggs move smoothly and don’t jostle each other. Consider surface friction as well. Smooth materials like vinyl or metal sheeting help eggs roll freely, reducing sticking and jams. In contrast, rough surfaces such as carpet or rubber create too much resistance, causing eggs to stick and jam. A slope of roughly 7 degrees, or about 12%, works well for commercial nests. For DIY boxes, sticking to the 5–8 degree range is best. For raised garden beds, a drip irrigation system often uses a similar slope approach to ensure even water flow and prevent pooling. Adjustments to the slope can be made based on testing with actual egg orientations and simulated hen bumps. For vacuum sealers, maintaining consistent performance over time also requires regular care to prevent mechanical jams. Before finalizing your setup, test with a golf ball to confirm eggs will roll smoothly without jamming. When testing, consider the specific dimensions of wood duck nesting boxes to ensure the slope works within the box’s interior height and depth.
Line the Box So Hens Don’t Slip
Line the box with textured surfaces to prevent hens from slipping. Use materials like artificial grass mats or rubberized linings with adhesive grip for the best traction. Secure these linings with double-sided tape or Velcro fasteners to ensure they don’t shift underfoot. For extra stability, apply silicone caulking along the edges—cold-cure or UV-stable sealants work well. Installing dimpled rubber sheets or ribbed plastic liners also provides reliable grip. Avoid smooth surfaces entirely; hens need coarse textures that offer secure footing. Proper lining reduces the risk of injuries, keeps your hens healthier, and minimizes stress. Take the time to line each box thoroughly, and you’ll effectively eliminate slipping hazards. For a durable, easy-to-clean option, consider rubberized linings commonly used in raised bed gardens to prevent weed growth. When constructing the box frame, use corner clamps for precise 90° alignment to ensure the liner fits securely against stable walls. The same principles of secure, airtight sealing used in vacuum sealers for meat can also be applied to keep nesting box liners firmly in place without shifting. If you also plan to compost used coffee grounds, these same rubberized linings can be paired with a dedicated compost bin to keep organic waste contained without leaks.
Keep Eggs Clean With a Hidden Collection Zone
Creating a hidden collection zone for eggs effectively keeps them clean by preventing contamination from droppings. A concealed, lower tray operates vertically separate from the hen droppings, reducing contamination issues by up to 85%. Smooth, non-porous surfaces allow eggs to slide out easily without sticking or trapping dirt, simplifying cleaning. Angled baffles guide eggs away from waste zones, ensuring they remain clean during collection. The lower compartment is secured with wire mesh barriers and sealed access points to prevent hens from entering and contaminating the eggs. Mastering advanced parkour techniques helps reach eggs located on trees, rooftops, and in caves but here the focus is on hygienic design rather than exploration. For long-term egg storage, vacuum sealing offers superior protection against oxidation when compared to canning. An integrated drip irrigation system can also be repurposed to gently rinse eggs as they roll, improving hygiene without manual washing. Selecting the perfect fit from top-rated waterers ensures hens stay hydrated without spilling near the collection zone.
An automatic drop mechanism further reduces handling time, maintaining egg hygiene from the moment they are laid. A centralized, low-level bin collects all eggs, keeping them well away from waste sources and minimizing cross-contamination. Using polished, corrosion-resistant materials not only prolongs durability but also prevents dirt absorption and bacterial growth. This system does more than just gather eggs; it ensures they stay spotless with minimal effort from you, supporting a cleaner, healthier operation.
Test the Roll Path and Lock Down Loose Parts
To test the roll path and lock down loose parts, start by verifying the slope angle with a golf ball or a real egg. The goal is to have it between 5 and 8 degrees to ensure eggs roll gently without bumping or stalling. Place the egg or ball at the top of the path and observe its movement. If it stalls or stops prematurely, increase the floor elevation slightly. If it bumps too fast or jumps off the path, decrease the slope. Use a level or inclinometer to help measure the angle accurately. Remember that the OSB floor material must be sturdy enough to withstand multiple adjustments without warping over time. For this reason, choosing a strong wire rack can provide a more durable and level surface for baking the chicken wings while testing similar slope principles. You can also consider using the knowledge of freezing egg whites from surplus eggs to reduce waste while your flock adjusts to the new boxes. A similar approach to ensuring durability is selecting a compost bin made from robust materials that resist warping and moisture.
Once the roll path functions correctly, secure all loose parts. Attach one-by-two braces at the top and bottom using pilot holes, which help prevent splitting of the material. Add two-by-four supports underneath the floor for proper elevation and stability. Don’t forget to inspect the hinges on access doors; tighten them with galvanized screws and ensure they are predator-proof. Smooth out all edges of the floor to prevent eggs from snagging or hens getting injured. Finally, apply a non-toxic sealer to protect the wood from moisture damage. When these steps are complete and everything is tightly secured, your roll path is set for daily use. External screws with washers, rather than internal hardware, allow for easier access and adjustments if you need to modify the slope later.