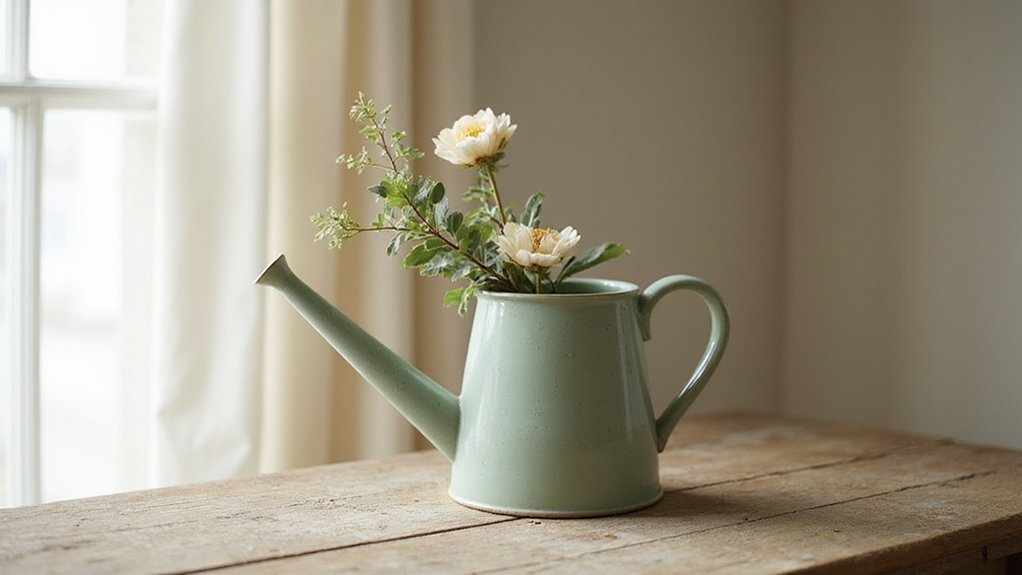
How to Repurpose a Vintage Ceramic Watering Can
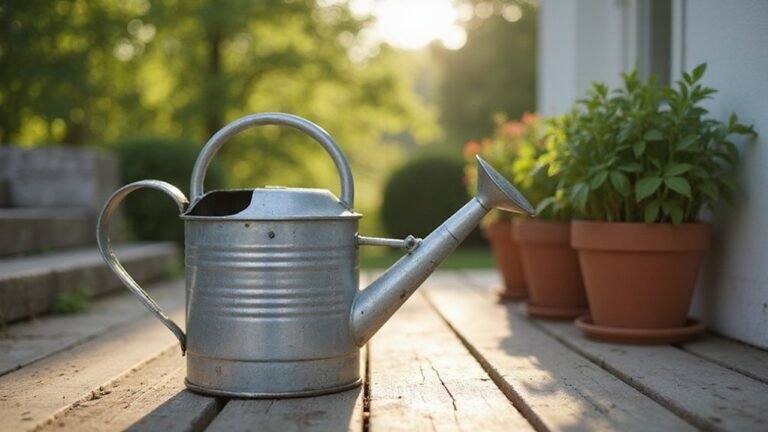
Ever wondered how to breathe new life into an old ceramic watering can? Whether you want to turn it into a charming planter or a unique decorative piece, the process is easier than you might think.
By following a few simple steps, you can transform vintage charm into a stylish addition to your home or garden.
From cleaning and repairing to painting and repurposing, the details behind each step help ensure your project turns out beautifully.
Keep reading to learn how to give your vintage watering can a fresh new purpose.
Skip TSP at Your Own Risk: Cleaning Vintage Ceramics
Skipping TSP is a mistake when cleaning vintage ceramics because it is a powerful degreaser and stain remover for glazes. It easily cuts through years of grime without aggressive scrubbing, helping to prep your piece for ceramic sealing. After using TSP, it’s crucial to rinse the surface thoroughly—any residue remaining can interfere with the bond strength of glazes or sealants. A vinegar soak can also help dissolve mineral deposits and calcium buildup from the interior. Inspect the surface carefully after cleaning. Tiny cracks can worsen if not treated, so prioritize repairing any damage before proceeding. Avoid mixing TSP with acidic cleaners like vinegar or lemon juice, as this neutralizes its cleaning power. Instead, flush the vessel with clear water after cleaning and dry it face-down to prevent pooling. Use soft tools such as chip brushes or old toothbrushes for delicate glazes. Steel brushes are too abrasive and can mar the surface. This gentle cleaning method prepares your vintage ceramic for the next restoration steps without sacrificing its character. For optimal drying, place the piece on a raised bed of clean towels to allow airflow underneath, preventing moisture from settling in hidden crevices. Consider the specific surface condition of your piece, as factors like wood duck nesting requirements inform how closely you must monitor for hidden cracks or residue after cleaning. For pieces requiring resealing, a steady temperature and humidity environment helps ensure an even cure and prevents glaze defects.
Spot and Seal Hidden Cracks Before You Start
To identify hidden cracks in your vintage watering can, you need to carefully inspect both its interior and exterior. Start by running your fingertips inside and outside, paying close attention to areas like the rim and neck where stress points often develop cracks that are not immediately visible. Use direct sunlight to highlight any glaze variations or crazing patterns, which can indicate underlying damage. Tapping the can gently with your finger helps assess its integrity: a dull thud usually signals hairline cracks, while a clear ringing sound suggests the ceramic is intact. To confirm suspected damage, fill the can with cool water and set it on a paper towel for a few days. Any wet marks will confirm a leak, requiring prompt sealing with a suitable ceramic repair product. Like a cracked mason jar seal, a damaged watering can surface can allow moisture to seep in and cause further deterioration. Bacteria can also harbor in cracks, risking contamination and health hazards if the watering can is used for plants or edibles. For the health of your flock, it is also wise to apply the same thorough inspection to chicken coop hardware to prevent moisture damage and rust. Skipping this step risks compromising both your project’s success and your safety. When buying replacement parts, look for wide mouth jars that resist stress fractures and hold tighter seals.
Get a Flawless Paint Base for Repurposed Ceramics
To get a flawless paint base on repurposed ceramics, start by gently sanding the entire piece with fine-grit sandpaper—220 grit or higher. This creates a slightly roughened surface that helps the primer and paint adhere better without damaging the ceramic. After sanding, wipe off all dust immediately with a clean, dry cloth to ensure a clean surface free of debris. For best adhesion, apply the primer with a soft, smooth, square brush that has no roughness.
Next, apply a bonding primer designed specifically for ceramics. Use a brush or spray gun to apply a thin, even layer that covers all surfaces, including edges. Taking care to avoid thick coats prevents drips and uneven coverage. Ensure the primer provides comparable performance and adhesion to high-end vacuum sealer machines for a lasting bond. Choosing a primer with quality and durability similar to top-rated compost bins ensures a resilient base for your paint. Follow the manufacturer’s drying instructions carefully before proceeding. Once the primer is fully dry, move on to painting with multiple thin coats of acrylic craft paint. Allow each layer to dry completely before applying the next to minimize streaks and uneven color. For squirrel control, galvanized chicken wire offers a durable barrier that resists rust and chewing.
Finally, seal your painted ceramic with a waterproof sealer. Apply at least two layers, letting each dry thoroughly before adding the next. This enhances durability and protects your artwork from moisture and handling. For best results, wait five to seven days after sealing before using the piece to ensure the paint and sealant are fully cured.
Achieve an Antique Look With Decor Transfers and Wax
Start by thoroughly cleaning the ceramic surface to ensure proper adhesion of the decor transfers. Remove any wax, dust, or grease using a gentle, non-abrasive cleaner. A smooth, clean surface is essential to prevent bubbles or peeling later on. This step mirrors the furniture preparation where a silky smooth finish was achieved through meticulous sanding. Once the surface is dry, carefully peel each rub-on transfer from its backing and position it onto the watering can. Use long, straight strokes to burnish the transfer, pressing firmly from the center outward to achieve full bonding. Take your time—rushing can cause misalignment or wrinkles, which can be difficult to fix once set. For those who also garden, pairing this project with a raised bed garden ensures your antique watering can has a beautiful place to be used.
After the transfer is securely in place, seal it with a water-based finish to protect the design. Once the finish is dry, apply dark antiquing wax over the transfer using long, even strokes. Wipe excess wax from raised areas to avoid darkening the entire surface, but leave it in the crevices to create depth. Pay attention to the details—applying wax too thick or unevenly can obscure the design. Use a clean rag to burnish the wax, smoothing out any uneven patches and enhancing the aged, vintage appearance. This wax technique adds authentic texture and helps the decor transfer seamlessly blend with the aged look.
Drill or No Drill: Choosing Between Planter and Display
Drilling into your vintage watering can is the best option if you want a functional planter with proper drainage. To do this, you’ll need a diamond-tipped bit for ceramics or a masonry bit for terra cotta. Use a 3/8-inch bit for standard drainage holes or a 1/2-inch bit if you prefer more water flow. Keep in mind, drilling is a permanent alteration that can damage the can if not done carefully, but it ensures your plants won’t rot from excess water buildup. For a simpler alternative, consider building a DIY quail feeder using basic tools and materials. If weight is a concern, lightweight wheelbarrows are ideal for transporting heavy soil bags across your garden. For best results, position the can at the right height to make watering easier and prevent strain.
If you want to keep your watering can purely decorative, avoid drilling altogether. Instead, you can use no-drill methods like placing plastic nursery pots inside or layering rocks at the bottom for drainage. These hacks let you add plants—especially succulents—without puncturing the can’s surface. The main drawback is that water may pool without proper drainage, increasing the risk of rot, so you’ll need to monitor moisture closely. Choosing between drilling or not depends on whether you prioritize function or full preservation. Personal attachments often influence decisions on planter modifications like drilling holes.
Pick the Right Soil, Drainage, and Plants for Your Can
To ensure proper drainage and soil health, drill at least quarter-inch holes at the lowest points of your can—one hole for every six inches of base area. Cover larger openings with a shard or mesh to prevent soil from escaping. Add a one-inch layer of pebbles at the bottom of the container to help water flow freely and prevent root rot. For soil, create a custom blend by mixing standard potting mix with 20% perlite, 10% compost, 5% sand, and crushed lava rock for airflow. This mixture minimizes compaction and excess moisture trapped by ceramic containers, promoting healthy root systems. Even when reusing soil from prior seasons, you can incorporate fresh potting mix to restore fluffiness and improve drainage in your ceramic container. Considering your container’s limited volume, use a raised garden bed approach to layer materials for optimal root depth and aeration. Maintaining a consistent temperature range of 99-102°F is crucial for successful egg incubation in any DIY setup.
Plant choice is equally important. Opt for succulents like Echeveria or herbs such as thyme and oregano, which thrive in dry, well-ventilated conditions. Avoid planting deep-rooted species, as shallow containers cannot support their growth. If your can sits in indirect light, ferns can be a good option, though they prefer more moisture and indirect light. Matching your soil mixture and plant needs ensures your vintage can remains healthy and vibrant over time. For large birds housed nearby, consider that top chicken coops offer spacious and well-ventilated designs similar to these repurposed containers.
Unexpected Indoor Uses: Cooler, Kindling, and Candles
You can repurpose your ceramic watering can as an indoor beverage cooler, a kindling holder, or a candle display. To use it as a cooler, fill the can with ice to chill wine bottles or soda cans. The ceramic retains cold temperatures, keeping your drinks refreshingly chilled longer. To prevent moisture damage, add a liner or a plastic insert inside the can. For storing fireplace kindling, place it near your hearth; the ceramic’s heat resistance protects surfaces from ash and sparks. Just ensure the can is free of any chips—address small cracks with crack repair before use to preserve its durability. For decorative purposes, place pillar candles inside the can. Its stable, heat-resistant form makes it safe for candle displays, and the spout can hold votives or string lights for added ambiance. This allows you to transform a vintage piece into functional decor without sacrificing style. For homesteaders seeking additional inspiration, expert insights recommend similarly repurposing other ceramic garden tools for practical, everyday use. A 2 gallon watering can offers an ideal capacity for these repurposing projects, balancing portability with enough space for ice, kindling, or candles. Choosing the right bag for vacuum sealer can also help preserve kindling or candle supplies by keeping them dry and free from moisture damage.
Turn Your Repurposed Can Into a Functional Lamp
To turn a vintage watering can into a functional lamp, start by choosing a standard lamp kit that includes a cord, socket, and harp. Drilling an 8mm hole in the ceramic surface is essential—use a diamond core bit at 5,000 RPM and keep the area damp to prevent cracks. After drilling, smooth the edges with a diamond file to maintain the can’s vintage charm and ensure safety. For a similar effect in garden art, a shepherd’s hook can be used to hang the repurposed can and display fairy lights instead of a lamp. For a stable outdoor setup, consider placing the can on a rain barrel base to keep it level and secure.
Thread the cord carefully through the hole, then attach the socket cover. Connect the neutral (ribbed) wire to the silver screw and the hot wire to the brass screw, tightening the wire hooks clockwise to ensure a secure connection. Inside the can’s neck, secure the lamp rod with washers and rubber tubing to prevent movement and stress on the wiring. An expansion mechanism can be added for a tight fit, stabilizing the lamp.
Finally, mount your shade onto the threaded stud and secure it with a finial. This method allows you to preserve the can’s vintage appeal while transforming it into a practical, safe light source.
Easy Maintenance for Your Repurposed Watering Can
Regular cleaning is essential to keep your repurposed watering can functioning well. Start by emptying and rinsing the interior thoroughly to remove any residual water and debris. Use warm water mixed with mild dish soap and scrub with a non-abrasive sponge to avoid scratching the surface. Rinse well to remove any soap residue and check for mineral deposits or algae buildup. To address these, disassemble the spout and nozzle, then soak the metal parts in a vinegar solution for about two hours. After soaking, scrub away deposits with a soft brush, rinse everything thoroughly, and allow all components to dry completely before reassembling. For a more thorough internal treatment, add vinegar to the watering can gradually to kill bacteria and loosen grime before rinsing.
For ongoing maintenance, tilt the can upside down to drain leftover water, and air-dry it in a sunny spot to discourage mold and algae growth. Wiping down both the inside and outside with a dry rag helps keep it clean and looking fresh. Conduct monthly visual inspections for cracks or loose fittings, and test the flow rate to ensure proper operation. If you notice any minor damage, repair it promptly using ceramic glue, and replace any worn parts immediately to prevent further deterioration.
Fast Fixes for Common Repurposing Mistakes
Fast fixes for common repurposing mistakes are essential to keep your project on track. For cracks in ceramic watering cans, use two-part epoxy putty, which cures in 15 to 30 minutes, providing quick, durable repairs. To fill gaps or soft spots, soften heat-molded silicone from gum containers with boiling water before applying. If the bottom of your ceramic piece is warped, gently tap it on a hard surface or use a rubber mallet over a wood block to flatten it out. If you plan to still use the can for watering, enlarging holes in the sprinkler head with a drill can improve water flow and prevent clogging from pond debris.
Leaking spouts can be sealed permanently with waterproof glue, preventing moisture loss. For temporary fixes, heat a knife and melt the glue around the leak, then massage the rupture shut. When metal parts are damaged, weld small plates over large holes or reinforce fractured necks with epoxy putty. To convert the item into a planter, drill drainage holes at the bottom and line it with foam to avoid root rot, ensuring healthy plant growth. These fast, practical fixes help salvage your repurposing projects efficiently.