DIY Egg Incubator: A Complete Setup Guide
Thinking about hatchling your own chicks without a big budget? You can build a simple, effective DIY egg incubator for under $50 using just a styrofoam cooler, a 40-watt bulb, and a USB fan.
With a few basic steps, you’ll create a setup that maintains the right temperature and humidity for successful incubation.
Keep reading to learn how to assemble and fine-tune your incubator just right.
Save Money by Building Your Own Egg Incubator
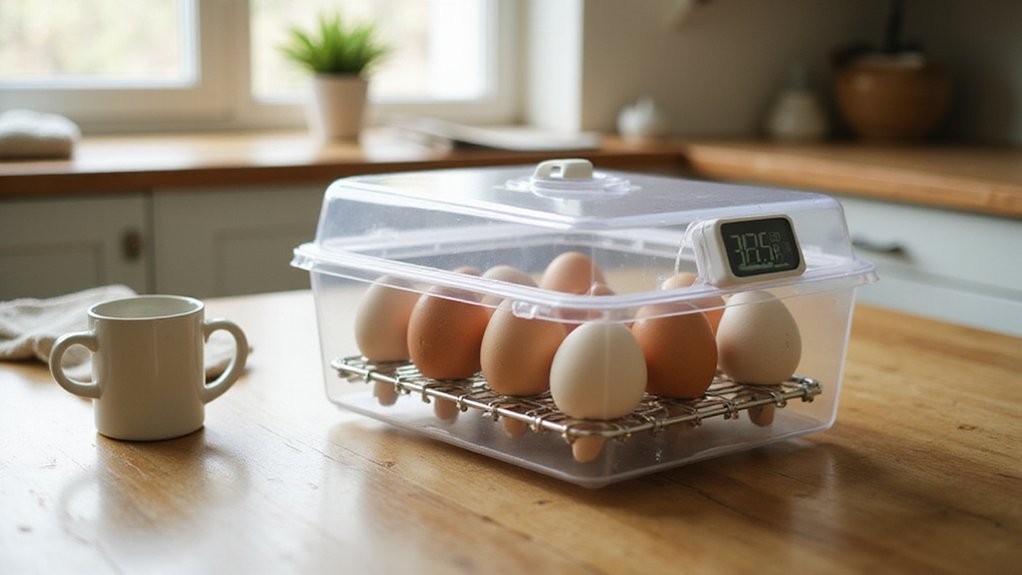
Building your own egg incubator can significantly cut costs, bringing the price down from $150–$400 for a commercial model to just $25–$50 for a 20–30 egg capacity. The main savings come from using a styrofoam cooler for insulation, which costs around $15–$20, and a 40-watt light bulb for heat, typically under $5. To ensure durability, reinforce the styrofoam seams with hot glue because it can crack easily. Prioritize safety by installing a thermal cutoff switch that trips at 105°F, which costs about $3–$5, preventing overheating. A digital thermostat allows precise temperature control, reducing fire hazards and maintaining stable conditions. Building it yourself enables you to save between $100 and $300 per unit, turning this into an affordable yet reliable project. For consistent humidity, add water to the bottom of the incubator and maintain levels between 50-80% using a measuring cup. For healthy chicks, ensure the incubator is placed in a draft-free area with stable temperature similar to what a well-built chicken coop provides. Using wood duck nesting boxes as a reference, proper ventilation is also essential for embryo development. For the external frame, reclaimed wood can be used to build a sturdy support structure that elevates the incubator off the ground.
Choose the Right Box, Heater, and Fan for Your DIY Incubator
Choosing the right box, heater, and fan for your DIY incubator starts with focusing on insulation and heat delivery. Use a Styrofoam cooler for its excellent thermal insulation; it helps maintain stable internal temperatures without requiring costly modifications. Double-walled cardboard can work as a substitute but is less effective at retaining heat. Place a 40-watt bulb off-center to minimize hot spots, ensuring more even heating. Mount a USB computer fan directed at the bulb for consistent air circulation throughout the incubator. Include ventilation holes—about 1/4 inch in diameter on both long sides and the lid—for passive CO2 release. Elevate the egg trays at least one inch above the heat source to prevent overheating. Position the thermostat probe near the center of the incubator, away from the heat source, for accurate temperature readings. Employing a sealed fan housing around the USB fan can protect it from humidity, much like moisture protection in a DIY dehydrator build. To protect eggshell integrity, pre-sterilize all internal components using boiling water immersion for several minutes. These choices will help you build an energy-efficient and reliable incubation environment. For added durability in a humid environment, consider insulating the box with a foil-faced foam board layer, similar to how a wheelbarrow tire’s inner tube is protected from punctures.
Step-by-Step Assembly: Cutting, Sealing, and Wiring
Start by cutting precise openings in the box for placement. You’ll need an 11×16 cm hole for the viewing window, along with smaller holes for the thermometer, hygrometer, and power cord. Use a sharp utility knife or jigsaw to ensure clean, accurate cuts. Reinforce the front and inner walls with wood pieces to add stability and prevent warping or damage over time. This initial phase, like Part 1 Cutting Plywood in the series, sets the foundation for the entire build.
For insulation, line the interior with foam board or fiberglass insulation, securing it with glue designed for the material. Attach the glass window to the outside of the box, sealing all edges with tape or silicone caulk to prevent leaks. Proper sealing ensures stable temperature and humidity levels inside the incubator, which are crucial for reliable operation.
When wiring, follow your wiring diagrams carefully. Connect the white wire to the source port (S), the brown wire to the negative (-), and the red wire to the positive (+) terminal on the relay. Wire the heating bulb holder to the thermostat’s K0 and K1 terminals. Then, connect both the fan and the thermostat to a 12V power supply. Mount the thermostat on the exterior of the box using hot glue for a secure attachment. Position the fan facing the heating bulb so it can effectively circulate warm air throughout the interior, ensuring uniform temperature distribution.
Dial In the Perfect Temperature and Humidity for Hatching
To achieve optimal hatching, you should set your incubator to a steady temperature of 99.5°F (37.5°C) for forced-air units with fans. Calibrate your incubator to ensure it stays within 98.1°F to 100.9°F. If you’re using a still-air incubator, aim for 101°F to 102°F (38.3°C to 38.9°C), measured at the top of the eggs. Humidity during days 1 through 18 should be maintained between 50% and 55%, with wet bulb readings of 85°F to 87°F (29.4°C to 30.6°C). During the lockdown period of days 19 to 21, reduce the temperature to approximately 98.5°F (36.9°C) and increase humidity to 65% to 70%. This helps prevent chicks from sticking to the membrane and ensures proper development. To maintain these levels reliably, consider investing in one of the top hygrometers for incubators to ensure your readings are accurate.
To keep the environment stable, check temperature and humidity readings twice daily. Refill water channels to maintain humidity levels and place the incubator away from drafts or direct sunlight. Also, calibrate your hygrometer regularly for accurate humidity readings, as even small discrepancies can impact hatch rates.
Turn Eggs, Candle for Viability, and Prep for Hatch Day
Turn eggs three to five times daily during the first 18 days of incubation. Mark one side of each egg with an “X” and the opposite side with an “O” using a pencil to ensure they are not resting on the same side repeatedly. This method helps prevent development issues caused by embryos sticking to the shell membrane. Regular turning promotes even heat distribution and keeps the embryo centered. Avoid letting eggs settle on one side for extended periods, as this can hinder proper development and cause deformities. Using a watering can to lightly moisten the incubator’s humidity sponge can help maintain the proper moisture levels essential for successful hatching. For best results, quality and performance of your incubator should be evaluated before setup, just as gardeners assess raised beds to ensure reliable conditions. Maintain stable temperature and humidity readings by placing a calibrated thermometer inside the incubator at embryo level before adding eggs.