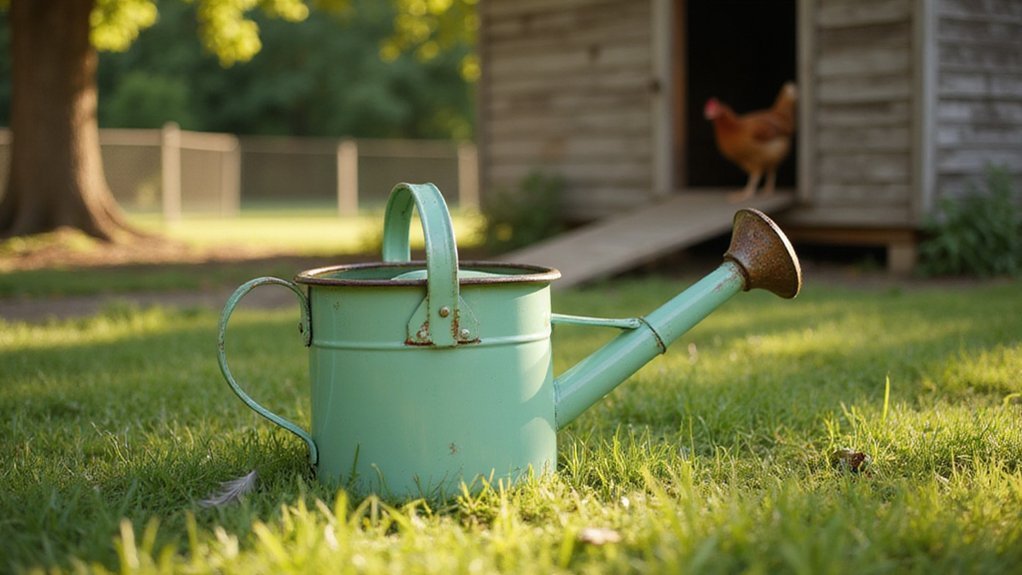
Choosing the right watering can for your chicken coop may seem simple, but the details matter.
A well-selected model saves you mess and keeps your flock safe.
Typically, a 0.5 to 1-gallon can with a narrow, downward-curving spout works best to prevent spills and head submersion.
Keep reading to learn how to pick the best fit for your needs.
Why a Child’s Watering Can Works for Chicken Coops
A child’s watering can, typically holding between 0.5 and 1 gallon, works well for chicken coops because of its size and design. Its low height allows even your smallest birds to drink comfortably without the need for a platform. The spout opening prevents their heads from submerging, which helps keep the water clean and reduces contamination. This design also supports water conservation by limiting spillage, ensuring you don’t waste resources. Its compact size fits easily in tight coop spaces, and the lightweight construction makes refilling quick and effortless. Additionally, using a watering can helps prevent pests by avoiding standing water that attracts flies and rodents. For an even more hygienic setup, you can place the can inside a tray made from compostable bags to simplify cleanup during regular maintenance. Regular cleaning is straightforward, keeping the water fresh without complex maintenance. For long-term freshness when storing feed, consider vacuum sealers that effectively preserve nutrients. This system aligns with homesteading goals by using a simple, durable tool that supports self-sufficiency. Overall, for a small flock, this simple tool delivers practical, hygienic hydration that meets daily needs efficiently. Choosing a can with a narrow spout helps direct water precisely, minimizing waste and further protecting the water source from debris.
Best Watering Can Material for Chicken Coops
The best material for a watering can in a chicken coop depends on your priorities for durability, hygiene, and ease of use. Galvanised steel is an excellent choice because it offers superior strength and rust resistance. You can test its durability by tapping the can with your knuckle— a resonant ring indicates good material quality. Stainless steel and copper also excel in longevity; copper naturally inhibits bacterial growth, making it a hygienic option. When evaluating coop accessories, it is helpful to consider top picks reviewed for reliable and durable construction materials. When selecting wood for coop structures, pressure treated lumber offers similar benefits of weather and rot resistance.
Reinforced, food-grade plastic is lightweight, BPA-free, and recyclable, which reduces environmental impact. It’s also easy to lift and refill, beneficial if you need to move the watering can frequently. Aluminum strikes a balance, offering lightness with moderate rust resistance, though it may require anodizing to improve longevity.
Climate influences your choice: metal watering cans stay cooler in hot weather but could become too cold or crack in freezing temperatures. Plastic may be more prone to cracking in extreme cold but tends to be more forgiving in summer heat. To select the best option, prioritize leak-proof, easy-to-clean designs and check the gauge of the metal— a dull thud when tapped suggests poor quality, so examine carefully.
Ultimately, your decision should weigh long-term durability against environmental impact, aiming for a product that lasts while minimizing harm to the planet. For those seeking a similar approach to material selection, reviewing top options reviewed can help identify the most reliable choices for your specific needs.
Watering Can Capacity for Your Coop Size
A 2-gallon watering can is suitable for 5 to 6 chickens for one day, providing enough water without frequent refills. A 3-gallon can supports a flock of six hens for about three days, making it a practical choice for small to medium-sized coops. During extreme heat, increase water capacity to at least 1 quart per bird per day to prevent dehydration. For larger flocks, such as 10 birds or more, a 5-gallon can covers roughly three to four days, while a 10-gallon unit works well for 20 or more birds, reducing the need for constant refilling. Always match can size to your flock’s size, climate, and watering schedule, and avoid oversized containers that can cause water to spoil or go to waste. Consider opting for brass watering cans due to their durability and resistance to corrosion in outdoor coop environments. For example, proper roosting bar height is a separate but equally important consideration for coop design that ensures your chickens sleep comfortably and safely. When selecting a watering can, look for a corrosion-resistant frame to ensure long-lasting performance in the coop’s varied weather conditions.
Matching Watering Can Flow Rate to Your Flock
To match your watering can’s flow rate to your flock’s drinking needs, calculate the required milliliters per minute by adding your bird’s age in days to 20. For example, a 20-day-old bird needs around 40 ml/min, while birds older than 21 days require between 70 and 100 ml/min. To test nipples, collect water for 30 seconds and then double that volume to determine if the flow is adequate. Check the nipples closest to and farthest from the regulator first to ensure uniform water flow across the system. Proper flow rate prevents issues like drought and keeps litter dry, promoting healthy birds. For automated systems, adjust pressure as your flock grows: increase it three to four times per batch, but lower it as birds reach full size to reduce splashing. This balanced approach ensures your flock stays well hydrated without wasting water. When building a supply system, integrate a DIY duck coop frame to securely mount the water line and keep it level. Random sampling across different lines within the house helps identify early issues to prevent problems in poultry growth. Consider using a rotating compost tumbler to recycle organic waste from the coop into nutrient-rich soil for garden beds. To secure the water line in place, use a pair of tin snips to carefully cut hardware cloth for the mounting points around the frame.
Daily Checks to Keep Your Watering Can Clean
After each use, you must completely empty your watering can to prevent water from stagnating and causing buildup. Remove any loose dirt, sediment, and organic debris from the bottom of the can. Rinse the interior thoroughly with clean water to wash away residual particles. Check the spout and nozzle regularly for blockages caused by debris buildup, and clear them as needed. This process mirrors the proper sealing method used to keep jars airtight and free from contamination. Let the can air dry upside down for at least one hour to prevent rust and mold. It’s also important to rinse the can with clear water after each watering, inspect it for signs of wear like cracks or rust, and dry it completely before storing. To further prevent debris from entering your watering can, consider installing a mesh filter over the opening, similar to how a rain diverter system filters roof runoff before it reaches a barrel. Store the can upright in a dry, sheltered spot to avoid dents and warping. Additionally, you should check for algae buildup on the rose, as this can block holes and harm spray quality, and cleaning it with sandpaper prevents blockages and maintains spray quality. For optimal durability, ensure your watering can is stored away from direct sunlight to prevent the plastic or metal from degrading, just as raised garden bed soil needs protection from harsh weather to maintain its structure. These simple maintenance steps keep your watering can clean and ensure your chickens stay hydrated.
Preventing Nozzle Clogs With Filtered Water
Filtering your water before it reaches the nozzle is essential for preventing clogs. Using an inline strainer with an 80 to 100 mesh screen, which filters out particles larger than 0.15mm, provides a solid first line of defense against debris. For additional protection, install a coarse strainer with a 20 to 40 mesh to catch larger particles like rust or metal chips before they reach finer filters. Employing a settling tank can also help reduce sediment buildup before the water flows through your system. For homesteaders familiar with the precise armature work in stop-motion films like *Chicken Run*, maintaining your filtration system with similar attention to detail ensures long-term reliability. A properly sized brooder box can also help keep juvenile chickens healthy while you focus on other maintenance tasks. You can also secure the entire setup with quality chicken wire to keep curious livestock from disturbing the filter components. Regularly monitor the differential pressure across your filters—when it reaches 5 to 10 psi, it’s time to clean or replace them. Choosing the right water source is equally important; letting tap water sit for 24 hours to dissipate chlorine or opting for rainwater can prevent mineral deposits and clogging. Consistently cleaning your reservoir prevents algae growth and keeps downstream components flowing smoothly. Additionally, ensure your watering can nozzle design incorporates a maximum free passage to allow any remaining larger contaminants to pass through without causing blockages.
Spout Width and Shape for Minimal Spillage
The optimal spout width for minimal spillage is between 4mm and 5mm internal diameter. This range delivers smooth, consistent water flow without splashing or dribbling. Narrower openings around 3mm can mimic rain but restrict flow, which may cause frustration when filling the coop. On the other hand, openings over 6mm create high-pressure streams that splash heavily, increasing mess and waste. Just as with canning jars, selecting the right mason jars for canning ensures proper sealing and performance for your particular needs.
The shape of the lip also plays a crucial role. Downward-curving, micro-beveled edges help break surface tension, preventing drips from clinging or traveling along the can body. Sharp lip edges should be avoided because they cause water to cling and rebound unpredictably, leading to spills. Internal baffle ridges further aid in controlling turbulence, slowing down the flow for a steady, low-pressure pour. This principle mirrors the controlled turbulence achieved by internal baffle ridges in a DIY food dehydrator build.
Ergonomics matter too. A curved downward tip and a length of 6 to 10 inches allow you to reach hen feeders comfortably without bending or jerking. This stability helps keep water where it belongs—inside the trough—and reduces unnecessary spillage onto the ground.
Weekly Vinegar Soaks to Remove Mineral Buildup
A weekly vinegar soak with a standard ratio of 1 tablespoon of apple cider vinegar per gallon of water effectively removes light mineral buildup in waterers. This gentle solution minimizes the risk of corrosion in plastic or rubber water containers while maintaining cleanliness. To use, fill your child’s watering can with the mixture, let it sit for 15 to 30 minutes, then scrub with a brush to loosen deposits. Dirty water can cause organ damage, so consistently applying this routine ensures minerals don’t accumulate excessively. Avoid using acidic solutions on metal fountains, as they can corrode quickly. After soaking, rinse thoroughly with plain water to remove any vinegar residue and keep the waterer clean without harsh chemicals.
Keep Water Cool in Summer, Warm in Winter
To keep water available and liquid during winter, raise waterers on cinder blocks well above snow accumulation. Refresh the water multiple times daily and offer warm water during the morning feeding to encourage drinking. Consider using heated waterers or placing small incandescent bulbs inside the blocks, but ensure all electrical components are weatherproof. Wrapping waterers in thermal materials can help insulate them, and installing a windbreak around the area reduces heat loss. Check water daily for ice formation and remove any ice if it appears. Additionally, seal coop doors to retain internal warmth and prevent cold drafts. For a durable, freeze-resistant option, the LITTLE GIANT 5 Gallon Plastic Poultry Waterer ensures larger capacity and sturdiness in extreme conditions. These steps help maintain accessible, unfrozen water, protecting your flock during extreme temperatures.
When to Upgrade to a Larger or Heated System
You should upgrade to a larger system when your flock exceeds 5 to 10 birds or your daily water demand surpasses 2 gallons. Larger waterers provide enough capacity to keep all birds hydrated without frequent refilling, which reduces stress and prevents water shortages. They also help prevent stagnant water sitting over 48 hours, which can lead to contamination and algae growth. Proactive planning leads to healthier birds and improved egg production.
A heated system becomes necessary when temperatures consistently drop below freezing. Larger waterers have more thermal mass, meaning they freeze more slowly than small founts. Installing heated bases or thermostatic outlets that trigger at 32°F ensures the water stays liquid and safe. Upgrading before winter extremes hit allows you to maintain flock health and minimize daily labor, making hydration reliable during cold weather.