If your eyes keep watering inside your chicken coop, you’re likely dealing with more than just dust.
Ammonia fumes from droppings are often the real culprit and can cause irritation.
By addressing these fumes and improving your coop’s ventilation, you’ll be able to reduce eye watering and create a healthier environment for your chickens.
Keep reading for the full approach.
Take 3 Immediate Steps to Stop Eye Irritation Right Now
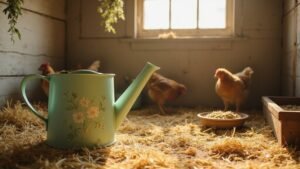
To stop eye irritation in chickens immediately, follow these three steps. First, isolate the affected bird to prevent the spread of infectious conditions like Coryza. Place the sick chicken in a clean, warm pen away from healthy birds. Next, clean its eye using a sterile saline solution—mix one teaspoon of salt into a cup of warm water—and gently flush the eye. Tilt the chicken’s head to allow the fluid to flow from the inner corner outward, removing any discharge without forcing the eye open. Also ensure the eyes appear alert and responsive as clear, wide-open eyes indicate no underlying health issues. Finally, apply a topical treatment such as VetRx to reduce inflammation and soothe the eye. Be sure to also address issues like feather molt and sun exposure, which can stress the bird and weaken its immune system. Consider upgrading to a properly ventilated coop to reduce ammonia buildup and dust that often worsen eye problems. Proper watering equipment, such as IKEA watering cans, can help minimize spills and moisture that contribute to coop ammonia. Monitor the isolated flock for 2 to 3 weeks and consult a veterinarian before reintroducing the affected bird.
Why Your Eyes Water in a Chicken Coop (It’s Not Just Dust)
Watering eyes in a chicken coop are often caused by multiple underlying factors beyond simple dust. High ammonia levels from wet bedding can burn your chickens’ corneas, leading to irritation and tearing. Bacterial infections like Infectious Coryza cause facial swelling and eye discharge, while mite infestations can migrate near the eyes, triggering severe irritation. Stress from feather plucking or overcrowding weakens your flock’s immunity, making eyes more susceptible to infections like Mycoplasma or to parasitic eye worms. Poor ventilation traps dust and dry air, further aggravating eye issues. To reduce watering eyes, address ammonia with products like Ammotrol, switch to dust-free bedding, and treat parasites with VetRx. Multiple factors often work together to cause eye watering, so tackling each one is essential for your flock’s health. Adding a trellis for raised garden beds near the coop can improve air circulation and reduce trapped dust and ammonia. A proper base layer of coarse material at the bottom of a garden bed aids drainage, which can similarly help keep coop bedding dry and lower ammonia buildup. Using bread scraps in your compost pile can reduce coop waste but ensure they are buried to avoid attracting pests.
How to Spot Sick Birds and Isolate Them Fast
If you notice a bird isolating itself from the flock, it’s a clear sign to act quickly. A sick bird may sit motionless, stop foraging, or display dull, fluffed feathers. Reduced appetite and abnormal posturing are early red flags. Check for these signs and move the bird immediately to a separate sickbay—such as a dog crate placed near your bathroom—for close observation. Handle healthy birds first to prevent cross-contamination.
Perform a quick physical exam: weigh the bird, gently palpate its breast muscles to assess muscle tone, and feel its abdomen for any hard masses, which could indicate egg binding. Also inspect the feathers for plucking, which signals stress or underlying issues. Consider the quality and performance of your equipment when transporting sick birds, as a sturdy wheelbarrow can help move heavy supplies or isolation crates more efficiently around the coop. Check the vent area for cleanliness and listen for abnormal breathing sounds. You may also need to secure the sick bay with an automatic door so the bird cannot rejoin the flock unattended. Store any treatments or supplies in clean glass jars to keep them sealed and organized. Always wash your hands thoroughly before and after handling to prevent the spread of illness. Quick isolation and rapid response are vital to stopping the illness from spreading further.
The Right Way to Flush Irritated Eyes at Home
To flush irritated eyes at home, you’ll need to follow a few careful steps. First, wash your hands thoroughly for at least 20 seconds to prevent introducing more bacteria or debris into your eyes. If you wear contact lenses, remove them immediately because trapped particles can worsen irritation and increase risk of infection. Prepare a sterile saline solution or make a homemade one by boiling water and stirring in half a teaspoon of salt until dissolved. Use lukewarm water, between 32°C and 37°C, since hot or cold water can cause additional discomfort.
Tilt your head so the affected eye is lower than the other, then gently pour the saline from the inner corner of your eye outward, avoiding direct stream into the eye to reduce pressure. Keep your eye open and move your gaze in different directions—up, down, sideways—to help flush out debris thoroughly. Do not rub your eyes, as this can push irritants deeper and make symptoms worse, especially if you’re dealing with eye allergies. After rinsing for at least five minutes, gently pat the area dry with a clean, lint-free towel. If redness or pain persists even after flushing, monitor your symptoms carefully and seek medical advice if necessary.
When Should You Call a Vet for Watery Eyes?
You should call a vet if your chicken’s watery eyes do not improve within 24 to 48 hours or if the symptoms suddenly worsen. Early intervention is crucial, especially if you notice pus, yellow-green discharge, or significant swelling that completely closes the eye. Be alert for additional signs such as lethargy, loss of appetite, or trouble standing. When multiple birds in your flock show the same symptoms simultaneously, it indicates a contagious disease that requires immediate professional attention to prevent a flock-wide outbreak. Do not ignore frothy discharge, foul odors, or damage to the eye’s cornea. If your bird stops eating or drinking, loses weight, or stops laying eggs, act quickly. Recurring eye issues after treatment or rapid spread to 20% or more of your flock also warrant veterinary help. If home care shows no improvement within two days, do not hesitate to consult a vet.
Which Antibiotics Actually Help Bacterial Eye Infections?
Topical antibiotics like fluoroquinolone drops (ciprofloxacin or ofloxacin) are most effective for quickly clearing bacterial eye infections in chickens. These medications achieve 70 to 85 percent remission within five days when used properly. It is essential to avoid overuse of these antibiotics to prevent the development of resistance. Gentamicin can also be used but carries a risk of chemical conjunctivitis, so it should be applied with caution. For proper application, consider using a watering can design that allows for precise, gentle cleaning of the affected area.
For mild cases, erythromycin ointment provides a sustained contact overnight, helping to contain the infection. Always follow the full course of treatment to prevent antibiotic resistance from emerging. In systemic infections, such as those caused by Chlamydia, oral azithromycin or doxycycline are options, but doxycycline is not safe for young birds. Neisseria infections require ceftriaxone combined with azithromycin.
Never skip a veterinarian’s diagnosis before starting treatment. Identifying the exact pathogen is crucial for choosing the right antibiotic. Stick to proven topical treatments first and use systemic medications only when necessary, following professional guidance.
Stop Ammonia and Dust With Better Coop Ventilation
Adequate ventilation is essential for controlling ammonia and dust in your coop. For every ten square feet of floor space, aim for one square foot of vent area. This ventilation rate maintains airflow at about five cubic feet per minute per chicken, which helps prevent moisture buildup that releases ammonia. Install high-level ridge vents to allow hot, dusty air to escape naturally, while preventing drafts at roosting height that can disturb your chickens. Proper roosting bar height should position birds above drafts but below ridge vents to maximize safety and airflow. Cover vents with half-inch hardware cloth to block predators without restricting airflow. Regular cleaning of vents ensures dust and debris do not clog the openings, maintaining effective air exchange. Keep humidity levels below 70 percent to further reduce ammonia formation. Even in cold weather, continuous minimum ventilation is essential for moisture control to prevent condensation and suppress dust. Consistent monitoring and adjustments will help keep the air clean, supporting your flock’s health and well-being.
Nutrition Changes That Prevent Watery Eyes in Your Flock
Adjusting your flock’s nutrition can significantly reduce eye watering caused by ammonia fumes. Start by supplementing their feed with 2000-3000 IU of Vitamin A per kilogram to support eye health. Adding 50-100 mg of Vitamin E per kilogram helps combat inflammation. Ensuring riboflavin intake above 10 mg per kilogram prevents corneal issues, while including 100-200 mg of beta-carotene supports young chicks’ eye development. For long-term prevention, consider using wood duck nesting boxes to provide your flock with cleaner, better-ventilated housing that reduces ammonia buildup. Building a zero waste chicken feeder for your coop can also reduce spilled feed and attract fewer pests. Choosing top roost options for your coop further improves ventilation and reduces moisture accumulation.
Feed ingredient quality also plays a critical role. Reducing protein content from 23% to 19% decreases nitrogen waste and ammonia buildup by about 18%, lowering eye irritants in the environment. Avoid recycled oils in feed and keep crude fat levels under 7% to prevent wet droppings, which can increase dust and irritants.
Use a covered waterer to cut down on dust contamination, and fortify drinking water with 50-100 mg of Vitamin C per liter. This addition helps reduce stress-related eye problems and boosts immune response. Implementing these nutritional adjustments can prevent watery eyes and promote healthier, more comfortable flock living.
How Often to Change Bedding to Stop Reinfestation
Changing bedding every 2 to 3 weeks is essential to prevent reinfestation. In hot summer months, increase this frequency to weekly to better control moisture and reduce ammonia buildup. If you use the deep litter method, turn the bedding daily and fully replace it every 6 months. Before adding fresh bedding, remove all old material completely. Spray disinfectant on floors and walls after removal, then allow everything to dry thoroughly. For pine shavings, turn them every one to two days to prevent compaction. Straw should be replaced immediately if it gets wet. Perform a full bedding change at least once a year, and increase how often you replace it if you notice pests or a strong ammonia smell. Using a vacuum sealer for feed bags can maintain freshness and prevent pest attraction. Regular bedding management is key to keeping your coop healthy and pest-free. Choosing construction sand as an alternative base can reduce dust and improve drainage in the coop.