DIY Food Dehydrator: A Homesteader’s Guide
Looking to preserve your garden’s harvest without breaking the bank? Building a simple DIY solar food dehydrator can be a great way to do it. With just a few basic materials and some easy steps, you’ll be ready to dry herbs, fruits, and vegetables naturally.
Keep reading to learn how to craft your own efficient, homemade dehydrator.
Build Your Solar Food Dehydrator Frame for Maximum Sunlight
To build a frame that captures maximum sunlight, start with a 3 ft by 3 ft square base using 2×4 lumber for the corners. This provides a sturdy yet portable foundation. Cut angled pieces so your collector box faces the sun at 30 to 45 degrees, which is essential for optimal solar energy absorption. Align the collector directly toward the sun to maximize heat collection. Secure every joint with screws or nails to prevent air leaks that could reduce efficiency. Attach window screening underneath to support your drying trays while allowing airflow. Keep the frame height generous enough to facilitate proper airflow between the collector and the drying chamber. Finally, install corrugated metal roofing with rubber washers spaced one foot apart to ensure everything stays locked in tightly. For best performance, ensure your design includes sufficient passive ventilation to prevent overheating and maintain steady drying conditions. This design leverages thermodynamic principles to improve heat transfer and overall efficiency, ensuring consistent drying temperatures. Use screws or nails spaced every six inches to fasten hardware cloth over the screening for added support against wind. For a similar approach to easy organic waste recycling, consider using a tumbler to actively mix and aerate compost. This solid foundation sets the stage for an efficient solar food dehydrator.
Choose the Right Materials for the Solar Collector and Glazing
Choosing the right materials for your solar collector and glazing involves balancing durability, heat absorption, and safety. For glazing transparency, glass offers excellent clarity and heat retention, with tempered glass handling thermal stress better than regular glass. Clear polycarbonate provides superior impact resistance, making it a good choice if safety from impacts is a priority. Acrylic sheets are lightweight and transparent, ideal for slanted panels where weight matters. Recycled glass can be a cost-effective alternative, but ensure it is properly sealed to prevent leakage and degradation over time. If you have old wood duck nesting boxes, the wood from them can be repurposed for the frame of a DIY solar dehydrator. For those concerned about chick safety, a brooder box review can help ensure your heat source does not pose a fire risk. When selecting glazing, consider comparing the top options for insulation properties to maximize energy efficiency.
For the absorber plate, material durability is critical. Avoid galvanized steel because it can leach toxins when heated. Instead, opt for food-grade stainless steel mesh or anodized aluminum, both of which resist corrosion and are safe for prolonged exposure to heat. Black-painted metal sheets are effective at maximizing heat absorption; choose matte black paint to enhance efficiency without introducing toxic substances. Using these materials ensures your solar collector will be safe, durable, and effective in transferring heat over many seasons.
Drill Intake and Exhaust Vents for Natural Stack Airflow
Drill intake vents low on the cooler north side about 3 to 4 feet above the floor, and exhaust vents high on the warmer south side at least 6 to 8 feet above the intake vents. Maintain a vertical height difference of 8 to 12 feet between the vents to maximize pressure differential, which drives natural buoyancy airflow. The total vent area should be calculated by dividing the room volume by 30, with a minimum of 1 square foot per 150 square feet of floor space. Ensure the exhaust outlet is 10 to 25 percent larger than the intake to prevent restriction and maintain proper airflow. Align intake vents on the windward side and exhaust vents on the leeward side to enhance cross-flow and airflow effectiveness. Remove any barriers between vents to ensure unobstructed pathways, allowing warm air to rise naturally and circulate efficiently. For context, roosting bar height similarly relies on proper vertical placement and airflow to keep birds comfortable and dry. When building these vents, consider using repurposed egg cartons as temporary baffles or templates to direct airflow and block drafts.
Paint the Interior Black and Build Durable Drying Trays
Painting the interior black and building durable drying trays are key for efficient dehydration. Use matte black flat paint that maximizes solar absorption up to 95% and can withstand temperatures up to 200°C. Coat the dehydrator’s interior thoroughly to optimize heat transfer. Apply heavy-duty aluminum foil to the bottom surface to reflect about 90% of incident radiation, which enhances interior insulation. Seal all joints with weatherproof silicone to prevent peeling and ensure long-lasting durability. You should match the insulation approach by using polystyrene for its insulating properties, helping retain heat inside the dehydrator.
For the drying trays, cut sturdy frames from untreated hardwood or marine plywood for structural strength. Stretch stainless-steel mesh with a thickness of 3–6 mm tightly across each frame to support food slices uniformly without sagging. Leave 1–2 cm gaps on all sides of the frame to promote unobstructed airflow. Mount removable slides inside the dehydrator for easy adjustment of tray positions. Space trays 8–10 cm apart; arranging food in a single layer is essential to prevent moisture pockets and promote even drying. Finish the setup by hinging the doors for simple access and maintenance.
Wire 12V Fans and Light Sockets for Even Heat Distribution
To wire 12V fans and light sockets for even heat distribution, start by connecting the fans. Attach the positive (red) wire to the positive terminal of your power supply, and connect the negative (black) wire to ground. Use 18 AWG wire, which is suitable for the current draw typical of small 12V fans, and insulate all splices thoroughly with heat-shrink tubing to prevent shorts. Before powering up, verify the voltage at each fan terminal with a multimeter to ensure proper connections and avoid damage. This setup requires a closed loop to function correctly, as the circuit must be complete for electrons to flow from the power supply through the fans and back to ground. For optimal airflow, consider the number of nesting boxes as a guide for spacing your ventilation components. A groundwork 2.3 gal watering can can be repurposed to hold counterweights or water for stable chamber humidification. Homesteaders can also experiment with variable fan speeds to fine-tune air circulation for different types of produce.
For the light socket, connect its live terminal through a switch to the shared 12V positive line. Connect the neutral terminal directly to ground. Install a 3A in-line fuse on the positive line before the socket to protect against overloads. Mount the fans at opposite ends of the chamber to promote cross-flow cooling, which helps maintain consistent heat and humidity levels. Angle the light sockets downward at 15 degrees to focus light into the drying chambers. To control the system, split the incoming hot wire into three pigtails: one leading to the fan circuit, another to the light circuit, and keep neutrals bundled together. Bond all ground wires together for a safe, common ground connection.
How to Pre-Treat Meat Safely Before Dehydrating Jerky
To ensure safety before dehydrating jerky, you must pre-treat the meat properly. Start by selecting lean meat with at least 93% lean content and trimming all visible fat and silver skin, as fat spoils quickly and can cause spoilage during drying. Slice the meat no thicker than ¼ inch to ensure even drying. For marinating and flavor infusion, keep the meat strips at 36°F to 40°F for 1 to 2 hours or overnight—never leave them at room temperature to prevent bacterial growth. For a similar raised garden bed project, you can find step-by-step instructions. Using repurposed materials like those in a pallet chicken coop can also inspire efficient DIY drying rack designs. For your dehydrator project, consider mimicking the secure ventilation found in top-reviewed chicken coops to ensure proper air circulation.
The crucial step is applying heat pretreatment before drying. Boil beef strips to 160°F or poultry to 165°F, and verify the temperature with a stemmed thermometer. After boiling, drain the meat thoroughly to remove excess moisture before arranging the strips on dehydrator trays. This method guarantees safety by eliminating harmful bacteria and preserves the flavor and curing effects achieved during marinating.
Blanch Vegetables at 125°F–135°F for Crisp Results
Blanch vegetables at 125°F–135°F for crisp results. This temperature range effectively halts enzymatic activity, preserving color and nutrients while preparing them for drying. Start by cutting vegetables into uniform pieces to ensure even blanching. Bring water to a boil at 212°F and add 1 tablespoon of salt per quart to enhance flavor and texture.
Submerge tender greens like spinach or kale for 30 to 60 seconds, and denser vegetables such as cauliflower for about 3 minutes. Corn on the cob can stay in the boiling water for up to 5 minutes. Immediately transfer the blanched vegetables into an ice bath composed of equal parts ice and water at or below 4°C (39°F) for the same duration as blanching. Drain thoroughly to prevent spoilage and facilitate more efficient drying.
Blanching this way reduces drying time by approximately 15 to 20 percent, leading to a more vivid and crisp final product after 6 to 10 hours at 125°F–135°F. Proper execution ensures vegetables retain their vibrant color, nutrients, and crunch, resulting in product that’s both attractive and shelf-stable.
Harvest and Dry Herbs at Low Heat to Preserve Flavor
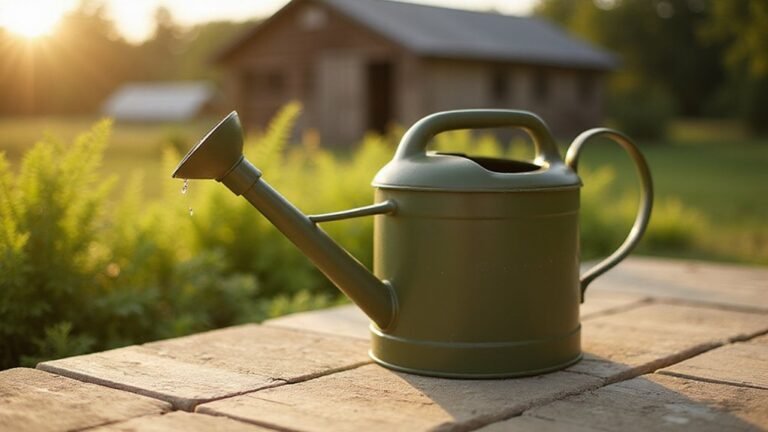
Harvest herbs in the early morning, between 6 and 9 a.m., once the dew has evaporated but before the sun reaches its peak. This is when the essential oil concentration is highest, which helps maximize flavor retention. Use sturdy scissors to clip stems just below the lowest clean leaves, avoiding stripping leaves before drying to prevent uneven desiccation. For optimal preservation, set your dehydrator to 95°F with a tolerance of plus or minus 2°F. This low heat protects the delicate volatile compounds responsible for flavor. Arrange herbs in a single layer on silicone mats, ensuring they do not overlap, as overlapping traps moisture and causes steaming instead of drying. Run the dehydrator at this temperature for approximately 48 hours. Finer herbs like thyme may dry in 3 to 6 hours, while more robust herbs such as sage could take 9 to 15 hours. A 2 gallon watering can provides the right capacity for gently watering herb gardens without over-saturating the soil. Using a lightweight metal design prevents rust and ensures even water distribution for healthier plants. Check for crispness and perfectly dried leaves that crumble easily when rubbed. If using an oven, keep the door slightly cracked and set it below 150°F. Rotate trays every 30 minutes to promote even airflow and consistent drying.
Test for Dryness and Condition Food for Long-Term Storage
After the dehydrator completes its cycle, you need to test for dryness carefully. Under-dried food can develop mold and spoilage. For fruits, check the texture: they should feel leathery and pliable but not sticky. When squeezed, there should be no droplets of moisture. Vegetables should snap cleanly, producing a sharp “ping” sound, which indicates they are brittle and properly dried. Herbs ought to crumble or shatter easily, showing no flexibility. To further ensure uniform moisture, you should condition the food by storing it in a moisture-proof container for 4-7 days, shaking daily, which allows any residual moisture to be absorbed by drier pieces, equalizing internal moisture.
Use the jar conditioning test to assess moisture content. First, cool the food to room temperature. Then, seal it in an airtight jar and leave it for 24 hours. If no condensation appears on the jar sides, your food is thoroughly dried. If moisture shows up, you’ll need to return the food to the dehydrator for more drying time. Additionally, check weight loss: fruits should lose about 80 percent of their water weight, and vegetables about 95 percent. To determine the final weight, subtract the expected water loss from the initial weight. Only store food that has been dried properly to prevent spoilage during long-term storage.
Fix Common Solar Food Dehydrator Problems Fast
To keep your solar dehydrator functioning properly, address these common issues quickly. If your dehydrator has no heat, repaint your absorber plate with true flat black paint because gloss finishes reflect heat away instead of absorbing it. Adjust the collector angle so it faces the sun directly; small changes can significantly increase efficiency. Examine your glazing for microfractures since tiny cracks can block sunlight and reduce heat transfer. Dust and debris can also obstruct your solar panel channels, so clear these to restore proper airflow. For long-term storage or wet items, consider using compostable bags to keep your food clean and ready for the compost bin. A well-insulated drying box also helps maintain consistent heat levels even on partly cloudy days.
Poor airflow often results in uneven drying. Verify that tray spacing is at least 1.5 inches to allow air to circulate freely. Unblock both top and bottom vents to prevent moisture buildup inside the dehydrator. Occasionally rotate trays halfway through the drying process to promote uniform dehydration and prevent over-drying on one side.
Pests entering the dehydrator can ruin your food supply. Seal all screen gaps thoroughly and apply a weatherproof coating to wooden joints to prevent warping that could create new entry points. If cracks develop, inject epoxy glue into them and re-seal annually with food-safe oil to maintain a tight seal.
Overheating is another common problem. Prop the door open slightly to reduce internal temperature if it gets too hot. Measure the gap between trays; it should not exceed 12°F difference to prevent scorching and ensure even dehydration. Regular maintenance and adjustments keep your solar dehydrator efficient and your food properly dried.