Wondering if you can safely freeze mason jars for your homesteading efforts? The answer depends on choosing the right type of glass and using proper techniques. When done correctly, freezing jars can be a practical way to store bulk foods and preserves.
Keep reading to learn how to freeze mason jars without risking cracks or breakage.
Why You’re Tempted to Freeze Mason Jars (and Why That’s Tricky)
Freezing mason jars requires careful technique to avoid breakage. First, ensure you leave 1 to 2 inches of headspace at the top of the jar. This extra space allows for liquid expansion as it freezes, preventing pressure buildup that can crack the glass. Always screw the lid on tightly enough to create an airtight seal, which helps prevent contamination and freezer burn. However, do not tighten the lid too much, as trapped air must escape during the initial freezing process. Before freezing, check that the rim and threads are clean and dry to ensure a proper seal, as residue can compromise the airtight closure. For those storing eggs or other produce, a well-sealed chicken coop provides similar protection against environmental damage. Similarly, choosing a properly designed nest box can protect wood duck eggs from predators and harsh weather.
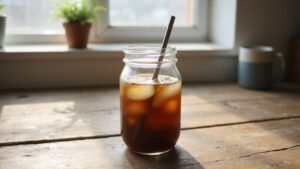
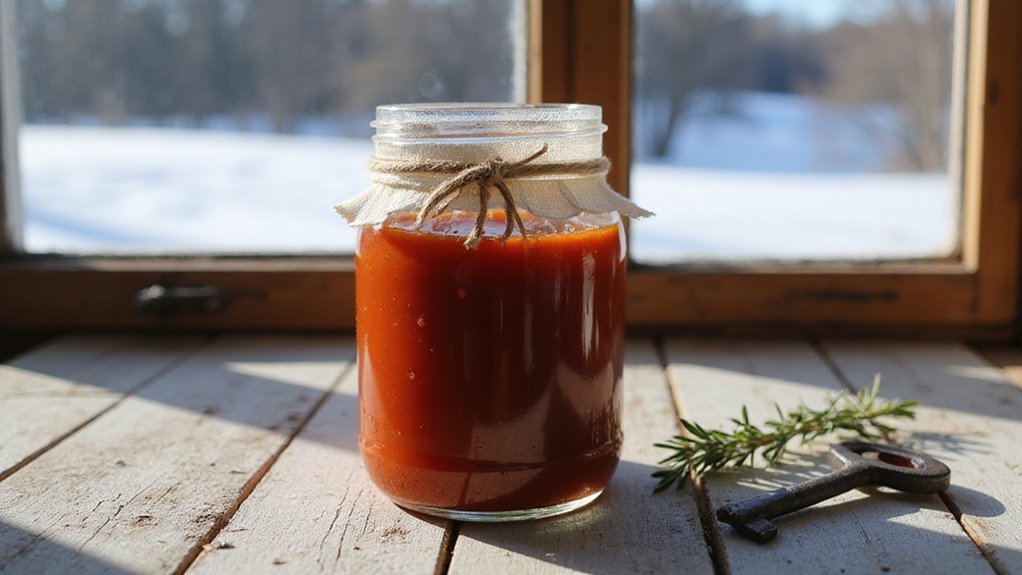
Labeling space can be limited on jars, so using color-coded lids can help you quickly identify contents like broth, stew, or sauces without opening each jar. Never pour hot liquids directly into cold jars, as the sudden temperature change causes thermal shock that can shatter the glass. Instead, let hot liquids cool to room temperature before placing them into the freezer. Following these steps helps ensure your jars stay intact and your food remains safe.
Only These Mason Jar Shapes and Glass Types Survive Freezing
Glass type is crucial for freezing safely. Tempered or borosilicate glass can withstand the cold without cracking because they are designed to handle thermal stress. Regular soda-lime glass, commonly found in many jars, lacks this resilience and is prone to shattering when frozen. For the best survival rates, consider top mason jars that use tempered glass specifically for canning and freezing. Avoid using commercial product jars unless they are explicitly labeled “freezer-safe” or feature a snowflake symbol—these indicate the glass has been tested for cold tolerance. Decorative jars often use weaker glass, so don’t rely solely on their appearance. For example, even with the right glass, leave ample headspace to accommodate liquid expansion during freezing. Experienced homesteaders sometimes use a worm composting bin to recycle kitchen scraps into nutrient-rich soil. Choosing the right glass and shape ensures your jars survive the freeze without damage. Additionally, proper roosting bar height encourages best chicken behavior, especially when positioned at the correct elevation for poultry.
How to Spot a True Freezer-Safe Jar in Your Pantry
To identify a truly freezer-safe jar, look for jars with straight-sided walls or a taper that widens toward the top. These shapes prevent liquid expansion from creating pressure. Choose jars made of tempered or borosilicate glass; these materials resist thermal shock. Thicker glass with a bubble-free texture typically signals greater strength and durability. Unlike ceramic cookware, which can crack under cold temperatures, freezer-safe glass can handle extreme temperature changes. Silicone bakeware, while flexible, doesn’t offer the same structural integrity, so rigidity in the jar’s design is key. For this reason, jars with shoulders should be avoided entirely, as their narrow shape creates weak points that often lead to breakage.
Check for a snowflake icon or a label stating “freezer safe.” Ensure lids are snug but not overly tight—loose-fitting lids help prevent pressure buildup during freezing. Inspect the threads for uniformity and confirm the rim is free from nicks or cracks by running a fingernail along it. Performing a water freeze test—filling the jar with water and freezing it—can also verify whether it leaks or cracks under cold conditions, confirming its suitability for the freezer.
What If Your Jar Isn’t Labeled Freezer-Safe?
If your jar isn’t labeled as freezer-safe, don’t assume it’s unsuitable without a closer look. First, examine its shape—jars with straight sides and wide mouths tend to handle expansion better than those with tapered necks or rounded shoulders, which are more prone to cracking. Check the bottom for a snowflake symbol, a common indicator of heat treatment and tempering. Also, look at the glass’s appearance: clear, uniform glass suggests it’s tempered and more likely to withstand freezing, while cloudy or uneven spots may indicate weaker construction. When selecting the right jar for your garden tasks, consider that top wheelbarrows for gardening are often reviewed alongside durable storage solutions for homesteading, and a Bloem Easy Pour watering can is another practical tool for maintaining your garden without unexpected breakage. For instance, just as a properly designed chicken coop for silkies can protect your flock from temperature stress, correct jar selection prevents breakage during freezing.
You can still use a non-labeled jar for freezing if you follow certain precautions. Leave at least 1 to 1.5 inches of headspace to accommodate expansion. Cool your food completely before filling the jar to reduce internal pressure, and screw on lids loosely until it’s frozen. Placing the jar inside a cardboard box provides insulation and buffers against temperature shocks. Avoid freezing high-sugar or high-alcohol liquids, as these can expand unpredictably and cause the jar to break. When in doubt, opt for a trusted, freezer-safe brand like Ball or Kerr to ensure safety and durability.
How to Cool and Fill Jars the Right Way Before Freezing
To cool and fill jars properly before freezing, start by preventing thermal shock, which can cause the glass to crack. Always avoid pouring hot food into a cold jar. Instead, preheat your jars by running them through a dishwasher cycle or soaking them in warm water to gradually bring them to a safe temperature. For hot liquids, use rapid cooling techniques: submerge the filled jar in an ice water bath or stir the liquid in a pot before transferring it into the jar. Make sure the food is at room temperature, approximately 70°F, before filling to minimize stress on the glass. Never fill the jar with food hotter than 160°F, as this can cause immediate breakage. Once filled, allow the jar to sit undisturbed for about an hour. Check that no steam is rising and that the jar feels cool to the touch, indicating temperature equilibrium. To prevent jar breakage on contact with the cold freezer surface, insulate the filled jar with a cloth or silicone sleeve before placing it directly into the freezer. To better organize your harvest for freezing, consider the wheelbarrow sizes listed as 3, 4, 6, 8, and 10 cubic feet to transport bulk produce efficiently. Using a vacuum sealer comparable to the Nesco or 12 Deluxe models can further protect the food by removing air before freezing, extending its shelf life. For even more efficient processing, consider a compost tumbler to turn food scraps into nutrient-rich soil for your homesteading garden.
How Much Headspace You Need for Safe Freezing in Mason Jars
The required headspace for safe freezing in mason jars varies depending on the type of contents and jar style. For liquids like juice or broth in pint jars, leave at least 1 inch of headspace to allow for expansion. Quart jars containing liquids should have 1.5 to 2 inches of headspace to accommodate greater volume changes. Tapered shoulder jars need closer to 2 inches of headspace to reduce stress on the glass during freezing. For solid-packed items such as sauces or purees, a minimum of 0.75 inch of headspace is sufficient. Dry goods require only about 0.25 inch, as they do not expand significantly. To further prevent breakage, avoid drastic temperature changes when moving jars between the freezer and other environments. Just as you would calculate the number of nesting boxes per chicken to ensure comfort for your flock, careful headspace planning prevents jar failure. When planning your storage system, consider raised bed garden layouts for optimizing your homesteading space. Using durable exterior plywood for your coop walls can also help maintain stable temperatures for stored goods nearby.
Proper temperature management before filling helps prevent thermal shock, and consistent headspace ensures the lid seals correctly without cracking. Straight-sided Ball freezer jars are recommended because they help maintain uniform headspace, reducing the risk of leaks or breakage. Always adhere to these guidelines to keep your jars intact and your freezer mess-free.
Why Lids Should Stay Loose Until Contents Are Fully Solid
Keeping lids loose until the contents are fully solid is essential because trapped air expands as liquids freeze. This expansion can increase internal pressure beyond 15 psi, which stresses the glass and may cause hairline cracks. Leaving lids fingertip-tight or slightly loose allows air to escape as the liquid freezes, preventing seal failure and reducing the risk of jar breakage. To achieve the best results, you should choose pressure treated lumber specifically designed to resist moisture and decay without leaching harmful chemicals into your soil. For homesteaders raising poultry, the top waterers for chickens are designed to withstand freezing conditions while preventing spillage. Wait at least 12 to 24 hours for the contents to become completely solid before tightening the lids fully. This helps ensure the pressure has stabilized and the seal is intact. Additionally, a loose lid fit maintains the rubber seal’s integrity, which is crucial for preventing freezer burn. To further protect your garden, consider using a raised garden bed soil that provides optimal drainage and nutrients for healthy plant growth. Tightening too early can warp the seal, allowing air to enter and moisture to escape, leading to freezer burn. By keeping lids loose during freezing, you safeguard both the jar and your food.
What’s the Best Freezer Placement for Glass Jars?
Place glass jars in your freezer on door shelves or the top layer of a chest freezer, ensuring they are not near back vents or cooling plates. For upright freezers, avoid placing jars near the back vents to prevent rapid freezing and thermal shock. In chest freezers, rest jars on the top layer, keeping them at least one inch away from the cooling plate and walls. Use pre-chilled metal baking sheets as a stable base, but verify labels beforehand to avoid confusion. Keep jars in a single layer, separated by about an inch, until they are fully frozen. This arrangement helps prevent spills by stopping jars from tipping or stacking unevenly. Avoid placing jars on door glass surfaces or near auto-defrost vents where temperature fluctuations are common. A similar strategy of careful placement and spacing applies to wood when stabilizing structures to avoid pressure points. Maintaining proper spacing and placement reduces the risk of breakage during freezing. For best results, follow a consistent dehydrator temperature to ensure even drying and prevent spoilage.
How to Thaw Frozen Mason Jars Without Cracking Them
To thaw frozen Mason jars without cracking them, gradual warming is essential. Transfer your jar to the refrigerator’s top shelf or door and leave it for 1 to 3 days. Beforehand, loosen the lid a turn or two to release any built-up pressure from cold compression. As the glass warms slowly, it expands evenly, significantly reducing the risk of cracking.
For a faster method, use a cool water bath. Completely submerge the sealed jar in cold water, changing the water every 30 minutes for a total of 2 to 4 hours. Never use hot water, as rapid temperature changes can cause thermal shock and break the glass. Once the outer edges of the jar start to thaw, carefully transfer the contents to a pot. Always ensure the jar reaches room temperature before applying any direct heat.
When to Use Plastic Freezer Containers Instead of Mason Jars
Plastic freezer containers are ideal when you need flexibility and durability. Liquids with high water content, like broth, stock, or water-based soups, expand significantly during freezing. Plastic containers can flex under this pressure, reducing the risk of cracking or breaking, unlike glass jars. You can also fill plastic containers closer to the top, saving space in your freezer. Many plastic containers are labeled safe for microwave or oven use, allowing you to heat food directly without transferring it to another dish, which is especially useful since glass can shatter from thermal shock. For quick defrosting, plastic bags are convenient because they thaw faster when properly stored at the right temperatures. Plus, plastic containers typically stack uniformly, making it easier to organize your freezer. If portability, low cost, or minimal breakage are priorities, disposable plastic options are a practical choice. They also work well with various insulation materials in your freezer, helping maintain a consistent cold environment without risking structural failure. Overall, choose plastic when flexibility, safety, or convenience are most important for your freezing needs.