If you’re wondering how to make a simple chick waterer at home, you’re in the right place. A basic DIY setup can keep your chicks hydrated without breaking the bank, using just a few common supplies.
By the end of this, you’ll know how to assemble a leak-proof, easy-to-clean waterer that keeps your flock healthy and happy.
Gather Materials and Tools for Your Chick Waterer DIY
To prepare for building your chick waterer, gather all necessary materials and tools beforehand. You will need a drill with a 3/8-inch bit to create holes for poultry nipples and a hole saw for larger access points. A hacksaw is essential for trimming PVC pipes to the correct length, while a sharp saw is best for cutting wooden footings. For securing connections, have PVC cement, silicone sealant, and joint compound on hand.
Prioritize durability by selecting materials such as PVC and stainless steel components, which resist rust and cracking over time. To ensure clean water, consider installing a basic inline water filtration system with your vinyl tubing to prevent debris from contaminating the water supply. Keep sandpaper nearby to smooth rough edges after cutting, and always wear heavy gloves to protect your hands during cutting and assembly. For a more natural approach, some homesteaders prefer using clay watering cans for gentle, rust-free watering in the coop. For a long-lasting frame, cedar or redwood naturally resists rot and insects without chemical treatments.
Mark the placement of your nipples at 4-inch intervals using a marker and ruler for consistent spacing. Having all materials ready allows you to work efficiently and stay focused without interruptions, streamlining the entire building process. For example, some top coop designs reviewed include an integrated waterer system that keeps water clean and accessible.
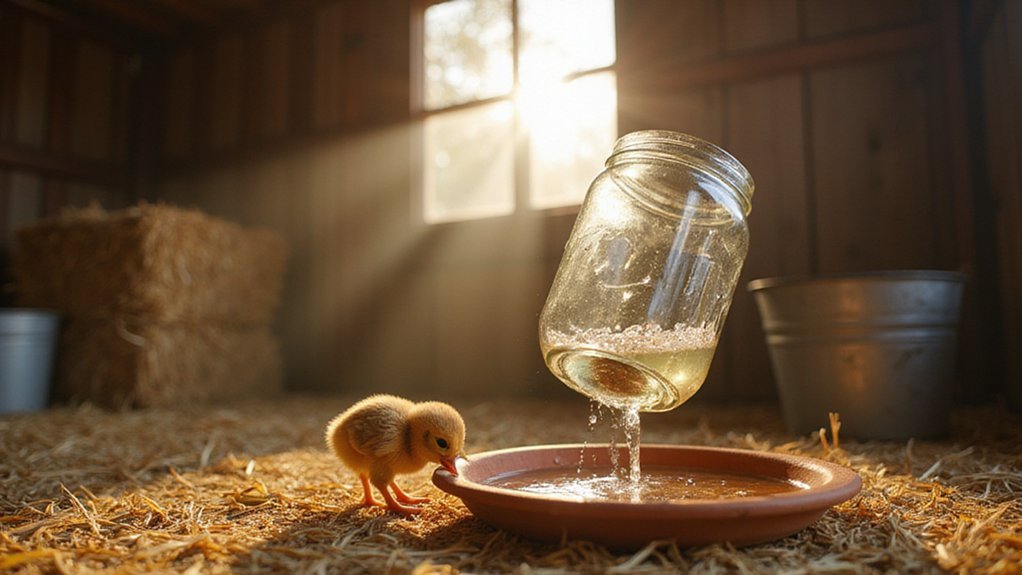
Pick the Best Container for Your Chick Waterer
Choosing the right container is critical for your chick waterer’s success, so prioritize food-grade options that won’t leach toxins into the water. Select container materials explicitly labeled as safe, such as plastic mayo jars or gallon water bottles. Avoid containers that previously held motor oil, cleaners, or other chemicals. Your water capacity should match your flock size: a 1- to 2-gallon container is suitable for 3 to 5 chicks, while a 5-gallon bucket can serve 10 to 20 birds.
Ensure the container’s shape offers stability—look for flat-bottomed designs that are circular or square. A height of 6 to 8 inches keeps water accessible without tipping. The base tray should be 2 to 4 inches wider than the container to prevent tipping over. The lid must seal tightly to create an airtight system that prevents contamination and spillage. Use durable, smooth-walled plastic, which resists cracking and simplifies cleaning. Before use, test the seal by flipping the filled container to ensure there are no leaks or gaps.
Cut the Base and Drinking Holes
Cutting the base and drilling the drinking holes are essential steps to make your container stable and functional. Begin by trimming the bottom edge to shape the base. Cut down both sides to create a flat strap, then round the edges to prevent tearing. Sand all edges smoothly to remove sharp plastic bits and ensure the base sits flat without wobbling. Alternatively, a scrap 2×4 base can be built to support the container and prevent spills in the same manner. For a similar cutting technique, use a pair of tin snips to trim any metal components cleanly. To avoid instability, the base height should be similar to proper roosting bar height for balance. Choosing the right insulation for the walls of the coop is equally important to maintain stable temperatures and protect the flock from drafts, as good insulation works similarly to keep conditions consistent.
Next, measure 3 inches from the bottom of the bucket to mark where you will drill the drinking holes. Use a 3/8-inch drill bit and keep the drill perpendicular to the surface for clean cuts. Drill holes evenly spaced around the circumference, making sure they are centered and with consistent diameters. After drilling, remove any jagged plastic fragments with pliers and smooth the edges with sandpaper. Checking for sharp bits and proper hole size helps prevent injuries to your chicks and allows cups to slide in easily.
Build a Leak-Proof Reservoir and Lid
To keep a DIY chick waterer from leaking, you need a leak-proof reservoir and lid. Use a standard 5-gallon plastic bucket made from durable, crack-resistant material. Ensure the lid snaps on securely to create an airtight seal, which helps generate vacuum pressure and prevents leaks. Check that the bucket rim is flat and the lid surface is smooth; this prevents debris buildup and makes cleaning easier. Unlike traditional open bowls or tubs that quickly get dirty from chicken activity, this closed system prevents contaminants like dirt and manure from entering the water source. For optimal results, consider the secure lid design found in premium wood duck nesting boxes to prevent weather intrusion. This airtight design is similar to the principle behind vacuum sealing for food preservation, which uses a sealed environment to extend freshness. For homesteaders wanting similar longevity in their gear, selecting a durable watering can from crack-resistant materials ensures the same level of reliable performance.
For proper lid maintenance, fill the bucket completely to eliminate air pockets, then snap the lid on immediately. Tighten it until no air can pass between the lid and the rim. To make a fill hole, drill about 3 inches above the bottom edge—below your water level mark. Keep the drill perfectly level to avoid jagged edges that could cause leaks or hurt your hens. Smooth any plastic burrs with sandpaper before moving on.
Next, wrap the thread of the fill plug with three to four clockwise turns of Teflon tape. This helps create a tight seal around the threaded part. Seal around the exterior joint with silicone sealant, pressing it into any gaps. Let the sealant cure for at least 24 hours before filling to ensure it sets fully and prevents leaks over time.
Assemble the Chick Waterer and Test for Leaks
To assemble the chick waterer and test for leaks, start by flipping the bucket over and placing it inside a sturdy base such as an old dog bowl. Mark a drill line slightly above the expected water level to prevent spillage during drilling. Drill a single hole below that line, ensuring accuracy to avoid leaks. Fill the bucket with water to the top before attaching the final lid, then firmly snap it shut. Flip the assembly back over and observe the water level for about ten minutes to check for any dripping at the adapter connection. Before filling, ensure threaded union fittings are used as bulkheads for standoff and leak prevention. Wait five minutes to allow trapped air to escape, then add water until bubbles stop forming. This step balances air pressure to ensure a consistent water flow. For optimal moisture control, consider using a mesh screen to prevent debris from entering the water, similar to the drying trays found in top food dehydrators for mushrooms. Confirm that the base remains level and that the water does not spill over the adapter opening. For a similar approach to repurposing household items, you can apply the step-by-step build guide from a kitchen compost bin project to ensure your base is stable and properly sealed. This method incorporates common tools and materials like a drill and bucket, just as a DIY chick brooder build would require.
Fix Common Chick Waterer Leaks and Clogs
To fix leaks or clogs in your chick waterer, start by inspecting the O-ring and the nozzle. For leaks, replace any damaged or misaligned O-rings. Remove the old O-ring, clean the groove thoroughly, and install a new one to ensure a proper seal. Check the spring calibration; if the spring over-extends or sits off-center, it can break the seal and cause leaks. Adjust or replace the spring so it compresses evenly. For clogs, unscrew the nozzle and flush out grit, algae, or dust. Use a needle or toothpick to clear stubborn debris from the nozzle opening. Also, examine the threads for cross-threading or worn seals; applying plumber’s tape can improve sealing if needed. Pay attention to the gasket located at the back of the nipple, as debris caught between it and the plastic can also cause leaks. A vacuum sealer for meat can help you store treated parts for future use. A similar easy pour design can help reduce debris buildup in the waterer. Selecting a waterer with a top-rated brand can further minimize recurring leak and clog issues. Always test your waterer after each repair—if it’s dry, your flock stays hydrated and happy.
Mount the Chick Waterer in Your Coop Securely
To mount the waterer securely in your coop, start by adjusting its height to suit your flock’s age. For adult chickens, place the nipple pin 12 to 20 inches above the ground so they tilt their heads at a 45 to 55 degree angle when drinking. For chicks under one week, lower the pin to 4 to 6 inches to accommodate their smaller size. This height adjustment ensures the animals can drink at a comfortable angle. This careful setup is similar to the precise claymation techniques used to animate realistic chicken movements in films like *Chicken Run*. For a similar kind of practical resource on homestead water systems, consider the guidance found in a guide to garbage can rain barrels. A well-constructed incubator also relies on precise temperature control to ensure successful hatching.
Next, choose appropriate mounting hardware. Use nylon or metal ropes or chains with carabiners attached to each end. Screw brackets into sturdy beams or support structures to hold the waterer in place. For easy height adjustments as your flock grows, install pulleys along the ropes or chains. Thread the rope through the pulleys, connect it to the waterer, then raise or lower it to the desired height. Always test the setup by making sure the waterer hangs level and that the support beam can bear the weight. Double-check for stability and sturdiness—your flock’s access to clean water depends on it.
Train Your Flock to Use the New Waterer
To train your flock to use the new waterer, start by removing all old water sources. This forces your birds to explore the new system. Since thirst quickly drives them to investigate, most will approach the waterer within a few hours. Keep an eye on shy or timid birds to ensure they find it too.
Gently tap the nipple with your finger to drip water; curious hens will come closer to inspect. Guide a beak to the nipple and press it to release water, which teaches them how the system works instantly. To encourage pecking, offer treats such as sunflower seeds in the drip trough or peanut butter on the nipple. Once one bird learns to use it, others are likely to follow as flock behavior triggers imitation, and this method of placing treats near the waterer has proven effective for adaptation.
Monitor the flock closely during training to prevent dominant hens from crowding out shyer ones. Training typically takes less than a day, but remember that proper water intake depends on reliable learning. Regularly check each bird to avoid dehydration, especially during the initial training period. If they’re hesitant, use a red laser pointer; the flock will follow the light toward the waterer.
Make Multiple Waterers for Large Flocks
Since a single waterer won’t suffice for a large flock, you’ll need to build multiple units. For example, 100 chickens require at least 10 gallons daily, and during hot weather, increase that by 60% to 16 gallons minimum for the entire flock. Instead of relying on one large tank, create several 20-gallon units, each capable of serving about 20 birds comfortably. This setup promotes water conservation by reducing spillage and runoff. Use a 3/4-inch pipe fitted with a 7-nipple watering system spaced 6 inches apart for efficient water flow. Position each waterer unit about 6 feet apart and mount them roughly 1 foot off the ground. This arrangement prevents crowding and minimizes contamination risks. To refill and maintain these units efficiently, a large Lowe’s watering can is ideal for carrying water to distant pens. Scaling up is simple: for 500 birds, opt for 50-gallon tanks with an additional 20% margin to account for evaporation, ensuring your flock stays well-hydrated without waste. The nipples benefit from social learning as chickens quickly pick up proper use from observing each other.
Why Your Chicks Need a Clean Chick Waterer?
Regularly cleaning your chick waterer is essential to prevent health issues. Bacteria and parasites can thrive in contaminated water, leading to infections and disease in your flock. Litter and droppings in open dishes spread illness rapidly, making daily water replacement crucial, especially during hot weather. Use warm water, around 20 to 25°C, to help prevent chilling. Scrubbing with vinegar effectively kills bacteria and breaks down biofilm buildup. By maintaining a clean waterer, you ensure your chicks stay hydrated and healthy, reducing the risk of dehydration, poor feather quality, and mortality. For long-term storage of clean water or feed, consider using top rated vacuum sealers to preserve hygiene and freshness.