Finding the right watering can can make a big difference in keeping your houseplants happy and healthy.
The key is choosing one with a long, narrow spout for precise watering, a comfortable handle, and a capacity that prevents wrist fatigue.
Using the right water temperature and watering slowly until you see runoff will also help.
Keep reading to get all the details you need.
The 4 Must-Have Features in a Houseplant Watering Can
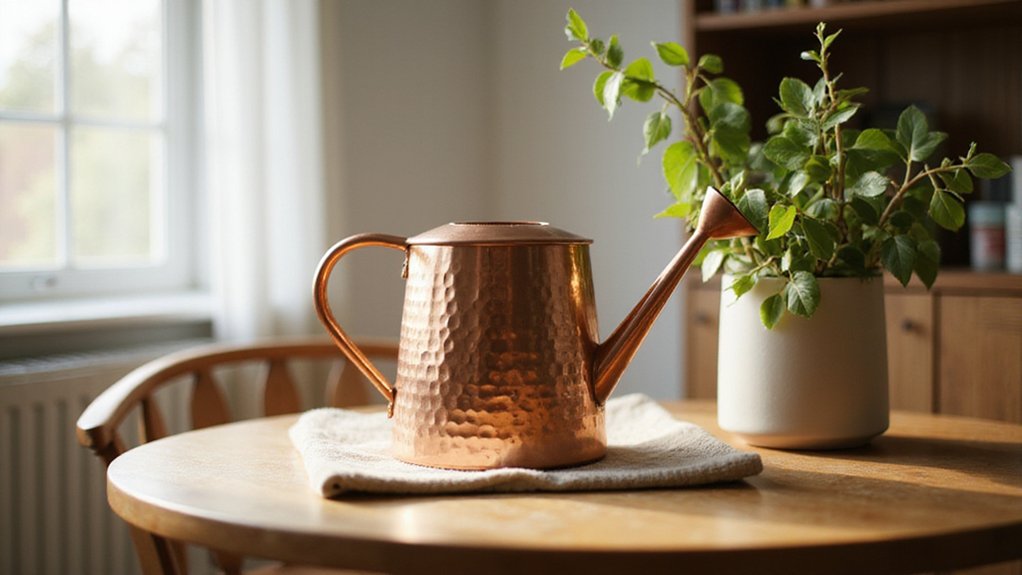
The four must-have features in a houseplant watering can are spout design, capacity, material, and handle ergonomics. Choose a long, narrow spout exceeding 25 centimeters to easily reach ground-level pots without kneeling. A curved tip helps prevent messy drips, keeping your watering tidy. For delicate seedlings, a rose with more than 40 small holes allows for a fine mist, while a rose with 12 to 20 holes works well for mature shrubs. Consider reviewing top chicken coops for design inspiration on durable outdoor housing. When arranging multiple containers in a small space, a raised bed garden layout can optimize accessibility and plant spacing. Opt for a capacity between 0.5 and 1.5 liters to prevent wrist fatigue and give you better control during watering. Larger cans tend to be heavier and harder to manage, especially during extended watering sessions. Material-wise, 304-grade stainless steel offers excellent rust resistance and durability, with a base thickness of around 0.8 millimeters to maintain strength without adding unnecessary weight. A contoured, rubber-padded handle ensures a secure grip, reducing hand fatigue and providing comfort during prolonged use. When filled to about two-thirds, the watering can remains balanced, preventing tipping and allowing you to focus on delicate tasks like pest control or precise watering without worrying about spills. For outdoor use, a garbage can chicken feeder demonstrates a similar robust design principle for long-lasting performance in challenging environments.
Watering Can Techniques for Every Houseplant Type
To ensure proper watering, start by pre-wetting the soil and using a rose attachment to apply water in gentle, slow bursts. For sensitive ferns, stop watering once excess water drains from the bottom of the pot. Use a light touch, applying just enough water to moisten the soil without over-saturating it. This technique helps prevent overwatering, which ferns are especially prone to, and encourages even moisture absorption. Adjust the frequency based on your plant’s response, allowing the top two inches of soil to dry out between watering sessions to maintain healthy roots. For cache pots without drainage holes, water slowly until the soil is moist but not pooling, and monitor moisture levels with your finger before watering again. Alternatively, for bottom-watering, fill a saucer, submerge the pot until the top feels moist, then remove any excess to avoid standing water. Using room temperature water rather than ice or cold water supports nutrient absorption and protects root health during each watering session. For best results, maintain proper insulation around the coop to regulate temperature and reduce stress on plants. To protect raised beds from excess rain and evaporation, consider using a durable garden cover to shield the soil and maintain consistent moisture levels.
When to Use Your Watering Can on Indoor Plants
The best time to water your indoor plants is when the soil needs it, not on a fixed schedule. To determine this, test the soil by inserting a clean probe 2 to 3 inches deep. If it comes out bone dry, your plant’s roots are in need of moisture. Surface dryness can be misleading because it may dry out faster or stay moist longer; checking deeper into the soil provides a more accurate gauge of watering needs. During spring and early summer, when your plants are actively growing and transpiring, watering more frequently is essential. In contrast, winter dormancy means watering can be less often—perhaps every 3 to 6 weeks for cacti or calatheas. You can also lift the pot to check its weight; a light one indicates the soil is likely dry. When watering, pour slowly until water drains from the bottom of the pot, ensuring even moisture distribution. Avoid letting roots sit in standing water longer than 30 minutes to prevent root rot. You might also consider using a compost bin to recycle plant trimmings into nutrient-rich soil for your houseplants. For those who like to prep water or nutrients in bulk, glass mason jars can be frozen safely if you leave proper headspace and use wide-mouth jars. Building your own bin compost system is a practical way to sustainably manage plant waste while enriching your indoor garden soil.
The Finger Test and Other Ways to Check Soil Moisture
To check soil moisture accurately, the finger test is a simple and effective method. Insert your index finger two inches deep near the plant base, avoiding the pot’s edge where moisture tends to evaporate faster. For small pots, one inch is sufficient. Feel the soil; if it’s cool and damp, your plants are adequately watered. Dry, warm soil indicates it’s time to water again.
The chopstick method works well too. Insert an unfinished wooden skewer at a 45-degree angle towards the bottom of the pot. Leave it in for about five minutes and then check. A clean, dry stick suggests the soil has absorbed all the moisture it can, and your plant may need watering. Alternatively, lift your pot after watering to note its weight. A significantly lighter pot usually means it’s time for another drink, as water loss reduces the weight.
For more precise assessment, a moisture meter can be used. Insert the probe two to three inches into the soil, avoiding roots, and read the level. A green zone reading typically indicates the ideal moisture level. Combining these methods helps ensure you don’t over- or underwater your plants, promoting healthy growth. Checking soil moisture is critical, as homesteaders building raised bed gardens often face similar drainage challenges. Homesteaders might also consider using a Jellycat watering can for their houseplant routine, as its playful design can make daily watering more enjoyable.
Avoid These 5 Common Watering Mistakes
Even simple watering routines can harm your houseplants if you make these common mistakes. First, avoid overwatering. Signs such as yellow leaves, mold, or mushy roots indicate you are suffocating your plant because roots need air as well as moisture. Second, do not stick to a fixed watering schedule. Instead, adjust the watering frequency so the top 1 to 2 inches of soil dry out completely between waterings, preventing over- or underwatering. Third, water deeply until about 10 to 20 percent of the water drains out through the drainage holes. Failing to do this can create dry root zones, leading to weak or rotted roots. Additionally, letting plants sit in water after watering can cause root rot, so always ensure water drains from the bottom within 20 to 30 minutes. Fourth, do not pour water directly at the stems. Instead, water the soil 1 to 2 inches away from the plant to avoid stem rot and encourage healthy root growth. Finally, skip misting as a primary hydration method because it cannot replace properly watering the soil. For healthy root development, consider the height of roosting bars in your gardening setup. Correcting these watering mistakes ensures your houseplants stay healthy and thrive.
How to Clean and Store Your Watering Can for Longevity
Cleaning your watering can thoroughly after each season helps ensure it remains functional for years. Use household staples like warm soapy water or a vinegar solution to remove dirt and minor mineral deposits. For tougher mineral buildup, fill the can with a mixture of one part white vinegar to two parts warm water and let it sit overnight. The next day, scrub the inside with a brush to loosen deposits. For metal cans, choosing metal that is galvanized or coated can naturally resist corrosion and reduce maintenance needs.
Don’t forget the rose attachment: detach it and soak it in warm vinegar for 10–15 minutes. Use a toothbrush to scrub away any residue and poke a toothpick through the nozzle to clear clogs. Rinse all parts with clean water and dry completely to prevent bacteria growth. Proper cleaning helps prevent rust and prolongs the life of your watering can. For preserving the patina of a decorative rose, you can choose to let it sit in lemon juice and salt for optional shine. Adding a wood duck nesting box to your garden can also attract local wildlife.
For storage, keep your watering can upright in a frost-free location such as a garage or shed. Applying a light coating of WD-40 to the exterior metal will help protect it from rust, but avoid putting any oil inside the can where it could contaminate your water. Adding silica gel packets inside can absorb moisture and prevent corrosion. Before storing, inspect seams and joints for wear or damage, which can lead to leaks. Regular cleaning and proper storage practices keep your watering can in good shape and ready to use season after season.
Match Your Watering Tools to Your Plant Collection
Matching your watering can to your plant collection starts with considering its size and weight. For narrow shelves or small container gardens, a 1-gallon can is ideal because it keeps weight under 9 pounds when full, making it easy to handle in tight spaces. Larger collections benefit from 2-3 gallon cans, which reduce the number of refills needed but can weigh up to 25 pounds when full, so choose based on your strength and comfort. Similar to careful preparation for food storage, sterilizing mason jars ensures your gear stays in top condition. For those managing large amounts of water, consider repurposing a large container like a garbage can as a rainwater reservoir to reduce refill frequency. Just as agricultural lime is used to adjust soil pH for optimal plant growth, matching your watering can to your plants ensures healthy hydration.
Prioritize spout length to target specific planting locations. Long, narrow spouts are great for hanging baskets or deep shelves, allowing precise watering without splashing. Wide spouts suit large-leaf houseplants, facilitating quick watering over broad surfaces. An ergonomic design reduces hand fatigue during extended sessions, and handles should match your ability—single-hand handles offer greater mobility, while dual-grip handles provide stability when lifting heavier cans.
Always test the weight and feel of your watering can in person to ensure it fits your space and strength. This step helps prevent fatigue or strain during watering sessions and guarantees you can reach every plant comfortably without overexertion.
Why Water Temperature Matters for Your Watering Can
Water temperature should feel lukewarm to the touch, around 68 to 77 degrees Fahrenheit, to avoid stressing your plants. To achieve this, let tap water sit out for 3 to 5 hours so it can reach room temperature. If you’re in a hurry, you can add a small amount of hot water to cold, but always test the mixture with your finger first. The water should never feel cold or hot—both can harm plant roots. According to scientific research, staying within a temperature range of 60-70°F enhances water and nutrient uptake. Avoid using softened water, as the salt buildup can damage your plants over time. For homesteaders, using a watering can made from a durable material like galvanized steel or BPA-free plastic ensures the water stays at a stable temperature for longer. Keeping the water at the right temperature ensures your plants absorb nutrients properly and stay healthy.
How to Water Your Plants When You’re Away?
To water your plants effectively when you’re away, set up a self-watering system with a reservoir positioned higher than your plants. This allows gravity to facilitate water flow into the soil. Use cotton wicks extending from the reservoir into the soil; their capillary action provides steady moisture to the roots. For a quick solution, drill holes in a plastic bottle cap, fill the bottle, and bury it upside down in the pot—just ensure it doesn’t damage the roots. Moisture crystals buried a few inches deep can also offer slow, consistent water release. Be cautious not to oversaturate the soil, as artificial drainage helps prevent waterlogging. To maintain humidity, cover the plants with a clear plastic bag, making sure the leaves do not touch the plastic. Ensuring good soil aeration is crucial too, as it prevents root rot even when you’re away. For plants like cacti and succulents, a water before leaving is often sufficient without requiring any complex setup. For a more secure method, you could use a wall-mounted bracket to suspend a water reservoir above the pots, ensuring stable placement. Consider integrating a solar-powered fan to improve airflow and reduce humidity buildup around the plants. For small-scale setups, top mason jars with lids offer an excellent refillable reservoir that prevents debris from entering the water supply.