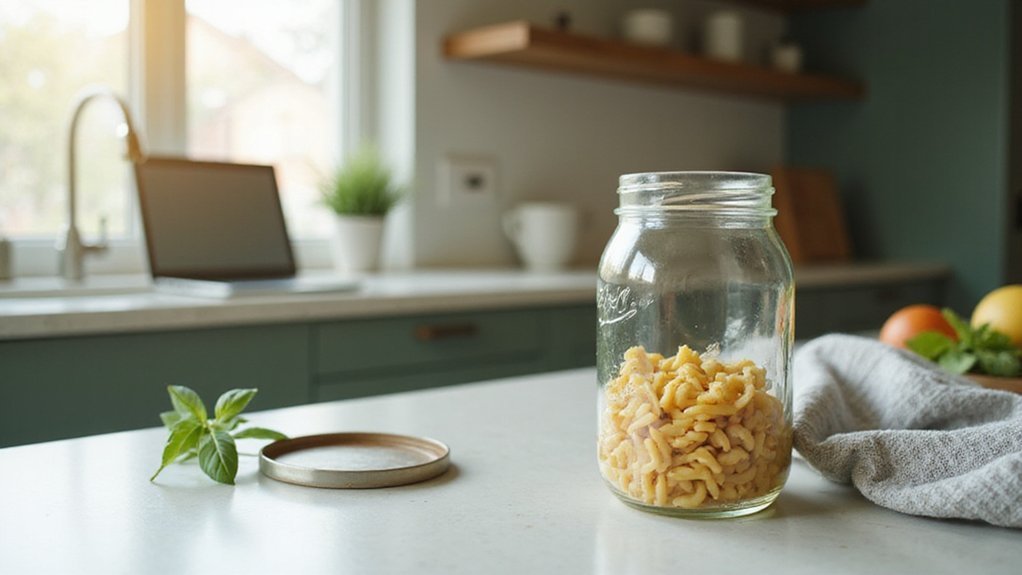
Wondering if your Ball Mason jars can handle a trip in the microwave? The short answer is no, most standard jars aren’t microwave safe because they can shatter or explode from uneven heating.
However, some specially labeled jars like the Ball Elite Collection are designed for microwave use.
Keep reading to learn which jars are safe and how to use them properly.
Can You Microwave Standard Ball Mason Jars? (No: Here’s Why)
You should never microwave standard Ball mason jars. These jars are explicitly labeled by the manufacturer as not microwave-safe, and using them in a microwave can pose serious safety risks. Removing metal lids and rings does not eliminate the danger; the glass itself can crack or shatter under rapid or uneven temperature changes. This is especially true for older jars that lack safety certifications for microwave heating. Unlike nesting boxes for bunnies, which are designed for specific habitat needs, these jars are not engineered to withstand microwave heat. For those looking to house poultry instead, investing in a durable chicken coop ensures your flock remains safe and comfortable. For a comparison of engineered avian housing, reviewing options for wood duck nesting boxes can highlight critical differences in design for thermal safety.
Microwaving sealed or frozen jars is even more hazardous. Pressure buildup from heat can lead to violent explosions, causing potential injury and mess. Rely only on jars clearly marked “microwave-safe.” If a jar does not have that label, do not use it in a microwave—no matter how tempting it might be.
Why Annealed Glass Can’t Handle Microwave Heat
Annealed glass cannot handle microwave heat because it lacks the thermal resilience needed for such use. When heated unevenly in a microwave, it undergoes significant thermal expansion. Water molecules in food absorb microwave energy directly, creating hot spots that cause the glass to expand at different rates. This uneven expansion generates internal stress that the glass cannot absorb. Since annealing only relieves manufacturing stresses and does not strengthen the glass against rapid temperature changes, the material remains vulnerable. Its high thermal expansion coefficient, approximately 8.5 × 10⁻⁶ per degree Celsius, means it expands more than borosilicate glass under heat. When exposed to microwave heating, this expansion surpasses the glass’s limits, often resulting in cracking or shattering due to internal pressure buildup. Homesteaders seeking durable options may instead consider watering cans from Home Depot that are designed for repeated outdoor use. Additionally, because microwaves cause molecules to oscillate, the limited molecular movement in the solid glass prevents it from dissipating heat evenly, worsening the stress. For reliable glassware in high-heat applications, users should instead consider materials with controlled heating capabilities similar to those found in specialized egg incubators. A more practical alternative for everyday tasks is to use a durable watering can constructed from materials that withstand thermal stress.
Which Ball Jars Are Actually Microwave-Safe?
Only the Ball Elite Collection Amber Jars are microwave-safe. These jars are tempered, making them more durable under heat, and are explicitly labeled for microwave use. Their UV protection does not interfere with heating, so you can confidently use them in the microwave. For gardeners, a floral watering can simplifies the task of gently warming water for delicate plants. Standard Ball canning jars, vintage jars, and any jars with metal components should be avoided. Always remove metal lids and bands before microwaving to prevent sparking. For heating purposes, transfer your contents into a verified tempered jar or a non-metal container. The Ball Elite Collection Amber Glass Wide Mouth Mason Jar is made from BPA-free glass and has a capacity of 32 fluid ounces, ensuring safe and reliable microwave use. Prioritize cleaning the jar thoroughly and ensure you replace the lid correctly if you plan to microwave the jar—never reuse old metal lids for heating. Only the Elite Collection or other certified tempered jars are truly safe for microwave use. Unlike standard glass, tempered glass jars resist thermal shock from sudden temperature changes. For best results, always match your heating duration to the jar’s tempered capacity, as recommended for gardening uses like warming water.
How to Spot a Microwave-Safe Symbol on Your Jar
The microwave-safe symbol is usually found on the bottom of your jar. Look closely at the underside for the mark, which may be etched into the glass or printed with ink. The most common symbol features three horizontal wavy lines, often enclosed in a rectangle, or the words “microwave safe.” Avoid confusing symbols like “oven safe” or “heat resistant,” as they do not guarantee microwave compatibility. Since some labels can be faded or painted over, use a flashlight to reveal faint marks under the base lip. If no symbol is present, the jar is not intended for microwave use. Keep in mind that “food safe” indicates chemical safety for storage, not heating suitability. If you’re unsure about a symbol’s clarity, try rubbing the bottom to see if there’s raised text or compare it with a known microwave-safe jar for confirmation.
Safe Alternatives to Microwaving Standard Canning Jars
If standard canning jars aren’t microwave-safe, you can still reheat your food safely using alternative containers. Choose borosilicate glass dishes that can withstand temperatures up to 500 degrees Fahrenheit without cracking. Tempered Pyrex bakeware is also a reliable option, as it is explicitly labeled for microwave and oven use. Microwave-safe ceramic bowls and stoneware are good choices too, since they distribute heat evenly and reduce the risk of thermal shock. To avoid thermal stress, heat your food in short two-minute intervals, and never fill containers beyond 80 percent of their capacity. Always inspect your containers for cracks before each use to ensure safe reheating every time. For homesteaders who want to minimize waste, note that vacuum sealer bags are designed for single-use sealing but can sometimes be reused for dry goods only. Similarly, when choosing a roosting bar, remember that the right height helps hens avoid injury and droppings while allowing easy access. A durable watering can made from thick-gauge steel is another essential tool for homesteaders who need to reliably water their gardens without frequent replacements.
What to Do If You Really Need to Heat a Glass Jar
If you need to heat a glass jar safely, start by inspecting it carefully for cracks or chips. Remove all metal lids and rings to prevent any accidents or damage during heating. Don’t assume that a jar’s aesthetic design or brand reputation guarantees safety—appearance and brand don’t protect against thermal stress. Bring the jar to room temperature first to help prevent thermal shock, which can cause the glass to crack or shatter.
Next, place a microwave-safe cup of water next to the jar inside the microwave. Run the microwave on medium power for one minute. If the water heats while the jar remains cool, it’s safe to proceed. If the jar warms up as well, stop immediately—this indicates it’s not suitable for heating. Use 30- to 60-second bursts when reheating, stirring or rotating the jar between intervals. Never exceed a total of three minutes of heating to minimize risk. Afterward, always use vented covers to allow steam to escape and wear mitts or oven mitts when handling the hot jar. Finally, check the jar closely for any new signs of damage after heating before using it further.
When a Jar Is Too Damaged for Microwave Use
If a jar is visibly damaged, it is no longer safe for microwave use. Cracks, chips, or chips on the rim create points where heat causes the glass to expand unevenly. Hairline fractures on the body can rapidly spread when heated, risking structural failure. Damage like severe etching or cloudiness indicates the glass has weakened, making it more prone to breaking under thermal stress. While plastic mason jars resist thermal shock, glass jars with damage still pose a shattering risk. Unlike well-maintained glass, a compromised jar lacks the structural integrity needed to handle sudden temperature changes, similar to how improper layering can cause a compost bin to fail under stress. Relying on a damaged jar in the microwave can lead to shattering or explosions, presenting a serious safety hazard. For gardeners, using a sturdy trellis for raised beds offers better thermal stability than a damaged glass container under heat. Always discard any jar with visible damage to avoid risking injury or messes.
The Real Risk: Metal Lids Sparks in the Microwave
Metal lids, especially those with metal screw bands, should always be removed before microwaving. Repeated arcing from metal contacts can damage your microwave’s interior walls and internal circuitry, leading to expensive repairs. Metal screw bands trap heat and prevent the food from heating evenly, resulting in cold spots or uneven cooking. Additionally, sealed containers with metal lids can build dangerous pressure, increasing the risk of accidents. To ensure safe and even reheating, always remove metal lids completely. Use vented plastic or silicone covers instead, as they allow steam to escape safely and help heat your food more evenly without the risk of sparks or fire. For those applying creative labeling or decoration to jars, remember that water conservation techniques from practical guides can help reduce waste when cleaning containers before reuse.
How to Store Jars Safely After Use
After processing and sealing your jars, store them in a cool, dark place with temperatures between 50°F and 70°F to preserve food quality. Avoid exposure to light, as it can rapidly degrade nutrients and spoil delicate flavors. Keep jars upright on a level surface to prevent leaks and maintain seal integrity. Never lay jars on their sides, which can compromise the seal or cause spills. For added safety, you can also use easy sterilization methods like boiling water or oven heating before initial use. For those building a custom solution, a DIY reptile egg incubator uses similar temperature control principles for precise heat management. Maintaining the correct humidity level is also critical, and using a reliable hygrometer ensures the environment stays within safe ranges for long-term storage.
Remove the bands after 12 to 24 hours once the jars have sealed. This allows you to inspect each jar for an airtight seal and helps prevent rust from forming under the bands. For decorative storage, keep bands off entirely so you can easily identify any seal failures. Be cautious not to stack jars more than one row high without the bands, as this risks damaging the seal or causing jars to topple.
For unused jars, wrap them in paper, nest them inside larger jars, and cushion the spaces with packing material to prevent chips or cracks. Always check for any nicks, cracks, or chips before reuse; cracked jars cannot securely hold a seal and should be discarded or replaced. Proper storage ensures your preserved foods stay safe and in good condition over time.