You may wonder if you can find a dedicated poultry watering can at your local hardware store. While stores like Home Depot don’t offer specialized options, you can easily put together a more effective watering system yourself.
Using everyday supplies like a large bucket and poultry nipples, you’ll be able to keep your flock clean and well-hydrated.
Keep reading to see how you can build it.
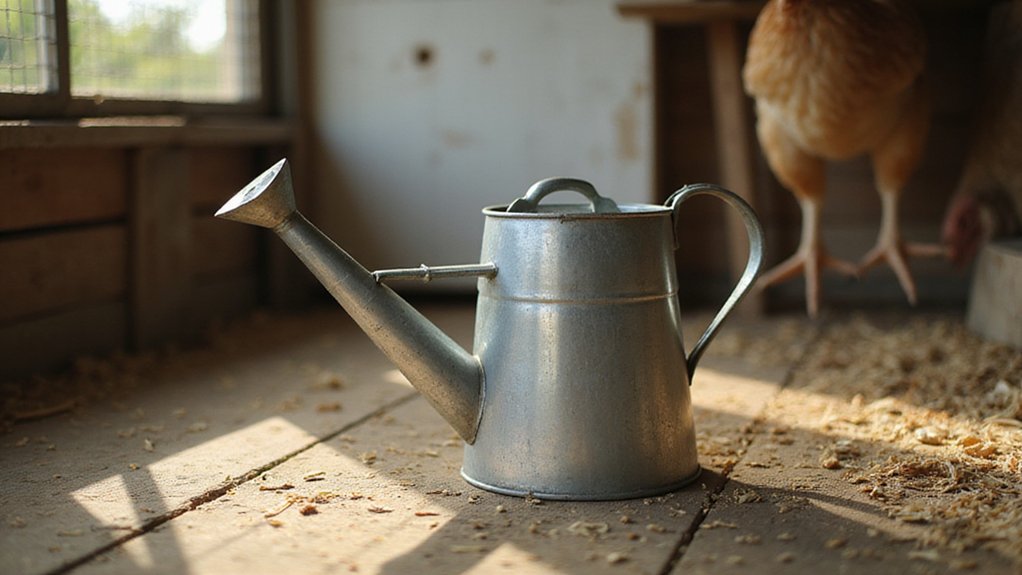
Why a Standard Watering Can Won’t Work for Poultry
A standard watering can simply cannot meet the needs of poultry because it cannot provide continuous, unrestricted access to water. When birds are forced to drink from a stagnant can, the water quickly becomes contaminated. Standing water fosters the growth of bacteria and mold, making contamination almost unavoidable. Droppings and debris easily foul the open can, creating breeding grounds for pathogens like E. coli. Within days, biofilm forms on the surface of the can, resisting cleaning efforts and increasing health risks. Manually refilling a can also disrupt the water supply, leaving birds without water for hours and causing unnecessary stress. Unlike a raised garden bed cover, which protects against contamination, a watering can lacks any barrier or filtration system. Poultry-specific equipment, such as a properly designed coop, ensures birds have continuous access to clean water. A more effective approach to managing organic waste would repurpose coffee grounds for enriching garden soil instead. Because it lacks filtration or aeration, a watering can not only fails to deliver clean water but also introduces health hazards. For poultry, a watering can is more of a liability than a solution.
What Home Depot Actually Sells for Poultry Watering (Not a Watering Can)
Home Depot offers a variety of fittings and accessories tailored for poultry watering systems beyond just traditional watering cans. You’ll find compatibility options for different tubing sizes, including 1/4 inch, 3/16 inch, and 5/16 inch diameters, which are commonly used in poultry watering setups. These fittings include elbows, T-joints, and couplings designed to seamlessly connect your tubing, ensuring a secure and leak-free assembly. When selecting a dehydrator for preserving feed or treats, the best food dehydrators provide reliable drying performance. For homesteaders interested in garden integration, a ceramic watering can planter offers a dual-purpose option for small-scale plant watering and decoration. For the raised bed soil in your garden, consider a balanced soil mix with good drainage to support healthy plant growth.
Color options are mostly limited to neutral tones like black or clear, which help identify different parts or prevent algae growth. When selecting fittings, check that they are compatible with your tubing’s material—most are made from durable plastic that resists cracking and UV damage. Zip ties and conduit straps are essential for securing tubing along coop walls or frames, providing stability and preventing movement that could cause leaks or disconnections. Grommets create tight seals around tubing where it passes through holes in the coop or feeders, preventing water leaks and contamination.
To ensure your setup functions reliably, use brackets and support hooks to hold cups and tubing in place. These mounting options help maintain correct positioning and reduce wear over time. Additionally, for bird safety, ensure cups are placed 7 inches from the ground to prevent injury and accommodate natural behavior. Confirm that any cups you choose are compatible with brackets and hooks sold at Home Depot, as some systems require specific fittings or mounting hardware. Paying attention to these details guarantees your poultry watering system remains leak-free, durable, and easy to maintain.
Best Buckets at Home Depot for DIY Poultry Waterers
A 5-gallon bucket is the most practical size for a DIY poultry waterer. You’ll want to choose the orange Homer buckets available at Home Depot, made from BPA-free #2 HDPE plastic, which is safe for your flock. Drill four 3/8-inch holes about 1 to 2 inches above the bottom to prevent sediment from clogging the waterer. Seal the nipples with Teflon tape to ensure leak-proof connections. Remove the metal handle and replace it with wire for easier hanging. The bucket is often elevated on a concrete block to give chickens easier access to the drinking cups. For a more attractive and durable option, consider a copper watering can if you prefer a rust-resistant material that naturally inhibits bacterial growth. Using a tumbler can also help you recycle organic waste efficiently from the kitchen.
For alternative watering options, smaller 3-gallon buckets can be used for fewer birds, but expect to refill more often. Proper cleaning is essential—scrub the bucket with a mild soap solution and rinse thoroughly to prevent algae growth. Additionally, these buckets can be repurposed as countertop compost bins for convenient kitchen recycling when not used for watering. Place the waterer in shade and elevate it 6 to 8 inches off the ground to keep your chickens comfortable and to reduce contamination risks.
12, 24, or 48 Nipples: Which Size for Your Flock?
For small flocks of 3 to 6 birds, a 12-nipple system is ideal. Typically, 2 to 3 nipples provide enough access for proper hydration. This size is cost-effective and simple to install, making it perfect for backyard setups or beginner growers. Keep nipples spaced 12 to 24 inches apart to allow multiple birds to drink at once without crowding. Initial installation should have nipples at chick eye level, then raised gradually as the birds grow. Ensuring your header tank maintains at least 2 bar pressure helps keep water flow steady and prevents blockages. Using a vacuum sealing method can help protect replacement nipples from moisture damage during storage. For consistent maintenance of your poultry equipment, you can apply the same drying principles used by top food dehydrators for jerky to ensure nipples remain clean and free of moisture buildup.
How to Build a Simple Gravity-Fed System With Home Depot Parts
To build a simple gravity-fed system, start with a 55-gallon food-grade barrel placed 2 to 4 feet above ground level. This height creates enough gravitational force to provide steady water flow to your poultry. Drill a 1-inch hole near the bottom of the barrel, then insert a brass garden hose fitting with an O-ring for a secure seal. Secure the fitting with a shut-off valve, which allows you to control water flow easily. This system also works well for remote plants by using a 5-gallon bucket as an alternative water source. For added durability around the barrel, consider using top chicken wire to protect the setup from curious livestock. Using Western red cedar for the barrel’s support frame ensures the structure resists rot and stands up to outdoor moisture.
Connect ½-inch poly tubing to the shut-off valve using a hose clamp. Drill small holes in the tubing for drip emitters at water stations or near your poultry’s drinking area. These emitters distribute water gradually and help prevent overflows. This method is also compatible with raised bed garden kits to deliver water directly to plant roots. To prevent clogs within the system, install an inline filter, especially if your water source contains debris or sediment.
Adjust the shut-off valve to control the flow rate and ensure your flock receives a steady supply of water. This setup, which often costs between $45 and $65 in parts, is both affordable and reliable. It offers a sustainable watering solution that is simple to maintain and effective for poultry management.
Winter-Proof Your Home Depot Waterer
To winter-proof your Home Depot poultry waterer, you need to insulate and protect the system from freezing. Start by wrapping your waterer bucket with reflective bubble wrap insulation to trap heat. Seal all pipe connections thoroughly with closed-cell foam to prevent cold air from entering and to lock in any heat generated. To control the system’s temperature effectively, connect it to two separate outlets: one for a thermostatic switch and another for a de-icer. A 500-watt submersible heater is sufficient for setups up to 25 gallons, while larger systems may require a 1000-watt heater. Insulate flexible irrigation lines with heat trace tape to keep ice from forming inside, similar to how you would insulate a nesting box to protect against drafts. For an alternative that prevents freezing automatically, a 60-watt heating element ensures water remains unfrozen in subzero temperatures. Always test your power sources with a lamp before winter arrives to ensure everything works properly. For canning, using a pressure canner ensures green beans are preserved safely at high temperatures. Following these steps will help keep water flowing smoothly, reducing your need for daily thawing chores. For the roosting bars, ensure they are set at the appropriate height to prevent droppings from contaminating the waterer.
DIY Parts List for a Home Depot Poultry Waterer
To build your poultry waterer, gather the following parts: 1/2-inch SCH40 PVC pipe, a slip x slip x 1/8-inch FPT reducing tee, PVC caps, a female S x FPT adapter, and a barb x MIP adapter for tubing. You’ll also need poultry nipples, cup couplers, rubber grommets, a brass swivel GFT fitting, and a socket tool. For the water supply, use a 5-gallon food-safe bucket equipped with a bulkhead fitting and a lid. To cut holes, employ a hole saw or a 3/8-inch drill bit, ensuring precise sizing. Seal all threaded connections with joint compound and silicone to prevent leaks. Mount the PVC pipe approximately one foot high using pipe straps and stainless steel hose clamps for a secure fit. Small birds can access water easily with stepping stones placed around the structure. Space the poultry nipples six inches apart along the pipe for optimal access. This gravity-fed setup relies on proper placement and the right parts to keep the flock hydrated without a pump, simplifying the watering process significantly. For a completely zero waste approach, repurpose old container materials as an alternative to buying new. The kit’s nipples, fittings, tools, hoses, and hardware provide all essentials for a cost-effective assembly. To avoid splashing that can exacerbate eye watering issues, position the nipples away from dusty bedding areas. For optimal plant integration, this system can also be adapted using expert watering techniques for nearby succulents that require similar moisture control.