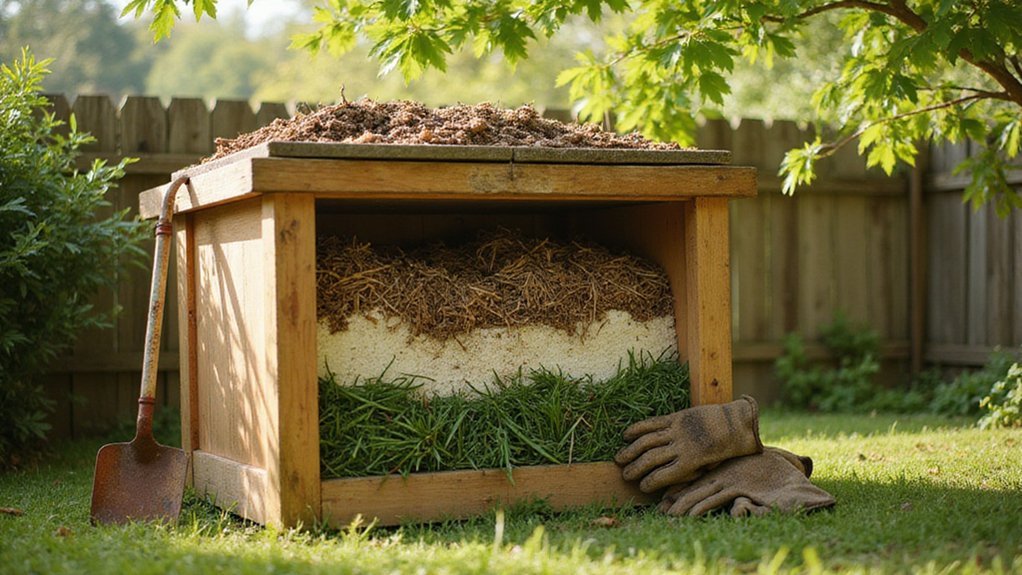
How to Layer a Compost Bin for Best Results
Wondering how to get your compost to break down faster and smell better? The key is in how you layer your materials.
Starting with a chunky brown base, like twigs or wood chips, helps create good airflow. Adding alternating layers of browns and greens in the right ratio keeps the compost active and manageable.
Keep reading to see exactly how to do it for the best results.
Why Your Compost Pile Needs a Chunky Brown Base Layer
Starting with a chunky brown base layer of twigs, wood chips, or coarse straw that measures about 4 to 6 inches thick is essential. This size creates vital air pockets, which allow oxygen to reach microbes that break down organic material efficiently. Without this coarse layer, your pile risks becoming compacted and oxygen-starved, leading to foul odors and slowed decomposition. The base not only supplies carbon to balance the nitrogen-rich greens but also helps absorb excess moisture, maintaining a sponge-like consistency. Additionally, elevating the pile on this layer improves airflow underneath, promoting a hotter, faster composting process. It also acts as a physical barrier against pests and animals, reducing scent attraction and limiting access. Just as galvanized steel in a watering can resists rust and ensures durability, this sturdy base material withstands decomposition while supporting airflow. A similar approach is used in best chicken coops to provide proper ventilation and a dry, healthy environment for your flock. When selecting a cover for a similar purpose, choosing a raised garden bed cover that allows airflow while keeping out pests offers comparable benefits for soil health. Overall, this sturdy foundation is key to faster, more effective composting from the very start.
Avoid These 5 Compost Layering Mistakes
Avoid these five common compost layering mistakes to keep your compost healthy and efficient. First, always maintain the correct green-to-brown ratio. Too many greens, like vegetable scraps and fresh grass clippings, create a slimy, smelly mess and can slow down decomposition. Conversely, an excess of browns such as dried leaves or straw can make the pile too dry and inhibit microbial activity. Aim for roughly equal parts by volume of greens and browns. For effective decomposition, also maintain a roughly 2:1 ratio of browns to greens by weight rather than volume.
Next, ensure proper moisture levels. The pile should feel damp—like a wrung-out sponge. If water runs out when you squeeze a handful, you’re over-watering and suffocating the microbes. Too little moisture slows decomposition, while too much creates anaerobic conditions that cause foul odors. Adjust moisture by adding dry materials or water as needed.
Aeration is another critical factor. Turning your pile at least once a week—using a pitchfork or compost aerator—introduces oxygen, keeping microbes active and preventing foul smells from anaerobic bacteria. Without proper aeration, your compost can become compacted and smell bad.
Food scraps are nutritious but can attract pests if left exposed. Always cover kitchen waste with a thick layer of browns after adding scraps. This barrier keeps pests out and prevents the pile from becoming a fly magnet.
Finally, patience is essential. Rushing the process often leads to mistakes like overfeeding or neglecting maintenance. Regularly check your compost, adjust as needed, and give it time. When you avoid these pitfalls, you’ll produce rich, balanced compost instead of a smelly, rotten mess.
What’s the Right Green-to-Brown Ratio for Hot Compost Layers?
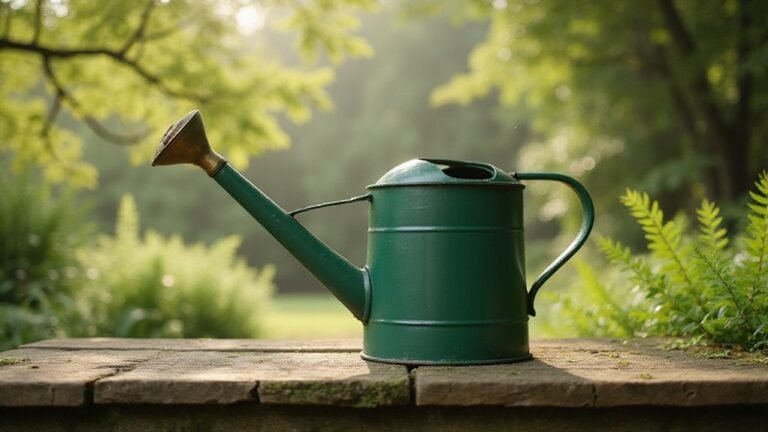
A 2:1 green-to-brown ratio is a good starting point for compost layers, but you should adjust based on moisture levels. Excess greens can make your pile slimy and produce ammonia odors, which indicates an imbalance—add more browns to correct it. If your pile is slow to heat up, it may have too many browns; in that case, toss in additional greens or water to boost microbial activity. Shredded leaves or wood chips are excellent brown materials to incorporate. Keep green layers under 3 inches thick, and cover them with three times that volume of browns to ensure proper airflow and heat retention. For even more control over moisture and air, consider repurposing DIY vacuum sealer bags to seal and store pre-mixed batches of browns for later use. If your pile is near a chicken coop, using wood chips as the brown layer can later serve as excellent bedding that absorbs moisture and controls odors. A 3-gallon watering can is ideal for precisely adding moisture to your compost layers without over-saturating the pile.
Set Each Layer’s Thickness for Maximum Airflow
To maximize airflow, set each layer’s thickness intentionally. Start with a coarse base layer of 8 to 10 inches of sticks or corncobs; this creates an airy foundation that prevents compression and promotes air circulation from the bottom up. Ensure your base layer is generous enough to accommodate the number of chickens in your flock, as each chicken nesting box requires similar consideration for space and ventilation. Follow with green materials, layered 2 to 3 inches thick, to balance nitrogen without compacting the pile. Then, add brown layers, 4 to 6 inches thick, to absorb excess moisture and maintain carbon content. Ensure each material type is layered uniformly, with consistent depths across all similar layers. Lastly, include a thin soil layer of 1 to 2 inches to introduce beneficial microorganisms without obstructing oxygen flow. For dedicated homesteaders, a French blue watering can offers a durable, stylish tool for applying water evenly across the pile. When watering, aim for a sponge-like moisture level—damp but not pooling—to keep air flowing efficiently through each layer and speed up decomposition. Maintaining this proper moisture level helps replicate the gentle heat and low humidity that a food dehydrator uses to dry food without cooking it, ensuring aerobic conditions.
Build Your Compost Layers Like a Lasagna for Faster Breakdown
To build your compost bin like a lasagna, start with a coarse base layer of browns, such as small twigs or wood chips, about 4 to 6 inches deep. This layer provides essential airflow and insulation, preventing the pile from becoming compacted and aiding microbial activity. Directly on top, alternate layers of browns and greens in a ratio of approximately 2 or 3 parts browns to 1 part greens. For every 1 to 2 inches of greens like kitchen scraps or fresh grass, add 2 to 3 inches of browns like leaves or shredded cardboard. This balance maintains a carbon-to-nitrogen ratio of around 30:1, fueling beneficial microbes for faster decomposition. Keep the green layers centered and fully cover them with a brown “blanket” to suppress odors and preserve moisture. Shape the brown layers into saucers or dishes to contain scraps effectively. Finish by sealing the entire pile with a 5-inch layer of dry browns to retain heat and moisture. Build your compost to a height of about 3 to 4 feet for optimal heat retention. Adding compost activators or manure can speed up microbial activity without the need for turning, and chopping greens into smaller pieces of 1 to 2 inches will increase surface area, thereby accelerating decomposition. A practical DIY guide emphasizes that these steps ensure better results for novice builders. For consistent moisture levels, use a plastic watering can with a fine rose to lightly dampen each brown layer as you build. Once the pile is established, the ideal moisture content resembles a damp sponge to maximize microbial efficiency. This lasagna method effectively creates a nest of brown material that prevents food waste from being exposed, reducing odors and pest issues as demonstrated by Rick Carr.
How Wet Should Compost Layers Be (Plus When to Add Soil)
Moisture should feel like a wrung-out sponge. When you squeeze a handful, it should release just a few drops. If it crumbles easily, it’s too dry; if water streams out, you’ve added too much. To correct moisture imbalance, add dry sawdust or straw to absorb excess water, or turn the pile to help with evaporation. Keep the compost bin in the shade to prevent it from drying out and cover it during heavy rain to control moisture levels. For best results, use the same moisture principle as a nesting box for bunnies, where the bedding should feel dry but not dusty. A long spout can help you water layers evenly without disturbing their structure. When adding soil, sprinkle a thin 2–3 cm layer after placing coarse materials at the bottom. The soil introduces microorganisms that accelerate decomposition. Ensure the layers are moist but not waterlogged, and balance them with enough green and brown materials. This moisture level is similar to the ideal vacuum seal for meat, which prevents spoilage by removing air. Proper moisture management and timely soil addition help maintain an active, healthy compost.
How Burying Kitchen Scraps in Brown Layers Stops Pests and Smells
Burying kitchen scraps 6 to 8 inches deep under brown layers effectively stops pests and odors by masking the smells that attract them. Placing dry leaves, shredded paper, or straw on top creates a barrier that absorbs and blocks volatile organic compounds. This reduces fly attraction by about 75 percent compared to uncovered surface scraps. The dry layers also trap moisture and block scent signals, making it harder for rodents and flies to detect food sources. This method of layering is similar to how a chicken run protects resources by providing a sheltered environment that deters pests. Always cover every green addition with a 4 to 8 inch layer of carbon-rich material. This prevents vinegar flies from laying eggs and stops food from turning into a breeding site within 48 hours. Maintaining a brown-to-green ratio of roughly 2:1 to 3:1 ensures an odor-free environment. For extra pest deterrence, sprinkle cayenne pepper or diatomaceous earth on top of the layers. This mimics natural forest floor decay, which keeps pests out and odors in check. A similar concept applies when using a watering can for succulents, where precise moisture control prevents root rot and deters fungal pests. For long-term storage of dry brown materials, Ball Mason jars provide an airtight seal that keeps carbon-rich layers fresh and pest-free.
How Often to Turn Your Compost Layers for Even Breakdown
Turning your compost layers at regular intervals is essential for even breakdown. For thermophilic composting, turn every 2 to 3 days during the first two weeks to keep the temperature above 104°F. Use a thermometer to monitor heat levels; if the temperature drops below 100°F, turn immediately to reintroduce oxygen and boost microbial activity. Cold composting requires less frequent turning—about once every 3 to 4 weeks—since the process is slower and less heat-dependent. For balanced composting, turning weekly promotes good mixing and aeration. Adjust the frequency based on pile size: for a 3x3x3 foot heap, turn every 2 to 3 days to ensure oxygen penetrates all layers. After around 30 days, turn less often as decomposition slows naturally. If you add fresh green material, turn immediately afterward to prevent stratification and unpleasant odors.