How to Make Banana Chips in a Food Dehydrator
Thinking about making your own banana chips but unsure where to start? The key is choosing the right bananas, slicing them evenly, and controlling the dehydration process to get just the right crispiness.
With a simple method involving lemon juice and precise temperature settings, you can enjoy homemade, crispy banana chips in your own kitchen.
Keep reading for the full step-by-step guide.
How to Peel and Slice Bananas for Evenly Dried Chips
To peel bananas effectively, start by snapping off the stem and pulling the skin down in two sections. Carefully remove any fibrous strings and check for bruises or dark spots. Immediately discard the peel to prevent contamination and browning. If you wait before slicing, keep the peeled bananas in a cool, covered bowl to slow oxidation and preserve freshness, or better yet, immediately toss the peels into a compost bin to reduce waste. For long-term pantry organization, you can store the finished chips in durable glass jars that keep out moisture and pests. However, if you are using glass jars like Ball Mason jars, note that they are not designed for microwave use and can crack under thermal stress, so always check jar safety before reheating dried chips. This approach ensures your banana slices are clean and ready for even drying.
Choose the Best Variety of Banana for Crispy Chips
The best variety of banana for crispy chips is Lacatan. Choose firm, slightly underripe bananas that are yellow with green tips. Lacatan bananas have dense flesh that holds heat well and thick skin, making peel removal easy and slices uniform. Their firmness allows you to cut them into 1/8 to 1/4 inch thick slices without breaking, ensuring evenly crisp chips. Avoid overripe bananas because they become too soft and sugary, resulting in sticky, chewy chips. Plantains are another option, offering a savory and crunchy texture due to their high starch content. Always test firmness: the banana should resist bending easily, which guarantees the structural integrity needed during drying and prevents collapsing on dehydrator trays. Properly drying your chips also requires a reliable setup, similar to how best chicken coops provide stable conditions for your flock. A mini watering can ensures precise moisture control when rehydrating ingredients for recipes.
Use a Pretreatment Soak to Prevent Browning
To prevent browning, soak banana slices immediately after cutting in a pretreatment solution. This quick step halts the action of polyphenol oxidase enzymes that cause discoloration, preserving the fruit’s vibrant yellow color. You can experiment with different flavor combinations by choosing various soaks. For example, soak slices for 10 minutes in lemon juice water, or opt for a honey dip to add subtle sweetness. For faster results, use an ascorbic or citric acid solution for just 3 to 5 minutes. These preservation techniques not only prevent discoloration but also slightly strengthen your slices’ cell walls. After soaking, drain the slices well on a strainer and pat them dry with a clean cloth. Raised beds offer improved drainage and soil control for your garden, and a drip irrigation system can provide consistent moisture to your plants. Proper drying is crucial to prevent clumping and ensure even dehydration later. Choosing the best wood duck nesting boxes ensures the birds’ safety and supports successful breeding.
Set Up Dehydrator Trays for Maximum Airflow
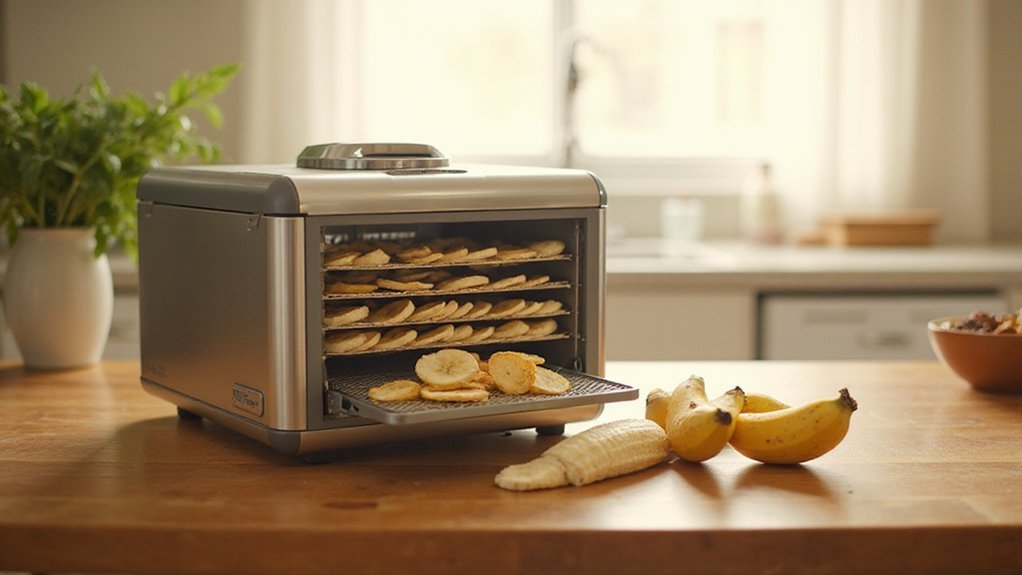
To ensure maximum airflow when setting up dehydrator trays, arrange your banana slices in a single layer with at least 1/4 inch of tray spacing between each piece. Overlapping slices traps moisture and causes uneven drying, while packing them too tightly slows airflow through the unit. As with securing the wire to fence posts, ensure banana slices are held in place without overlapping. For consistent results, rotate tray positions every hour by moving the bottom tray to the top and vice versa, especially if you have a vertical airflow model. This helps counteract hotter zones within the dehydrator. If you own a horizontal airflow model, you can rotate trays less frequently. Additionally, position the dehydrator with at least 4 inches of clearance from walls to promote proper ventilation. Regularly clean the fan blades and vents before each use, as dust buildup can reduce airflow efficiency by up to 30%, potentially leading to soggy spots in your dried banana chips. Flipping or turning banana slices during the process helps ensure thorough drying and promotes even moisture removal. For homesteaders, choosing a Rubbermaid watering can with good balance and a removable rose makes garden hydration more efficient. For those seeking convenience, automatic chicken coop doors provide reliable daily operation for poultry keepers.
Set the Right Temperature and Time for Banana Chips
Set the right temperature and time based on your desired banana chip texture. For chewier chips, aim for 135°F and dehydrate for 6 to 8 hours. If you prefer a crunchier texture, increase the temperature to 150°F and dehydrate for 4 to 6 hours. For maximum crispness achieved through sugar crystallization, set the dehydrator to 160°F and reduce the drying time to 3 to 5 hours. Thinner slices, around 2 to 3 millimeters, dry faster at higher temperatures. Keep in mind humidity levels; higher moisture content can add 1 to 3 extra hours to the dehydration process. Ripe bananas require close monitoring to prevent burning or over-drying. You can enhance flavor by adding cinnamon or coconut flakes before dehydration. Once finished, store cooled chips in airtight containers, adding silica gel packs to help maintain their crunch. Adjust the dehydration time as needed to reach your preferred texture, rather than relying solely on the clock. For those also raising rabbits, the same silica gel packs used in chip storage can be placed in nesting boxes for bunnies to help control dampness. Similar to drying basil, spacing slices evenly on the dehydrator trays ensures uniform airflow and consistent drying results. To improve the final texture, apply a light salt brine before dehydration to draw out excess moisture and enhance flavor.
Test for Doneness and Cool Chips the Right Way
To confirm your banana chips are fully dehydrated, perform the snap and bend test after they have cooled for 5 to 10 minutes. Warm chips can feel misleading—softer and more pliable—so always allow them to reach room temperature first. For an accurate texture check, take a cooled chip and gently bend it. You want to hear a clean, audible snap. If it bends without breaking, it needs more drying time. A chewy or leathery texture indicates moisture is still present. Choosing the proper top waterers for your setup helps maintain consistent humidity levels during the drying process.
Pair this with a color assessment: ideally, dried chips should range from pale yellow to golden brown. Chips that are too dark could be scorched, and sticky surfaces suggest moisture remains. Test chips from both the center and edges of your dehydrator tray to ensure even drying. If any chip feels soft or fleshy, continue dehydrating until it firms up. The best soil for raised beds provides a balanced foundation that prevents uneven moisture retention. For durable storage, selecting the best wood for your raised garden bed can help stabilize ambient conditions during long drying sessions.
Store Your Banana Chips to Keep Them Crunchy
To keep your banana chips crunchy, store them in airtight glass Mason jars or plastic containers with secure seals. Place these containers in a cool, dark spot where temperatures stay consistently between 50°F and 70°F. During the first week, check the containers daily for any condensation. If you notice stickiness or dampness, return the chips to the dehydrator for additional drying. Before sealing, ensure the chips are completely dry and cooled to prevent moisture buildup. For long-term storage, selecting mason jar lids with airtight seals is essential to prevent air from softening the chips. Ensuring proper air circulation within the storage area can also prevent moisture from accumulating, much like in a well-ventilated bin compost system.
It’s recommended to condition the chips by loosely covering them for 7 to 10 days to allow moisture to equalize. Alternatively, seal a small batch in an airtight bag for 24 hours; if they feel tacky, dry them further. Once properly stored, opened containers keep the banana chips crunchy for two to three weeks. Avoid refrigerating, as the humidity can make the chips soft. Keep containers away from sinks, stoves, and sunny windows to maintain optimal dryness. For extended shelf life, freeze the chips in airtight bags for six to twelve months. For the best results, ensure your brooder box setup avoids excess humidity, a common issue in poultry raising.
Try Sweet, Salty, or Spiced Banana Chip Variations
You can experiment with sweet, salty, or spiced banana chip variations based on your flavor preferences. For sweet chips, use just-ripe bananas that are firm to the touch; brush 1/8-inch slices with honey-vanilla or maple-nutmeg mixtures and dehydrate at 135°F for 6-8 hours. This enhances the natural sugars with warm spices, creating a rich, dessert-like treat. For savory options, choose slightly greener bananas and slice them 1/4-inch thick. Coat the slices with olive oil and sprinkle with sea salt or black salt combined with cumin, then dehydrate at 140°F for 7-9 hours. This results in a crunchy, salty-spicy snack. For added flavor, toss the spiced chips in chili flakes or mango powder after drying to ensure even coverage. Mixing different flavor elements—such as a sweet glaze with a sprinkle of salt—can yield unique, customized banana chips tailored to your taste.