Wondering how to start composting on your homestead? It’s simpler than you might think and can turn kitchen scraps and yard waste into rich soil.
By setting up a bin with the right materials and layering, you’ll soon have a steady supply of compost to boost your garden’s health. Keep reading for easy steps to get your compost pile going.
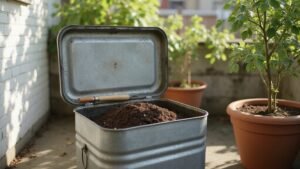
Where to Place Your Compost Bin for Best Results
Place your compost bin on a level, well-drained site to prevent waterlogging and allow leachate to drain freely. Ideal surfaces include soil, concrete, or gravel. Choose a location that receives 3–4 hours of sunlight daily to avoid drying out or overheating the compost. Keep the bin at least 10 feet away from your house and away from neighbors’ windows to minimize odors and pest issues. For wildlife considerations, avoid low-lying areas that attract animals. Instead, position the bin near garden beds and a water source for easy access throughout the year. Maintain enough space around the bin for turning the compost and always cover the pile to trap heat, reduce smells, and prevent critters from getting in. For building a long-lasting enclosure around your pile, pressure treated lumber offers excellent rot resistance. For a similar approach to preserving your harvest, consider sterilizing mason jars for canning to ensure safe food storage. To keep your composting routine efficient, provide a secure, predator-proof coop for your chickens near the bin to utilize their manure as a rich nitrogen source.
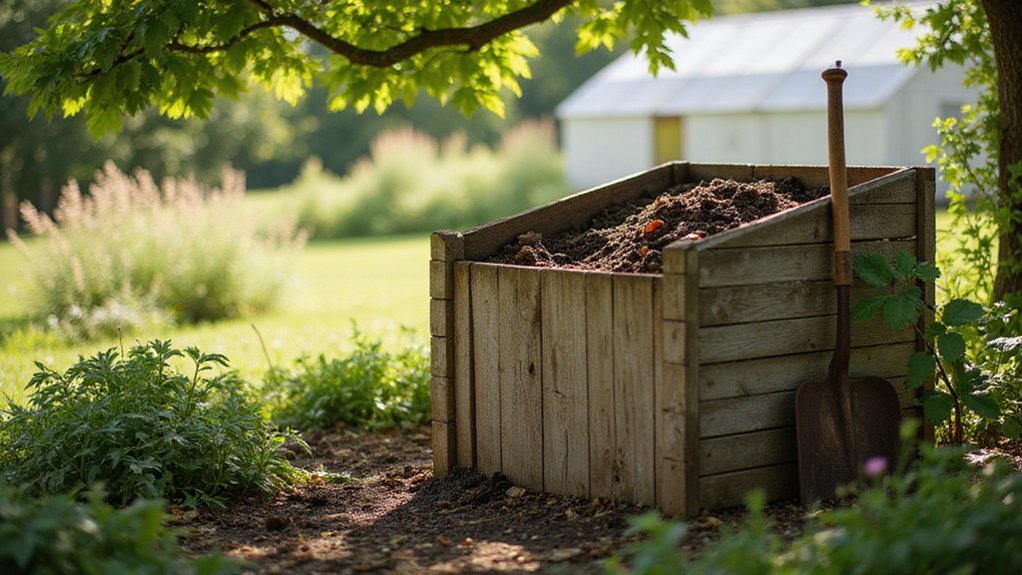
Choose a Bin for Your Yard Type
Choose a bin size that matches your yard’s size. For small yards under 500 square feet, select a compact 20–30 gallon bin. Medium-sized yards are best suited to 40–60 gallon tumblers or stationary units, while large yards can handle 80–120 gallon systems or multiple bins set up together. Matching your bin size to your yard ensures efficient composting and easy maintenance without taking up too much space or being under-capacity. For yards near waterfowl habitats, consider a design similar to wood duck nesting boxes to deter larger birds from disturbing the pile. Reviewing the top options can help you compare features like capacity and material before purchasing. Additionally, a raised garden bed cover can be repurposed to shield the compost from heavy rain, preventing excess moisture.
Material choices impact pest control and durability. Enclosed plastic bins or tumblers with locking lids are ideal in high-density neighborhoods, as they prevent raccoons and rats from accessing your compost. Wire bins work better only in large, isolated yards where wildlife isn’t a concern. For kitchen scraps, a 30–40 gallon tumbler minimizes odors and keeps pests at bay. If birds pose a problem, choose bins with bird-proof latches. Properly secured, durable materials are crucial in keeping unwanted visitors out and maintaining a clean compost area.
Start Your Compost Bin With a Twig Layer
Starting your compost bin with a 4 to 6 inch layer of twigs, branches, or coarse mulch creates a vital foundation. This layer helps regulate moisture by preventing water from pooling, which could turn your pile anaerobic and slimy. It also provides essential air pockets that allow oxygen to reach deep into the compost, supporting beneficial microbes. To speed up decomposition, chop or shred the twigs into pieces no larger than half an inch in diameter. These twigs serve as a good source of carbon, giving structure to your pile and offering habitat for microbes. For long-term preservation of your tools and dry materials, consider using containers with an airtight seal that delivers quality and value similar to top-rated vacuum sealers. Sprinkle a shovel load of finished compost or soil over this layer to jump-start microbial activity, setting the stage for a healthy and productive compost heap. The height of this foundational layer should also allow for proper air circulation, similar to how roosting bars need to be elevated to ensure birds remain clean and healthy. This initial carbon layer also aids drainage and oxygen flow as recommended when building a hot compost pile for effective composting. For those needing durable containers to store your finished compost or other dry ingredients, mason jars for food storage provide an airtight seal that keeps contents fresh.
Balance Browns and Greens in a 3:1 Ratio
To achieve efficient decomposition, you need to balance browns and greens in a 3:1 ratio by volume. This ratio is key to providing optimal nutrients and proper airflow in your compost pile. For every part green materials like kitchen scraps or grass clippings, add three parts of dry browns such as leaves, cardboard, or straw. This proportional approach corrects the myth that equal parts are sufficient, preventing a soggy, smelly mess caused by excess greens or a stalled pile with too many browns. Start by layering coarse browns at the bottom for drainage, then alternate layers of greens and browns. Break green materials into smaller pieces to accelerate breakdown and ensure quick decomposition. If your compost starts to smell ammonia-like, add more browns to balance the pile. If it remains dry or cool, incorporate additional greens and moisture. Regularly turning the pile every few days mixes everything thoroughly, promotes airflow, and helps maintain the proper ratio for efficient composting. For homesteaders who also manage gardens, a watering can osrs can help moisten dry layers when adding greens to a compost pile. Additional layering of coarse browns at the base improves drainage and prevents the pile from becoming waterlogged.
Keep Your Pile Moist Like a Wrung-Out Sponge
To keep your compost pile properly moist, aim for a moisture level between 40% and 60% by weight, which fosters ideal aerobic decomposition. To check moisture, dig about 4 to 6 inches into the interior of the pile and grab a sample. Squeeze the sample firmly. If only a few drops of water come out and your hand feels moist, you’ve reached the perfect moisture level. If a steady stream of water flows from your hand, it’s too wet. No drips at all indicate the pile is too dry. Add water using a garden hose with a spray nozzle, turning the pile as you go to evenly soak the core. Don’t just wet the surface—ensure the interior receives moisture as well. Cover the pile with a tarp or lid to keep evaporation low from sun and wind, and to prevent heavy rain from over-saturating it. Just as a chicken coop requires proper insulation to maintain stable conditions, your compost pile benefits from a cover to regulate moisture and temperature. Using construction sand in a chicken coop base can aid drainage and keep bedding drier. For a consistent water supply to your livestock, consider building a gravity-fed system similar to an automatic chicken waterer. Check the moisture every few days during summer. Immediately cover or water the pile after turning or watering to maintain consistent moisture levels.
Turn the Pile Once a Month for Hot Composting
Turning your hot compost pile once a month isn’t enough during peak activity. To properly aerate, you should turn every 3 to 7 days when the temperature reaches 65 to 70°C. Monitoring the temperature helps you gauge when to turn; if the pile cools below 50°C, switching to weekly turns is appropriate. Once the temperature drops under 40°C, monthly turning is sufficient. Frequent turning encourages thermophilic bacteria, which drive fast decomposition, so don’t skimp on aeration when aiming for rapid breakdown. Your shovel is the most important tool for this task. A similar simple DIY approach can be applied to building a feeder to manage your quail’s feed alongside your compost system. Turning at higher temperatures, such as 40°C, is not ideal for optimal aeration. For those preferring a smaller system, worm compost bins efficiently process kitchen scraps with minimal turning. For longtime food storage, a vacuum sealer is worth it for homesteaders to prevent spoilage of harvested produce.
Fix a Heatless or Smelly Compost Pile
If your compost pile lacks heat or smells unpleasant, moisture imbalance is often the culprit. A healthy pile should feel like a wrung-out sponge. If it’s too wet, it’ll develop foul odors and slimy layers; unpack the pile, add browns like dry leaves or cardboard, and turn it to expose waterlogged sections. When it’s too dry, add water and green materials such as kitchen scraps, then insulate the pile and move it away from windy or sunny locations. Shaping the top into a slight concave helps trap moisture inside. For larger piles, consider using a dual-wheel wheelbarrow to transport heavy loads of browns and greens more easily. A fully anaerobic pile often smells like rotten eggs because it lacks oxygen, but simply turning the heap can restore the proper aerobic conditions needed for healthy decomposition. If the odor persists despite turning, it may indicate a deeper issue like excess moisture trapped at the core.
Check your brown-to-green ratio—aim for roughly two parts browns to one part greens. Excess greens can cause heat to escape and create odors; add more browns to balance. Conversely, if you have too many browns, mix in fresh grass or coffee grounds to boost green materials. Ensure your pile is at least three feet cubed; smaller heaps struggle to generate and retain heat. Finally, restore oxygen by turning the pile at least once a week and adding straw to create air pockets, which keeps the compost aerobic and odor-free.
How to Tell When Your Compost Is Done
Your compost is ready to use when it appears dark, crumbly, and uniform, with no recognizable scraps remaining. It should have an earthy smell, similar to forest soil. To test its maturity, perform the squeeze test: take a handful, squeeze gently, and it should hold together but crumble easily. It should feel damp without dripping. Using a thermometer, check the temperature; finished compost will match the ambient temperature and no longer be warm. For a biological test, plant a few radish seeds in the compost. If at least 75% sprout healthy green leaves, the compost is stable and ready for use. If the seeds yellow or fail to sprout, the compost still needs more time to mature. Screening the compost with a half-inch screen is optional but removes bulky woody debris for finer, more manageable compost.
Apply Finished Compost to Garden Beds Gently
Once your compost appears dark, crumbly, and earthy-smelling, it’s ready to be applied to your garden beds. Spread it gently to avoid disturbing soil structure or damaging plant roots. For new beds, apply a 2- to 4-inch layer and work it into the top 6 to 8 inches of soil. This improves soil fertility and creates a nutrient-rich environment before planting. For established plants, use a 1- to 2-inch top-dress layer, keeping it 2 to 3 inches away from stems to prevent rot. Lightly scratch the compost into the top inch of soil to help nutrients reach plant roots and protect delicate roots from temperature fluctuations. During autumn, a 1-inch layer of compost makes an excellent mulch for insulation, shielding roots from freezing.
For heavy feeders like tomatoes, increase the layer to 2 to 4 inches to supply extra nutrients. When applying compost under trees, spread it out to the drip line without piling it directly against the trunk. This allows water and air to reach the roots effectively. Spread compost evenly for best results, and always avoid over-application, which can lead to poor drainage or fungal issues. Gently incorporate it into the soil to maintain a healthy, thriving garden.