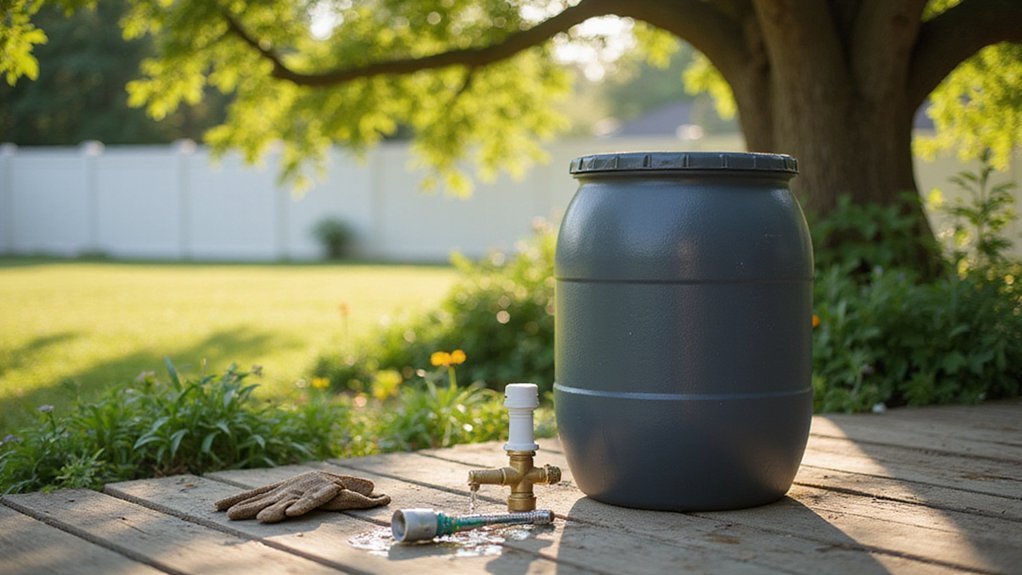
DIY Rain Barrel Kit: A Homesteader’s Guide
Thinking about collecting rainwater but not sure where to start? Setting up a rain barrel is straightforward if you pick the right spot and follow a few simple steps.
By the end, you’ll be able to create a functional system to harvest rain efficiently and keep your water clean and free of pests. Keep reading to learn how to get your rain barrel ready for use.
Choose the Right Spot for Gravity-Fed Watering
The best spot for your rain barrel is within 4 to 6 feet of the downspout. This distance minimizes the amount of piping needed, reducing the chances of water loss and making installation simpler. Ensure the downspout directs water from your roof’s largest section for optimal collection. Shade is also important—placing the barrel under a north-facing eave helps limit exposure to direct sunlight, which can encourage algae growth. Shaded, house-adjacent locations naturally deter curious critters, keeping your barrel safer from wildlife interference. Additionally, position the barrel on an elevated platform to improve water pressure through gravity. Check that the downspout outlet sits high enough to attach a diverter easily. Avoid areas beneath debris-heavy roof sections, like pine trees, which can clog the barrel and water inlet. The surface beneath the barrel should be level to prevent tipping or tilting over time. Finally, pick a spot that offers easy access for regular maintenance and cleaning, ensuring your rainwater harvesting system remains functional and hassle-free. For better protection against predators, consider mimicking the nest box entrance dimensions used in wood duck boxes to discourage larger animals from reaching the water. This system works best when you also add finished worm castings to the barrel to naturally enrich collected rainwater. For the wood structure itself, cedar or redwood is a top choice because it naturally resists rot and insect damage, ensuring long-term durability.
Gather Your Tools and Parts Before Drilling
Before drilling, gather all your tools and parts to ensure a smooth process. Wear eye protection to keep debris out of your eyes, and check that your power drill’s battery is fully charged for reliable performance. Select a 15/16-inch hole saw for your 3/4-inch spigot; a 1-inch diameter hole is suitable for standard adapter openings. Confirm that your faucet insert will fit snugly into the hole—using a hole saw that’s about 1/16 inch smaller helps prevent leaks. A 55-gallon food-grade barrel is an effective choice because it provides water during drought conditions. Have thread tape, sealant, washers, and a lock nut ready for secure fastening. Use a measuring tape to mark the exact drilling spot. A level helps keep the hole straight and even, while bricks or blocks provide a stable base for the drill. Include screening material to block mosquitoes and other pests. Verify that all components match your barrel’s lid and overflow openings to avoid mismatched fittings that can complicate assembly. For watering plants directly from the barrel, consider using a metal watering can to avoid plastic degradation and provide a long-lasting tool. For the compost bin, choose compostable bags that are designed to break down without leaving harmful residue. For an even more charming addition, a Jellycat watering can offers a whimsical alternative that still meets practical watering needs. Proper preparation ensures a smooth drilling process and a leak-free, secure installation.
Drill Your Rain Barrel Spigot Without Leaks
To drill your rain barrel spigot without leaks, start by marking the ideal height about 3 inches above the barrel base. This placement helps prevent sediment buildup from clogging the spigot. Select a 3/4-inch drill bit for the hole to ensure proper fit. Drill on a flat area and remove any burrs to create a smooth surface. To prevent leaks, slide a metal washer onto the spigot threads and then add a rubber O-ring. Apply a waterproof sealant over the washers and O-ring for extra security. Push the spigot through from outside the barrel, then add another rubber washer and sealant on the inside. Thread a hex nut onto the spigot from inside and tighten it hand-tight. Finish by tightening with a wrench for a snug fit. For a more secure installation, a solid brass half-inch male faucet connects directly to the drilled hole with washers for a leak-free fit. For food-grade storage applications, vacuum sealing the end of the hose ensures moisture doesn’t enter the barrel. Wrap plumber’s tape around the threads outside the barrel for additional security. Choosing the right egg incubator can also benefit from similar attention to detail in sealing and fit. Raised beds with a height of at least 12 to 18 inches provide the best drainage and root depth for nearby plants. Fill the barrel and check for drips, adjusting fittings if necessary. Proper installation will keep your rain barrel leak-free.
Cut the Downspout and Add a Rain Barrel Diverter
To cut the downspout and add a rain barrel diverter, start by selecting the downspout closest to your rain barrel location. Use a level to draw a straight, horizontal line where you want to make the bottom cut. Measure up 6 inches from this line and mark a second line for the top cut; this ensures the removed section aligns with your barrel’s height for proper water flow. An essential step in planning is to also gather all the necessary tools and materials from your workshop before making any cuts.
Complete the modification by using a hacksaw to cut vertically between these lines. Remove the rectangular piece and smooth any burrs with sandpaper to ensure a tight fit. This step is critical because overflow hoses are often too small for maximum inflow, causing rapid filling and potential foundation damage. For a secure attachment, you can apply similar techniques used for securing T posts to hold the diverter in place. Additionally, using a rain barrel diverter ensures that excess water is redirected away from your foundation once the barrel is full.
Next, slide the diverter into the open section, with the hose port facing your barrel. Align the PVC connector against the cut edges and secure it with wood screws through the pre-marked holes.
Reattach the bottom section of the downspout. Then, cut your connecting hose to the appropriate length. Connect the hose firmly between the diverter and the barrel inlet, routing it to prevent kinks. Proper routing ensures smooth water flow and prevents blockages in your rain harvesting system.
Secure the Screen and Lid to Stop Mosquitoes
To secure the screen and lid to prevent mosquito entry, first cut a piece of fine mesh screen—aluminum, nylon, or stainless steel—that extends at least one inch beyond the top opening of your rain barrel on all sides. An overlap of this size ensures the screen stays securely in place and blocks all gaps where mosquitoes could squeeze through. Use a hose clamp or zip ties to firmly fasten the mesh to the rim of the barrel, making sure there are no loose edges. For added security, wrap a bungee cord around the rim to hold the screen even more tightly. Consider using scrap materials like old window screens to reduce waste while still providing effective coverage. Unlike a food dehydration process, a freeze dryer removes moisture through sublimation, which is not relevant to rain barrel sealing. For a more durable and leak-proof solution, consider wide mouth lids that are specifically designed to fit standard mason jar openings. Choosing a screen with quality and performance comparable to top-rated compost bins ensures durability against weather exposure.
Don’t forget to cover overflow outlets and hose adapters with the same screen material to prevent mosquitoes from breeding through those points. When sealing the lid, apply weatherproof caulk along all seams and cracks, ensuring a watertight seal. The lid should lock tightly in place to prevent any gaps. Periodically inspect the seal—if it lifts or cracks due to pressure changes or aging, reinforce it with more caulk. Replace worn gaskets immediately to maintain a proper seal. With the mesh securely clamped and the lid sealed, you create a barrier that prevents mosquitoes from accessing your rain barrel, stopping their breeding cycle and safeguarding your yard.
Hook Up Multiple Barrels for Extra Water Storage
To hook up multiple barrels for extra water storage, follow these steps precisely. First, position your first barrel directly under the downspout. Place additional barrels in a straight line, ensuring there is a 3 to 4 inch elevation drop between each to facilitate flow. Before coupling, heat the plastic to make it more pliable, then drill 1-inch holes for hose fittings. For homesteaders, a watering can is a convenient tool for distributing collected water to plants.
Tighten all couplings securely using pliers. Attach Y-splitters to the lower hose bibs of each barrel to combine water outlets. Measure and cut hoses, adding 6 inches to ensure ample length for connections. Slide clamps onto the hoses before inserting the fittings, then tighten them to prevent leaks. To avoid drilling additional holes, you can instead use the existing spigots on the barrels to link them with a hose and Y splitter.
Open the valves inside each barrel, and cap the upper bibs on the intermediate barrels to prevent debris from entering. Attach an overflow hose to the upper bib of the end barrel, directing excess water to a permeable area away from structures. Aerobic decomposition works best when your rain barrels are kept clean to prevent stagnation. For proper water flow management, always ensure the final barrel is positioned lower than the previous ones. Regularly clean your barrels at least once a year to prevent clogs, and always run water through your gutters to test the system. Check all fittings for leaks and tighten as needed. Secure the barrels with earthquake straps to your structure for safety, especially in earthquake-prone areas.
Fix Common Problems: Low Pressure, Leaks, and Overflow
To fix leaks, start by inspecting the barrel body for cracks caused by UV damage. Small hairline fractures can lead to water loss and should be sealed with a waterproof patch or sealant. Next, check the spigot seals for worn gaskets; replacing these gaskets prevents leaks at the connection points. Tighten loose diverter box connections immediately to ensure they don’t cause drips or water wastage. For added protection, consider selecting a durable coop door to prevent similar weather-related degradation. Using a top pressure canner ensures reliable sealing for other homestead tasks as well.
Overflow typically means your downspout diverter is dirty or misaligned. Remove any debris or leaves blocking the inlet or outlet. Clean leaf filters weekly to prevent clogs that could cause water to back up and overflow. Adjust the diverter’s position if necessary to maintain proper water flow. Addressing these issues quickly helps keep water flowing efficiently and prevents damage or messes around your setup.
How to Maintain Your Rain Barrel for Years of Use
Regular maintenance is key to ensuring your rain barrel lasts for years. Annually, empty the barrel completely and scrub the interior with a non-toxic disinfectant. Rinse thoroughly to remove any residue. For stubborn buildup, a 3% bleach solution can be effective. Flush the spigot and overflow pipe often to prevent clogging and maintain smooth flow. Before the first frost, disconnect and drain all components, opening the spigot and bottom plug. Store the barrel upside down in a shed to prevent water accumulation and reduce the risk of damage.
To keep the exterior looking good, brush the barrel regularly to remove cracks and algae buildup. Remember that rainwater stored in your barrel is not potable—do not drink it. To prevent mosquito breeding, add mosquito dunks or a few teaspoons of vegetable oil to the water. Regularly inspect for mosquito larvae and apply larvicides or other treatments if needed. Check gutter guards and screens on a monthly basis to keep debris out of the system. Connecting multiple barrels with PVC piping can increase capacity, but make sure the system still feeds into your hoses by gravity. Secure the barrel firmly so it cannot tip over, especially in high winds or when full. Reconnect the system in spring to restore continuous water collection.