Thinking about how to collect rainwater without breaking the bank or complicating your yard? Building your own rain barrel is simpler than you might think, and with just a few basic materials, you can create an effective water catchment system.
By the end of this guide, you’ll know exactly how to set one up—from positioning your barrel to managing overflow—so you can start conserving water and reducing runoff right away.
Pick the Perfect Spot for Your Rain Barrel
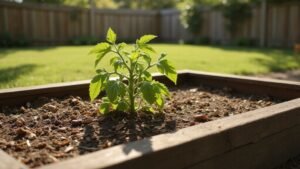
To pick the best spot for your rain barrel, choose a location near your largest roof section and close to the areas you plan to irrigate, such as garden beds or birdbaths. This placement maximizes water collection from runoff and makes it easy to use a hose from the spigot. Positioning it nearby reduces the need for long hoses and minimizes water loss during transfer. For best results, the barrel should be placed on a well-draining base similar to the soil structure recommended for raised garden beds.
Ensure the ground is level for stability. Dig out the area by 1 to 2 inches if on soil and fill it with sand, gravel, or pavers to create a sturdy base. Use a four-foot level to confirm the surface is completely even. Keep the barrel at least two feet away from your foundation to avoid water damage. Also, direct the overflow hose at least 4 to 6 feet away from the house to prevent runoff from damaging your foundation or causing pooling around the structure. For filling smaller containers like elephant watering cans, consider positioning the spigot within easy reach of your garden beds. Homesteaders often find that a metal small watering can is the best choice for durability and precise watering from the barrel.
Install the Spigot and Overflow Valve
To install the spigot and overflow valve correctly, start by positioning your rain barrel on a level, sturdy base away from the foundation. For the spigot, drill a hole 2 to 6 inches above the barrel’s base. Wrap plumber’s tape clockwise around the threaded end of the spigot, leaving the bottom quarter of the tape exposed. Insert the spigot through the drilled hole from the outside.
Inside the barrel, slide an O-ring and washer onto the threaded section of the spigot beneath the head to ensure a tight seal, then apply a bead of silicone sealant around the connection to prevent leaks. Secure the spigot with a locknut on the inside of the barrel. Tighten it firmly but avoid over-tightening to prevent cracking. A similar approach to drying herbs evenly can be applied when ensuring components are positioned for optimal airflow and seal integrity.
For the overflow valve, cut a hole about 1 inch below the rim of the barrel. Apply plumber’s tape to the threaded end of the valve, then insert it through the hole with the hose connector end facing outward. Inside the barrel, slide a metal and rubber washer onto the threaded section, then secure the valve in place with a nut. To prevent leaks, apply a bead of sealant over the threads and where the washer contacts the barrel surface. For best results, position the barrel at a raised garden bed height that allows easy access to both fittings. When properly installed, the spigot assembly is similar to the predator guard design used in wood duck boxes to protect against unwanted entry.
Once installed, test the setup by pouring water into the barrel. Check both fittings for drips or leaks, and tighten connections if necessary. Proper installation ensures reliable operation and prevents water loss or damage. To manage overflow effectively, position the barrel with its overflow valve lower than the full barrel level so gravity can drain excess water into an adjacent system.
Cut the Lid and Add Insect Screening
To cut the lid and add insect screening, start by marking a circle on the lid with a permanent marker. Use a 7/8-inch spade bit to drill a starter hole at the center of the marked circle. Then, cut along the line with a saber saw or jigsaw, rotating the material toward the cutter for a clean edge. To install the mesh, cut the screen slightly larger than the opening and place it on top with the louvered side facing up. Secure the mesh with a ribbon of caulk around the rim to ensure a tight seal and prevent gaps. It is important to create a tight seal to keep out debris and insects, similar to using a damp paper towel on a jar rim. Different barrels vary in tightness and size, so cutting out a thin strip for lid ease may be necessary if the fit is too tight. Consider using a consistent airflow to aid in drying the interior, much like the principle used in DIY food dehydrator builds. Finally, push the two lid pieces together snugly with adhesive to complete the assembly. As with vacuum sealer bags, verifying a proper seal prevents leaks and contamination.
Connect Your Downspout to the Rain Barrel
To connect your downspout to the rain barrel, start by measuring and marking the location on the downspout where you will make the cut. Use a level to ensure the top of the barrel aligns vertically with the downspout, then mark that point. Measure 3 inches downward from this mark for the center cut, then cut the downspout 8 to 12 inches above the top of the barrel using a hacksaw. Attach a 3-inch vinyl elbow to the upper cut section, then connect a short downspout segment to direct water onto the screened lid. Secure the elbow with screws to prevent leaks. For a more refined and portable setup, consider using an indoor watering can for direct transport of collected water to your garden.
Place the rain barrel on a raised, level base made of concrete blocks for stability. Fill the barrel partially with water to check its balance and sturdiness. Align the barrel inlet with the vinyl elbow, then secure the barrel in place with a strap. Connect the downspout hose tightly to the inlet using Teflon tape and silicone sealant to ensure a watertight connection. A sturdy base of cement blocks prevents the barrel from tipping over even when full. This step not only helps conserve water but also minimizes gutter maintenance by preventing debris buildup. If you enjoy these types of projects, consider constructing a compost bin using similar recycled materials from your kitchen. For your flock, a similar sturdy design is also critical to protect against predators and weather.
Route the Overflow Hose Away From Your Foundation
To route the overflow hose away from your foundation, position the outlet at least 4 to 8 feet from the house, aiming onto ground that slopes away. Use a 2-inch diameter hose—avoid downsizing to garden tubing—and ensure it has a continuous downhill slope so water drains solely by gravity. Support the hose with stakes to prevent sags that could trap debris or slow drainage. At the discharge point, install a splash block or gravel pad to control erosion and improve yard drainage. Never direct overflow onto your neighbor’s property or towards basement windows and cracks in your foundation. The goal is to move water far enough away so it cannot pool or run back toward your home. Regularly inspect and clear debris from the hose to prevent clogs and maintain proper flow. A steel hose clamp should be used to secure the hose connection tightly to prevent leaks. For ideal drainage, position the overflow outlet at a height matching roosting bar guidelines to ensure consistent gravitational flow.
Test for Leaks on the First Rainfall
To test for leaks on your rain barrel during the first rainfall or simulated test, start by filling the barrel partially with a hose. Then, repeatedly open and close the spigot, watching for any water seepage around the handle, threaded outlet, and bulkhead nut. This step helps ensure your system can hold pressure without leaks.
Next, gradually add water until the overflow activates. Follow the entire discharge route, inspecting each joint and seal for drips. Pay close attention to the connections, making sure they are airtight and sealed properly. Check the filter access point and inlet opening for a tight seal as well. Choosing a bright color for your barrel can help you spot pooling or drips more easily against the surface.
Perform this test in daylight with a helper present for a thorough visual inspection. Watch carefully for pooling, splashback, or sagging tubing, and mark any leak spots with chalk for future repairs. Before reconnecting all parts, confirm that the barrel, spigot, and overflow are completely leak-free to prevent surprises during a real rainstorm. For a reliable seal, consider using high-quality threaded connections similar to those found on top-rated drinking jars. Avoid composting weeds with seeds or persistent roots in the barrel, as they could sprout in collected water and clog the system.
Clean the Screen and Flush Sediment Annually
Regular screen maintenance and sediment removal are essential for optimal rain barrel performance. Check the mesh surface weekly or after heavy storms to remove leaves, twigs, and insect nests. Inspect the ½ inch screen for tears or warping, and rinse it with a garden hose to remove loose organic debris. Replace any damaged screens with UV-resistant mesh to prevent contamination from entering your water supply. Adding an indoor compost bin to your kitchen recycling routine can further reduce organic waste in your home. Using a wide-mouth mason jar from the review ensures easy access for cleaning and durable storage of collected rainwater. For long-term durability, consider using cedar wood for your raised bed frame, as it naturally resists rot and insects.
To remove sediment, drain the barrel once each year after pollen season. Silt buildup can decrease your water storage capacity by up to 15 percent. Use a long-handled brush to loosen compacted sediment inside the barrel. Open the bottom valve and flush with clean water until the outflow runs clear. Dispose of the sediment away from downspouts in your garden. Performing this routine annually keeps your rain barrel functioning efficiently throughout the year. A pressure washer can be used for deeper cleaning, as it effectively removes stubborn dirt and buildup from interior surfaces.