DIY Wood Compost Bin: A Simple Guide
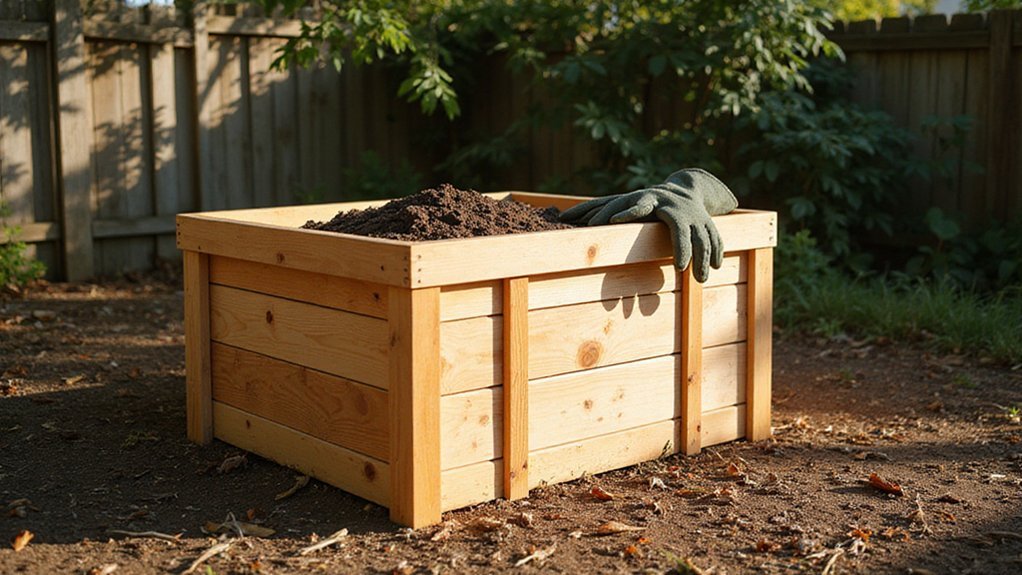
Wondering how to build an effective compost bin without breaking the bank or needing fancy tools? With just basic lumber and a weekend, you can create a simple, three-bin system that helps turn yard waste into rich soil.
Building it is straightforward, and with a few tips, you’ll have a neat setup that encourages healthy composting.
Keep reading for all the steps to make your own.
Gather Your Tools and Materials for a Compost Bin
To build a sturdy compost bin, you need to gather several essential tools and materials. Start by assessing your garden layout to find an ideal location that allows easy access for turning and maintaining the compost. Prepare the ground by leveling it and removing debris to ensure stability. A quality watering can is also useful for moistening dry layers as you build the pile.
For tools, collect a power drill, a circular saw, measuring tape, and a carpenter’s square to cut and assemble the lumber accurately. A staple gun will be useful for securing hardware cloth to keep pests out. Safety gear such as work gloves and goggles are important for protection, while clamps will help hold boards steady during assembly. When selecting materials, consider that the best cover for raised garden beds can similarly protect your compost pile from excess rain and animals.
In terms of materials, choose rot-resistant lumber like cedar or pressure-treated wood for durability. You will need 2x4s to create the frame, 2x6s for the walls, and 4×4 posts for supports. Use 2.5-inch deck screws for assembly and 1/4-inch hardware cloth to prevent pests from entering the compost. A level ensures everything is aligned correctly for stability. Having these tools and materials ready before starting will make the construction process smoother and more efficient. The same principles of predator protection that keep chickens safe in a coop apply to securing your compost bin from unwanted digging animals.
Build the Compost Bin’s End Walls and Main Frame
Start by constructing the main framework and end walls of your compost bin using 4x4s. Place two 48-inch 4x4s vertically for the sides and two 41-inch 4x4s horizontally for the top and bottom, creating a rectangular frame. Drill pilot holes with a 6-inch bit to prevent the wood from cracking, then countersink with a 5/8-inch Forstner bit for a clean finish. Fasten the pieces together using 6-inch structural screws, ensuring the frame is sturdy. Applying a moisture-resistant seal to all wood joints will protect the frame from rot, similar to how jars are sealed for freshness.
Add extra support and stability with A23Z brackets, attaching them with 1.5/8-inch screws at each corner. These brackets help prevent the frame from twisting or shifting over time. Pre-drilling all screw holes into the brackets ensures a secure fit for long-term stability. Once the frame is assembled, attach the back and outside wall boards with 3-inch screws, pre-drilling to avoid splitting the wood. Apply adhesive to all joints for added wall insulation and moisture resistance, which helps keep the compost dry and promotes proper decomposition.
Space the slats evenly along the walls to allow for adequate drainage and airflow. Install four 31-inch cross braces at the corners using 1.75-inch screws—these braces prevent the walls from bowing outward as the compost fills. Since the rear wall is stood upright after construction, the side panel placement involves securing it with initial screws to square the structure before completing it with parallel screws. Finally, set each 4×4 corner post 2 feet deep into the ground, making sure they are plumb and securely anchored for a solid, level foundation.
Add Interior Walls and Install Hardware Cloth for Pest Control
To add interior walls and install hardware cloth for pest control, start by assembling your indoor partition: place two inner panels between the two outer panels, spacing them 96 inches apart to create three sections within your compost bin. Use scrap timber as spacers between slats, leaving 1.5-inch gaps for airflow. Secure the panels with fence rail brackets—install one at the top, one at the bottom, and one midway—and screw them into the 4×4 posts for stability. Additionally, when screwing boards to the panels, ensure the tops are aligned for a uniform partition. For a vibrant watering can to complement your garden tools, consider color choices that brighten the workspace. Hardware cloth is a galvanized wire mesh that resists rust and stands up to repeated outdoor use. For optimal wood duck conservation, ensure your tools and materials are stored in durable, weather-resistant boxes.
For pest exclusion, cut pieces of hardware cloth slightly smaller than each opening. Attach these along the inside of the walls and the back frame using galvanized staples or nails. Ensure the mesh is snug but not stretched too tightly, as this can cause tearing or warping. Leave the bottom of the bin open for soil contact and aeration. The hardware cloth mesh prevents rodents from entering while still allowing sufficient airflow to aid compost decomposition. For extra waterproofing, attach roofing felt over the mesh battens.
Construct a Hinged Lid for Your Compost Bin
To build a functional hinged lid for your compost bin, start with a 3×3-foot frame constructed from 2×2 boards. Use three internal cross supports for added strength and stability. Pre-drill holes and secure the frame with 2-1/2 inch deck screws to ensure sturdy joints. Attach a 3/4-inch plywood sheet on top, spacing screws every 6 inches with a 1-inch distance from the edges to prevent splitting. Install two heavy-duty steel hinges approximately 6 inches from each back corner, pre-drilling holes to allow smooth movement. For a more durable and long-lasting build, use exterior-grade screws and seal the wood with a weather-resistant finish. Test the hinge action and regularly lubricate to maintain flexibility. Add a handle to the front center for easy opening. For security and pest prevention, drill a hole through the front edge of the lid and insert a removable pin or latch to keep pests out. Leave about a 1/2-inch gap around the edges to promote airflow, which helps decompose the compost efficiently and prevent odors. Organize your tools and materials before starting to ensure efficient construction, similar to the preparation steps in a DIY egg carton build. This lid design complements the bin’s two-compartment system by allowing access without disrupting the middle divider when turning the compost.
Pick a Shady, Well-Drained Location for the Bin
Choose a shady, well-drained location for your bin to prevent waterlogging and bad odors. Shady spots reduce heat and moisture buildup, which slows down decomposition and discourages pests. Look for an area that is naturally protected from direct sunlight and has good airflow. A shaded bin stabilizes moisture levels, reducing the need for frequent watering and keeping temperature extremes in check. For a reliable setup, consider exploring the top options in commercial bins that offer similar moisture control features. A food dehydrator uses a consistent low heat to remove moisture efficiently, whereas an oven may struggle to maintain such stable conditions over long periods. For similar results when cooking, using a wire rack allows air to circulate evenly around food, preventing sogginess and ensuring consistent drying.
Select a spot that is slightly elevated on well-drained ground. Elevation reduces water retention by about 30 percent, preventing soggy conditions that can lead to anaerobic decay. Avoid low-lying areas that stay wet and soggy throughout the year, as these promote mold and pest issues.
Place the bin at least 10 feet away from your house to minimize odors and deter pests. Ensure there is at least 3 feet of clearance on all sides for easy turning and maintenance. This setup promotes better airflow and access, making your composting process more efficient and less smelly.
Maintain Your Compost Bin by Turning and Watering
To maintain your compost bin effectively, you should turn and water it regularly. Aim for moisture that feels like a wrung-out sponge—squeeze a handful and ensure no water beads. During hot seasons, water at least once a week, spraying while turning to distribute moisture evenly. Develop a turning schedule: flip hot compost every 2 to 4 days, and cold compost every 3 to 7 days. Use a pitchfork or aerator to lift and mix the layers, keeping oxygen circulating. To prevent odors, balance greens and browns by adding dry materials if it gets too wet or watering if it is too dry. Following this routine ensures active microbes and faster decomposition. For a different approach, consider building a worm compost bin to process kitchen scraps indoors. Check the bottom of the bin for burrows or holes to identify potential pest entry points. For optimal results, remember to alternate green and brown layers when building the pile initially, as this correct ratio enhances microbial activity and aeration from the start. For a similar hands-on preservation method, consider dehydrating food to prevent waste and store excess harvest.