How to Install a Rain Barrel for Homesteading
Wondering how to set up a rain barrel for your homestead? It’s a simple process that can help you conserve water and cut down on watering costs.
By the end, you’ll know how to properly install and connect a barrel to harvest rainwater efficiently and securely. Read on for step-by-step tips to get your system up and running smoothly.
Cut and Drill Your Rain Barrel for Spigot and Overflow
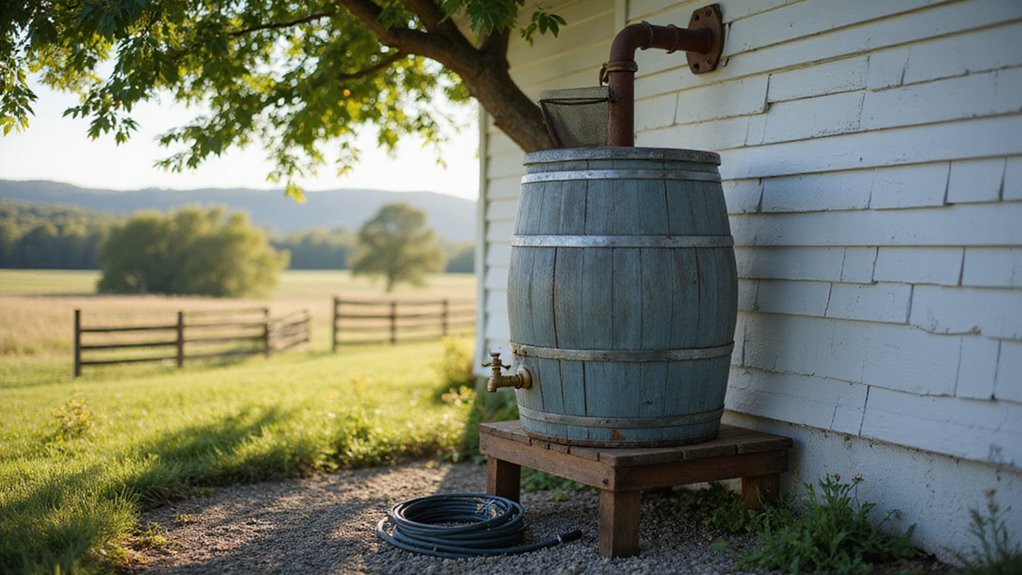
To prepare your rain barrel for collecting water, you’ll need to cut and drill for the spigot, overflow, and inlet. Start by marking the top center of the barrel for the downspout inlet. From there, measure 1 inch downward from the top edge to mark the overflow hole. On the opposite side, mark the spigot hole 2 to 3 inches above the bottom edge for proper drainage. The entire setup should sit on a stable, level base to prevent tipping when full. A rain barrel diverter connects to the downspout to automatically redirect water into the barrel once it reaches capacity.
Choose a barrel color that suits your aesthetic and helps hide dirt—darker hues are a good option. However, prioritize the material’s durability since it must withstand exposure to weather. Once the markings are in place, drill a 1-inch pilot hole inside the inlet circle. Use a jigsaw to cut out the inlet, leaving approximately a 1-inch rim for a screen to prevent debris from entering.
Next, drill a 7/8-inch hole near the top for the overflow. For the spigot, drill another hole about 10 inches above the barrel’s base. Use a threading tap to ensure the fittings can be properly threaded into the spigot and overflow holes, securing a tight fit that prevents leaks. Avoid rushing these cuts to ensure clean, precise holes for proper installation. Select a barrel that is food-grade to prevent toxic contamination if water contacts plants or animals. For a more convenient watering experience, consider pairing your barrel with a Bloem Easy Pour watering can designed for efficient use on the homestead.
Install the Rain Barrel Spigot and Overflow Hose
To install the rain barrel spigot and overflow hose, start by wrapping five flat layers of Teflon tape clockwise around the spigot threads. Insert the spigot from inside the barrel outward, about three inches above the bottom to prevent sediment clogging. Secure it with a washer and rubber seal on the interior, then tighten the nut by hand. Apply plumber’s glue around the external washer to ensure a watertight connection. This method works reliably for multiple container sizes like 55-gallon barrels, 5-gallon buckets, or 275-gallon totes. For larger setups, ensure your coop’s drainage system handles overflow just as a chicken coop built to redirect rainwater away from the foundation. Similarly, well-designed wood duck nesting boxes are elevated and placed near water to prevent flooding and predation. This same principle of elevated drainage applies to a bin compost build where airflow and moisture control are critical for decomposition.
For the overflow hose, attach a flexible elbow to the downspout and drill an inlet hole ten inches from the barrel rim. Insert a rubber grommet into the inlet and extend the fill hose fully without slack. Route the overflow hose at least three feet away from your foundation and angle it downward for proper drainage. Use stakes to secure the hose in place. To maintain the spigot, regularly check for drips, and for overflow, verify that the hose does not pool near walkways. Test the entire system by filling the barrel halfway and inspecting all joints for leaks.
Level the Ground and Elevate the Barrel for Stability
To level the ground and elevate the barrel for stability, start by clearing the area of debris and vegetation. Excavate the site to a depth of 3 to 4 inches and spread the soil evenly to prevent erosion. Fill the excavated hole with 3/4-inch clear crushed stone, tamping it down every two inches until you reach the desired grade. This compacted stone base helps prevent shifting and settling over time. The weight of a full barrel causes cinder blocks to settle, so a stable base is crucial for preventing instability. This approach also helps manage stormwater runoff and reduces localized erosion around the foundation. Using a watering can to transfer the first few gallons from the barrel can help you test the flow without needing the hose attached. For convenience, consider choosing a model with a removable spout to make filling and cleaning easier.
Next, create a stable platform by placing concrete blocks or pavers on top of the stone. Align them precisely front-to-back and side-to-side, then use a 2-foot level to confirm the surface is perfectly flat. To ensure the barrel’s proper elevation for gravity flow, elevate it with bricks or cinder blocks, making sure there is enough height for efficient water flow to your garden hose. If necessary, secure the barrel to a nearby structure with rope for additional stability. Before filling the barrel completely, add a few gallons of water inside and gently rock it to verify there is no movement, confirming stability and proper leveling.
Connect the Downspout to Your Rain Barrel Inlet
To connect the downspout to your rain barrel inlet, measure and cut the downspout at 18 inches above the barrel’s top, accounting for its raised base. Use a hacksaw for a clean, precise cut, then remove any shavings to prevent clogs. Attach a flexible downspout elbow with screws or PVC cement, aligning it so water flows directly into the barrel inlet. Proper positioning ensures smooth water transfer and prevents misalignment or splashing during rainfall. Ensure the tiny triangle on the flexible rubber connector points upward when inserting it into the downspout.
Install a screened inlet to keep debris out and maintain water quality. Verify the mesh is tear-free and securely attached. This approach is similar to using a durable container for feed storage, as both systems prioritize cleanliness and longevity. For protection against heavy storms, securing the barrel to a stable structure is as critical as building a sturdy chicken coop to withstand outdoor conditions. Connect overflow tubing, routing it 4 to 6 feet away from your foundation to manage excess water safely. Secure the barrel beneath the downspout elbow with straps to prevent tipping or movement during heavy rain. While a dehydrator provides more consistent heat for preserving food without hot spots, oven drying is often less energy-efficient.
Seal threaded fittings with Teflon tape and apply caulk to drilled holes to prevent leaks. After installation, check all connections during the first rainfall to ensure there are no leaks or opportunities for mosquitoes to enter. Inspect regularly to maintain an efficient rainwater harvesting system.
How to Disconnect and Store Your Barrel in Winter
To disconnect and store your rain barrel for winter, start by unscrewing the white plastic nut from the diverter outlet while leaving the tubing attached to the barrel. This step prevents water from remaining inside the diverter, which could freeze and crack the fitting. Next, seal the diverter with its original black cap to block water entry during the off-season. Drain the barrel completely by opening the spigot; use a hose or bucket to remove all leftover water. Leave the faucet slightly open to allow residual drips and prevent pressure buildup. Removing water prevents expansion that can crack the container. Additionally, the height for roosting bars should be determined separately to ensure your chickens have a safe and comfortable perch. You can also repurpose a small plastic bin to store kitchen scraps for composting while your barrel is stored. Drying the inside of the barrel with a cloth helps prevent mold growth, similar to how a food dehydrator removes moisture from banana chips.
For storage, move the barrel to a protected area like a garage or shed. It’s best to place it upside down to prevent snow and debris from accumulating inside. If outdoor storage is necessary, turn the barrel upside down, cover it with a tarp, and secure the cover with ties to a nearby post or stake. Store any hoses inside the barrel to avoid damage from freezing temperatures and cracking. Reinstall everything after the last hard freeze in spring to ensure your rain collection system remains in good condition year-round.