Wondering how a simple Walmart watering can can be a clever part of your homesteading tools? You might be surprised to learn that with just a few tweaks, this common item can become a precise seedling pumper or even a customized mister.
Ready to see how you can turn an everyday watering can into a versatile garden hack? Keep reading for the full details.
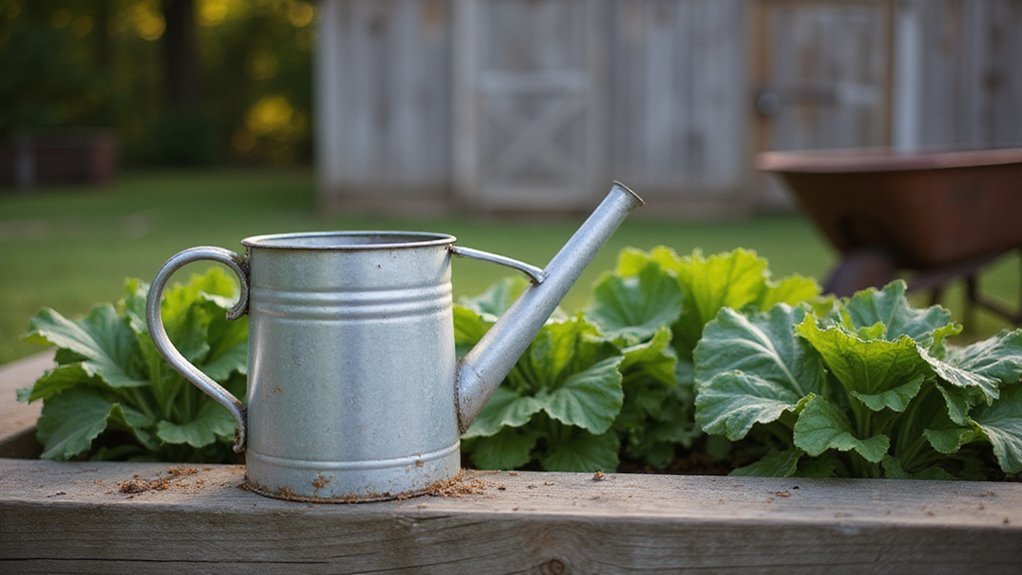
Choose a Walmart Watering Can for Your Homestead
Choosing the right water capacity is crucial. A five-gallon watering can works well for large outdoor beds, providing ample water without needing frequent refills. For medium-sized plant areas, a four-gallon can strikes a balance between weight and capacity, making it manageable over extended watering sessions. Keep in mind that a full five-gallon can weighs about 40 pounds, so opt for one you can lift comfortably to prevent strain. For those managing a homestead, pairing this tool with a top compost tumbler can streamline organic waste recycling and improve soil health. Walmart offers various sizes to match your homestead’s needs, ensuring you stay efficient without sacrificing ease of use. For more targeted tasks, consider a watering can with a long spout for precise watering of seedlings. Wood duck nesting boxes, by comparison, require careful attention to proper entrance dimensions to deter predators and ensure safe use.
Pick the Right Can for Seedlings and Containers
A watering can with a narrow, downward-curving spout and a 0.5 to 1-gallon capacity is ideal for seedling and small container watering. The narrow spout allows for targeted root irrigation at the soil line, helping you avoid wetting foliage and reducing disease risk. A 40+ hole rose produces a fine mist, perfect for early germination and gentle watering. An adjustable flow valve offers control over soil moisture, enabling you to switch from a soft drizzle to a gentle shower. This prevents root lifting and soil displacement, ensuring consistent moisture levels. Choose a lightweight can that is easy to maneuver with one hand, making it suitable for tight container gardens. Avoid high-pressure streams that could disrupt delicate roots, and opt for a tool designed to deliver a gentle, controlled flow for optimal seedling growth. For collecting and applying water, consider pairing your can with compostable bags to simplify transferring kitchen scraps to your backyard bin. Models like the KBby Long Spout excel at reaching tricky spots with their 14-inch spout, making them perfect for tight container spaces. You can also use the same gentle watering technique to rinse dirt and debris from coop surfaces before applying disinfectant. However, if you are using a Mason jar as a makeshift watering vessel, remember that standard Ball jars are not microwave safe due to potential thermal shock.
Plastic vs. Steel: Which Material Works Best?
Steel is the more durable choice. It can last between 10 and 30 years with proper care, especially when made from rust-resistant materials like galvanized or stainless steel. These handles and finishes withstand outdoor humidity without degrading. In contrast, plastic hose-end cans typically last only 2 to 5 years before UV exposure causes brittleness and cracking. Brass watering cans offer even greater longevity, often lasting for decades without rusting. For kitchen use, baking chicken wings on a steel rack offers similar long-term durability and even heat distribution. For outdoor structures, pressure treated lumber provides comparable longevity against moisture and rot.
When comparing costs, steel requires a higher upfront investment—about three times more than plastic. However, because plastic needs replacement every few years, steel becomes more economical over its lifetime. Its longer lifespan and recyclability provide greater value in the long run. If you garden regularly, choosing a steel can means you won’t need to replace it often, saving you time and money over time.
Turn Your Basic Can Into a Custom Misting Tool
Converting your existing watering can into a misting tool is a simple and cost-effective alternative to buying a specialized model. Start with a basic plastic, metal, or glass watering can. Swap out the standard nozzle for a misting nozzle made of brass, plastic, or stainless steel—these materials are all compatible. Instead of soldering, use a drill or sander to enlarge or modify the nozzle opening to accommodate the misting attachment. This setup isn’t just for gentle watering; it creates a fine mist that conserves water by directing it precisely where needed. It’s especially useful for watering delicate plant leaves or applying pest deterrents, such as targeting aphids or spider mites with a focused spray. This approach is similar to how homesteaders carefully evaluate if a vacuum sealer is worth the investment for long-term food preservation and tool efficiency. When considering tool upgrades, try a similar cost-benefit analysis as you would for air removal features in food storage equipment. This homemade solution also mirrors the budget-minded mindset of checking for a Dollar Tree watering can before paying more for specialized gear. Overall, this homemade solution provides a versatile tool that outperforms store-bought misting cans in both cost and adaptability.
Add a DIY Spray Nozzle With a Soldering Iron
To create a DIY spray nozzle using a soldering iron, start by inserting high-temperature ceramic tubing into the tip of the iron, ensuring a snug fit. Secure the tubing with high-temp silicone gasket maker to prevent air leaks. Then, fill the heated soldering iron tip with solder wire to create a molten reservoir; this allows you to dip wire leads for proper tinning. Attach a fish air pump to the nozzle handle using aquarium tubing and a T-connector to control airflow precisely. Remember to wear safety gear because the soldering iron gets very hot. This setup produces a powerful stream of hot air straight from your watering can, making your watering task more versatile. For homesteaders, this hack aligns with practical watering guidance found in expert cartoons. For a more durable seal, consider using mason jar lids that feature a rubber gasket for airtight performance. This technique can be reinforced by studying a step-by-step build guide for automatic chicken feeder projects to understand consistent assembly methods.
Prevent Rust After Modifying Metal Watering Cans
To prevent rust after modifying your metal watering cans, start by thoroughly removing surface oxidation with a wire brush. Use fine grit sandpaper to smooth rough edges and prepare the surface for sealing. For stubborn rust spots, steel wool can be effective but work gently to avoid damaging the metal. Rinse everything with high-pressure water to wash away debris and residues. Apply a chemical rust remover to neutralize any remaining acidic compounds and inhibit future corrosion. Once cleaned, seal the metal with a protective coating to block moisture that causes rust. Choose a rust-inhibiting paint or clear metal sealer. An epoxy primer offers strong adhesion, while spray sealants provide even coverage, especially on complex shapes. Ensure the surface is smooth for better paint or sealant adhesion, as this proper cleaning helps prevent further rust development. A reliable hygrometer would be crucial for monitoring the moisture levels during this drying phase. For long-lasting results, consider using a raised bed soil mix since its balanced composition resists the acidic conditions that accelerate metal rust. When choosing a sealant, wide mouth lids from the reviewed options offer an airtight seal that can protect stored tools and materials from moisture. Conduct this work in a well-ventilated space while wearing heat-resistant gloves and eye protection for safety.
Three Cheap Alternatives: Mason Jars, Bottles, and Buckets
You can water individual herbs effectively using a mason jar with a drilled lid, which drips slowly over 12 to 24 hours. By inverting a mason jar filled with water and fitting a lid with small holes, you create a simple, low-cost drip irrigation system. To set this up, drill 3–5 small holes in the lid, then screw it onto the jar. Place the jar upside down near your herbs, ensuring it is stable. This method provides a steady supply of moisture directly at the root zone, minimizing evaporation and runoff. For best results, use a wide-mouth mason jar to ensure a stable base and easy filling. This technique aligns with traditional Spanish homesteading practices that prioritize resource conservation.
Plastic bottles are best suited for medium-sized plants. Bury a capped bottle upside down with 3–5 small holes poked in the cap, close to the plant’s roots. Water seeps out gradually over three to five days, providing consistent moisture without needing daily attention. Be sure to bury the bottle deep enough to stabilize it and prevent tipping, and keep the holes small enough to control the flow.
For larger garden beds or multiple plants, a 5-gallon bucket fitted with tubing and a shut-off valve works well. This system functions as an adjustable drip emitter, with each bucket capable of serving three to five plants. Fill the bucket with rainwater or tap water, connect the tubing with a flow regulator, and place the outlet near each plant. This setup delivers a steady, customizable flow of water over several days, reducing waste and manual watering.
Adapt Your Watering Can for Vertical Garden Systems
To adapt your watering can for vertical garden systems, start by extending the spout to 12–18 inches. This length ensures you can reach deep-tier pockets without splashing leaves above, which helps prevent leaf burn and soil erosion. Integrate a 4–5 foot flexible hose onto a rigid 1/2-inch pipe connector for multi-point watering. Aim for a flow rate of 0.5 to 1.0 liters per minute to avoid overwatering or runoff. This method, using a slow, controlled flow, also enhances nutrient uptake when a weak fertilizer solution is added.
For a secure, durable connection, heat a 1/2-inch PVC collar to 140–160°F and fit it over the spout, ensuring a 2-inch overlap. Clamp the hose onto the collar with a 3/4-inch clamp to prevent 98% of disconnections during use. Drill nozzle holes measuring 1–2 millimeters at a 15–20° inward angle to achieve a uniform spray pattern, covering all pockets evenly.
Finally, retrofit your system with a battery-powered drip irrigation kit equipped with a timer. This automation reduces manual watering needs by approximately 70%, saving time and ensuring plants receive consistent moisture. Regularly check the nozzle holes and connections for buildup or leaks to maintain optimal performance.
Protect Your Can Through Freeze and Thaw Seasons
To protect your watering can from freeze and thaw damage, start by draining all remaining water completely after use. Residual water can expand when it freezes, causing cracks or warping, especially in metal cans. For metal containers, applying a foam jacket or thermal blanket offers insulation and helps prevent brittleness during cold spells. If you store your can outdoors in an unheated shed, wrapping it with a rubber sleeve or layered fabric provides additional protection. When thawing a frozen can, always use gradual warming—avoid sudden heat sources like fire or direct sunlight—as rapid temperature changes can cause structural damage. During particularly harsh winters, bringing your watering can indoors ensures it stays safe from freeze-thaw stress. These steps help maintain your container’s integrity and ensure reliable watering season after season.