Cleaning and disinfecting your chicken coop might seem overwhelming, especially when you’re trying to keep your flock healthy.
The key steps involve thorough cleaning, choosing the right disinfectant, and allowing plenty of time for everything to dry.
By following proper protocols, you can effectively reduce the risk of disease and keep your chickens safe.
Keep reading for a clear step-by-step plan to disinfect your coop safely.
Prep Your Chicken Coop and Gear for Cleaning
To effectively disinfect your chicken coop, you need to prepare both the space and yourself first. Begin by isolating your flock in a secure, predator-proof run with access to food and water. Remove all bedding and manure using a shovel, and scrape dried debris from walls and perches to remove organic matter that can harbor bacteria and parasites. Take out every feeder, nest box, and roost, then wash them thoroughly with warm, soapy water to eliminate residual dirt and residues. Next, perform a deep mechanical clean by spraying all surfaces, scrubbing hard-to-reach corners, and rinsing thoroughly to remove loosened dirt and soap. Improving ventilation is vital—open doors and windows to promote airflow and speed up drying. For seasonal cleaning, dry the coop completely in warmer months or use a dehumidifier during winter to prevent mold and moisture buildup. Finally, wear protective gear such as rubber gloves, a dust mask, and long sleeves. Make sure your safety equipment is in good condition before you start cleaning to protect yourself from dust, bacteria, and other potential hazards. For an added layer of preparedness, you can apply the heat and vacuum sealing method to store your clean gear free from contaminants. Consider selecting a coop with smooth surfaces to simplify future sanitation and reduce hidden debris. A full step-by-step build guide can help you construct a coop that naturally resists moisture and pest buildup from the start.
Choose a Disinfectant That Kills Avian Flu Safely
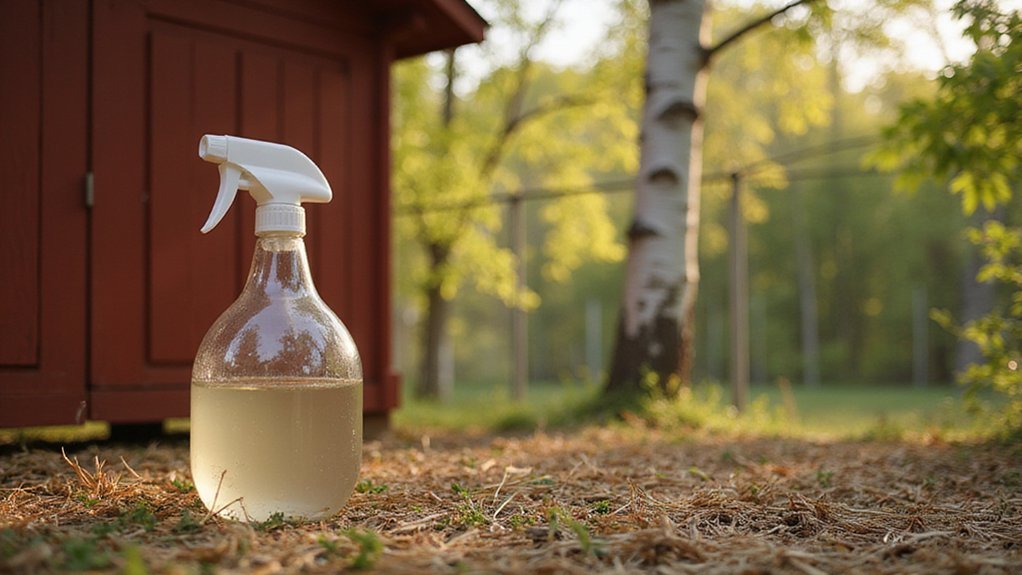
To safely eliminate avian flu, select disinfectants proven effective against influenza A and suitable for your coop’s surfaces. Look for labels that explicitly state about influenza A or avian influenza. Phenolic disinfectants like Pine-Sol are effective on hard, nonporous surfaces such as roosts and feeders, but avoid using them on porous materials. For porous items like litter or bedding, products like Virkon S or accelerated hydrogen peroxide are recommended because they penetrate and disinfect these surfaces effectively. Never mix bleach with phenolic cleaners or ammonia, as this can produce toxic gases that endanger both you and your flock. Proper training on disinfectant use is essential; always adhere to recommended contact times and wear protective gear to prevent injuries. When applying disinfectants to foot baths, use a 1:25 bleach dilution to ensure safety and effectiveness. Following these precautions can prevent recontamination and help keep your flock safe from avian flu.
Scrub and Rinse Every Surface Top-to-Bottom
Start scrubbing and rinsing every surface from the top down. Use a stiff brush to manually clean walls, floors, perches, and nesting boxes, ensuring you reach corners and crevices where dirt, mites, and beetles hide. This thorough approach helps remove pest habitats and prevents reinfestation. After scrubbing, rinse all surfaces with clean water to wash away loosened dirt and debris. Open windows and doors to improve airflow, which accelerates drying and reduces mold buildup. Sweep out any excess water from the floors and surrounding areas. Remember, disinfectant will come later; for now, focus on cleaning with water to establish a clean, dry foundation for the next steps. Choosing glass jars with lids for storing cleaning supplies helps keep your workspace organized and pest-free. For efficient disposal of removed waste, consider using a top-rated compost tumbler for easy organic waste recycling. For a similar approach to managing waste odors, consider choosing a kitchen compost bin that simplifies daily cleaning routines.
Apply Disinfectant With Proper Contact Time
Apply the disinfectant with the correct contact time to ensure it effectively kills pathogens. Most disinfectants need to remain wet on surfaces for at least 10 to 15 minutes to be fully effective. For example, Oxine AH only requires about 5 minutes, whereas phenols often require 30 minutes or more. Work from the top of the coop down, using a pump sprayer to ensure even coverage on all surfaces and especially on high-traffic areas. Keep surfaces visibly wet during the entire contact time. Close the coop doors to prevent vapor escape, which can reduce effectiveness. Do not rush this step; shorter contact times can result in incomplete disinfection. Homesteaders can also look to resources like Mastering Watering Cans for practical tips on using spray equipment effectively. For long-term storage of disinfectant supplies, consider using airtight mason jars to maintain potency. Wait the full duration specified on the product label before touching or reintroducing animals to ensure the coop is properly sanitized. One helpful approach is to design a raised bed garden near the coop to repurpose spent bedding as nutrient-rich compost for gardening.
Dry, Inspect, and Return Coop to Service
After disinfecting the coop, you must dry it completely before reintroducing chickens. Wait 2 to 10 minutes after rinsing so surfaces can air-dry. To speed up the process, open all windows and ventilation doors to improve airflow. Proper ventilation helps prevent dampness in nesting boxes, corners, and under roosts. Allow at least 4 to 8 hours for thorough drying, ensuring all surfaces are completely dry to prevent respiratory issues for your chickens.
Next, inspect the coop thoroughly for damage and pests. Check walls, roof, and floor for holes or cracks that could allow entry for predators or pests. Examine nesting boxes, perches, and roosts for splinters, loose parts, or instability. Search dark corners for signs of mites, lice, or rodent activity—prompt pest detection is essential for maintaining a healthy coop. Confirm that doors and hatches close tightly to keep out predators.
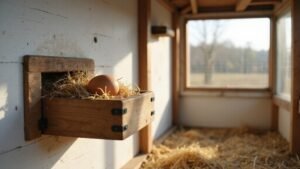
Finally, replace old bedding with fresh, dry material. Add 2 to 4 inches of bedding to the floor and nesting boxes to provide a clean environment. Clean feeders and waterers with hot soapy water, then refill and secure all objects before returning your chickens. Observe them for the first 24 hours after re-entry to ensure they are comfortable and adapting well.