DIY Raised Garden Bed Covers: A How-To Guide
Raising a garden bed and wondering how to protect your crops from pests and bad weather? Building a simple cover using a wood frame and PVC hoops can make a huge difference. It’s an affordable DIY project that keeps plants safe and healthy, boosting your gardening success.
Keep reading to see how you can set up your own garden bed cover step by step.
Why Build a Cover for Your Raised Garden Bed?
Building a cover for your raised garden bed is essential for protecting your crops from pests. A simple physical barrier, such as mesh or bird netting, effectively keeps aphids, birds, and rodents at bay. This method eliminates the need for chemical pest control, allowing your plants to thrive naturally. With pests unable to reach your plants, you’ll see a noticeable increase in your garden’s yield and health.
In addition to pest protection, a cover helps regulate the climate around your crops. It traps heat, creating a mini-greenhouse environment that can shield plants from unexpected frosts. It also acts as a barrier against heavy rain and strong wind, preventing soil erosion and damage. Maintaining consistent moisture and insulating soil under the cover encourages stronger root development, leading to healthier, more vigorous plants and a more successful gardening experience. For those wanting durable protection, look for designs that offer easy access features similar to those found in top-rated coops for optimal ventilation and maintenance.
For maximum seal durability, consider using lids with wide mouth rings that prevent warping under temperature changes.
Gather Your Materials: Wood, PVC, and Fasteners
To gather your materials, start with 2×4 lumber cut into 51-inch end pieces and 89-inch side pieces for the base frame. Use these measurements to ensure the structure will be stable and the right size. Grab 4-inch screws and corner brackets to secure joints tightly, and drill 1/8-inch pilot holes to prevent wood splitting during assembly. When selecting your fasteners, consider choosing the best compost bin materials to ensure durability in outdoor conditions.
For PVC piping, cut Schedule 40 pipe to your bed’s inner width minus 1.5 inches. You’ll need T-connectors and elbow fittings to form the hoop supports and connections. Plan to add more PVC and T’s for larger beds, with approximately one T every 4 ft. Apply PVC primer and cement to create strong, durable bonds that won’t come apart easily. When building a mobile structure, you can adapt this PVC framework using simple pivot hinges to easily open one side for access.
Select conduit straps to anchor the hoops every 3 to 4 feet, providing steady support for the frame. Utility hinges and pull handles will facilitate easy access when tending your plants. Coordinate your hardware finishes and spray paint colors to achieve a uniform look across the entire setup. For added convenience, consider using wide-mouth jars to store small fasteners and tools, as their easy access design is ideal for keeping supplies organized.
Keep all your tools, fasteners, and materials organized in your tool storage area for quick access during assembly. Finally, gather UV-resistant zip ties, greenhouse clamps, and your preferred covering—either plastic or mesh—to complete your greenhouse or hoop house project. Proper preparation ensures a smooth building process and a sturdy final structure.
Prep and Treat Your Wood Frame Before Assembly
To prep and treat your wood frame before assembly, start with surface preparation. Remove dirt and loose fibers by scraping, then sand all edges with fine-grit paper to open the grain and eliminate splinters. Wipe away dust thoroughly with a tack cloth to ensure a clean surface.
Next, apply a non-toxic wood treatment such as linseed or tung oil. Make sure to coat every face, including end cuts and hidden joints, to create a moisture barrier. Allow the treatment to dry completely before proceeding—this step requires patience. Reapply oil every 6 to 12 months to maintain durability. For an alternative approach, consider using red wigglers from a worm composting system to naturally break down organic matter near the garden. Western red cedar is a naturally rot-resistant species that offers a longer lifespan without chemical treatments, though it comes at a higher cost. Using pressure-treated lumber ensures safety for vegetable gardening and provides cost-effective longevity of 10-15 years. For a high-performance seal on the assembled frame, consider using a vacuum sealer to tightly wrap moisture-prone joints with protective plastic.
Finally, seal vulnerable end cuts and corners with a dedicated wood sealant. This step is crucial to prevent water pooling and rot, extending the life of your frame and protecting your plants. Skipping it can lead to premature deterioration, so don’t overlook this protective measure.
Build a Sturdy Base and Corner Posts for Your Cover
To build a sturdy base and corner posts for your cover, start by establishing the framework on your leveled ground. Measure and mark four corner points to define the base footprint. Drive two stakes into the ground at each end and two more in the middle to create a total of eight support points. Place these stakes where the frame curve begins to ensure proper alignment, pushing them down to the inside edge until they reach the bottom surface. Leave at least 12 inches above ground level to allow for secure attachment of the frame. You can use PVC pipe feeder construction principles to ensure consistent stake spacing and alignment. For best results, consider choosing a construction sand for chicken coop with sharp angular grains that lock together firmly for stability. Using a watering can cartoon can help visualize the proper stake placement around your garden bed.
Next, cut 2×4 lumber into 33-inch lengths to serve as corner posts. You will get two posts from each six-foot board, which helps minimize waste. Position each post one foot in from the frame’s ends for optimal stability. Secure the bottom frame box to each post using three galvanized screws per connection, with all layers kept flush to maintain uniform height. Repeat this process for all four corners. For even greater strength, you can build each post using a layered slotting design with 2x6s and 2x8s, bolting them together with galvanized carriage bolts. Then, add a second row of boards, screwing them in three places per end, followed by a third row in the same manner. Using 2.5-inch galvanized screws throughout ensures durability and prevents rust. This layered base provides effective soil drainage and a solid foundation to support your shade coverage.
Build Roof Gables and Attach the Top Frame
To build roof gables and attach the top frame, start by cutting your vertical frame members to the required length. Secure them with 3-inch deck screws, drilling pilot holes first to prevent splitting of the wood. Install 45-degree braces at each corner; these help keep the structure square and rigid. Attach hinges to the upper roof crossbars approximately 10 centimeters from the edge using 3.5 x 16 millimeter screws. Fasten the roof ridge with 4 x 40 millimeter screws, combining two 24 x 74 x 2000 millimeter wooden slats for stability. Fix the gable ends to the lengthwise base frame slats using 4 x 60 millimeter screws. To enhance rigidity, add horizontal braces every four feet across the gable supports. Ensure the roof frame is square and level by checking alignment as you work, applying the Pythagorean theorem (3-4-5 rule) as in the initial post layout. These gables provide a sturdy foundation for future upgrades such as solar irrigation tubing and pest deterrents, ensuring your raised beds remain productive and protected.
Install PVC Hoops for Raised Bed Cover Support
Start by measuring the width of your raised bed accurately. For a standard 4-foot-wide bed, you will need 10-foot PVC pipes to create a 3- to 4-foot-high arch. Precise measurements are crucial; use a ratcheting cutter to cut each pipe to the exact length, ensuring clean, even ends. For anchoring, pound rebar stakes into the soil along both sides of the bed, inserting them 6 to 8 inches deep and angling them slightly inward for stability. Space these stakes evenly, with hoop supports placed 2 to 3 feet apart along the length of the bed. Slide each PVC pipe over a rebar stake, gently bending it into a smooth arch. Make sure all arches are uniform in height and curve to maintain even tension when attaching the cover later. Leave some overhang on the sides of each hoop to secure the fabric cover securely. 1/2 inch Schedule 40 PVC supports shade cloth, plastics, and hail covers, making it a versatile choice for this framework. This will give your raised bed a sturdy, well-supported framework for the cover.
Pull the Row Cover Tight and Pinch It Closed
Pull the row cover tight lengthwise and pinch it closed to keep insects out. With the PVC hoops securely in place, stand five to six hoops ahead of sandbaggers to gain leverage. Pull gently so the cover fits snugly but is not stretched to the point of tearing. This tension along the lengthwise keeps wind from lifting the material off the hoops. Effective pest control relies on moving crops seasonally to reduce overwintering pest populations. For a similar approach to securing lightweight materials, you can use a simple tray system from a DIY quail feeder build to hold the cover edges down. Additionally, this method mimics how a chicken tractor rotates livestock to manage pests and soil health. When choosing tools for such projects, consider the cost and lifespan of materials to ensure durability.
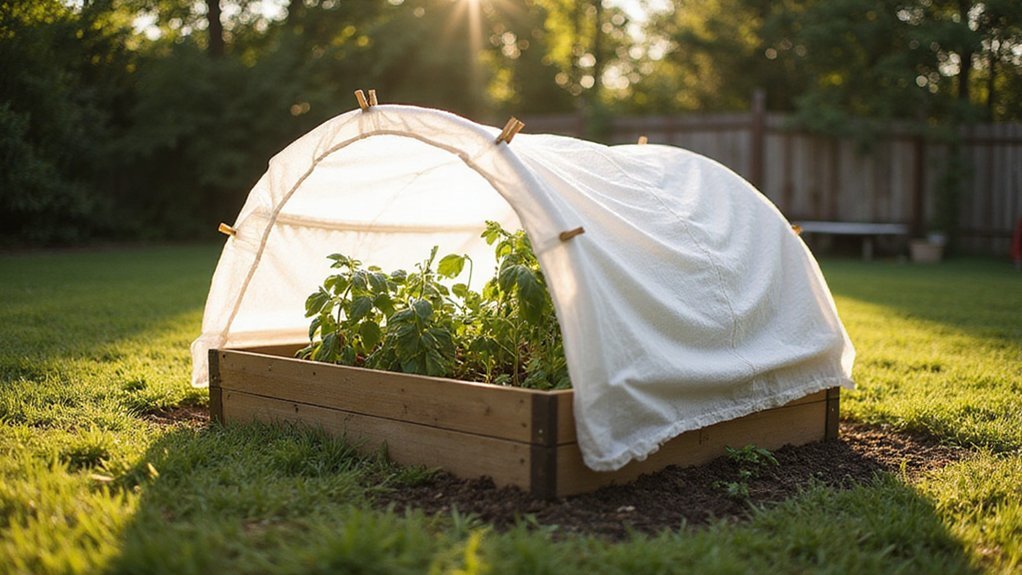
Next, pull the cover across the bed width to remove any slack. Work with a partner on each side to form a square section at a time. Ensure there is at least six inches of extra row cover on all sides resting on the ground. Scrunch the excess fabric at both ends and pinch it flush against the corners to prevent gaps. A tight, complete seal along all edges is essential for effective pest prevention.
Secure the edges by wrapping the excess fabric around rocks, bricks, or sandbags, tying it off to hold everything in place. Confirm that the entire cover is taut but gently held, resisting wind without damaging the material. Proper tension and secure anchoring ensure the row cover stays in place and functions effectively.
Install Hinges for a Liftable, Removable Cover
To install hinges for a liftable, removable cover, start by placing the hinges along the longer side of the frame. Measure 6 to 12 inches from each end for optimal placement. Mark the pivot points with a pencil to guide drilling. Before attaching the hinges, drill pilot holes that are slightly smaller than the screws to prevent the wood from splitting. When building the frame, ensure the measurements accommodate the intended use, including the hinged design for easy access. Fully spread the hinge leaves during installation to verify proper clearance and movement. Using brass or stainless steel screws, attach the hinges by inserting them through the hinge plates into the wooden frame, ensuring they sit flush and are fully countersunk. Align the cover over your raised bed, then secure the second side of the hinges to the upper bed wall. Test the lid’s pivot movement by lifting it gently. For a durable setup in wet conditions, consider installing a rain barrel to collect runoff from the cover. Make adjustments to hinge depth if there is sagging or uneven gaps. For covers wider than 3 feet, add a center support beam to maintain structural integrity and prevent sagging. For a more durable setup, consider using galvanized or stainless steel hardware to resist rust and weathering in outdoor conditions. A raised bed garden for homesteading benefits from this hinged design by allowing easy access for planting and maintenance.
Secure the Row Cover With Elastic Bands and Rocks
To secure the row cover effectively, you will use elastic bands to gather and tighten excess fabric at the tunnel ends, then weigh down the edges with rocks. Start by pulling the fabric taut over your hoops to prevent slack that could catch the wind. Apply elastic bands at intervals of 2 to 4 feet along the ends to hold the fabric securely in place. This spacing helps prevent wind from lifting the cover and keeps rain from slipping underneath. The recommended roosting bar height for chickens follows a similar principle of stability and accessibility.
Next, place fist-sized rocks 6 to 8 inches apart on one side of the tunnel, then repeat on the gathered side after cinching. This spacing creates a seal that minimizes pest entry by blocking insects from crawling underneath. After banding, push the end hoops slightly inward to increase tension, which improves stability. Finally, set rocks over the banded sections to prevent elastic slippage during strong winds, ensuring your cover remains firmly anchored throughout the season. When cutting the hardware cloth for the tunnel frames, use tin snips to make clean, straight cuts without bending the wire edges.
Check for Gaps That Let Wind and Pests In
Start with a visual inspection of all corners and edges, especially where the frame meets the ground. Gaps as small as 1 to 2 millimeters can allow insects inside, while openings about 0.5 millimeters or larger can let in wind and cause damage. Pay close attention to corners, as concrete weights or soil loads can sink them, creating separation. Even flat ground isn’t foolproof—any shift in the frame can lead to openings. Feel around the edges by pulling the cover tight and pressing along the seams to identify weak spots. Don’t forget the middle sections; wide spaces between supports can also create vulnerabilities. Adding cross supports and bamboo stakes across the middle helps stabilize the frame, as the vertical supports form the structural backbone for the poly pipe framework.
Seal all material joints thoroughly. Gather and twist the cover fabric at corners, then clamp it tightly to prevent lifting. Adding cross supports across the middle can help stabilize the frame. Use clamps and screws along edges to keep the cover secure, minimizing voids or gaps. Address every opening now, as it’s far easier than repairing damage caused by wind or pests later.