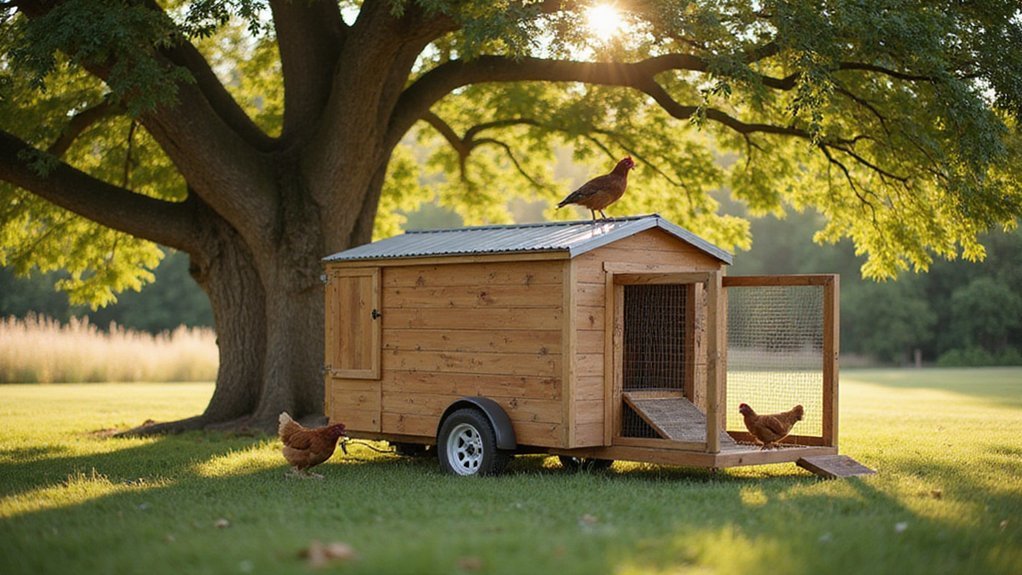
Thinking about keeping chickens but worried about high feed costs and protecting them from predators? A mobile chicken coop, or chicken tractor, can help you save money and keep your flock safe by moving it to fresh grass and bugs every day.
Building your own allows you to customize size, ease of movement, and weather protection.
Keep reading to find out how to create your own simple, effective chicken tractor.
Why Build a Mobile Chicken Coop? Benefits of a DIY Tractor
Because you move a mobile coop regularly, your chickens access fresh grass, bugs, and a variety of nutrients that improve their health and lower your feed costs. Foraging can meet up to 30% of their daily nutritional needs, influencing your feeding strategy naturally. During peak insect seasons, you’ll see a significant drop in commercial feed expenses. This diverse diet also contributes to stronger eggshells and darker yolks, thanks to the variety of food they consume. For those new to flock keeping, reviews of top chicken coops can help you compare permanent stationary options as well. You might consider following a step-by-step guide for a DIY duck coop if you decide to build a second, stationary structure. If you want to preserve excess summer fruit for healthy chicken treats, a food dehydrator is excellent for making fruit leather and dried snacks.
Moving the tractor frequently enhances predator protection by preventing predators from learning the coop’s location. Stationary setups may become easy targets, but when you shift the coop daily, predators’ patterns are disrupted, reducing threats to your flock. While they feast on insects and greens, their immune systems are strengthened, and the land benefits from increased organic matter, negating the need for chemical fertilizers.
Gather Lumber, Conduit, and Tools for the 8×16 Coop
To gather materials for building the 8×16 coop, you’ll need specific lumber, conduit, and tools. First, collect 2x4s: two pieces of 94.5 inches for the base and top framing, and two 22-inch pieces for corner supports. These dimensions help create a sturdy frame and support structure. For larger framing, gather 2x6s in 16-foot and 8-foot lengths to form the main foundation sides and ends, providing ample support and stability for the structure. For a lightweight build, this coop design shares the goal of minimal waste and versatility from the chicken tractor approach. This approach also prioritizes easy access to feed for the chickens, a common concern among homesteaders. Homesteaders can apply expert insights from watering can material guides to select durable, rust-resistant hardware for the coop. Experts suggest that a raised bed height of around 12 to 18 inches is optimal for most vegetables, reducing the need for bending.
Next, for the roofing, you need 3/4-inch conduit. Cut 36-inch pieces to serve as the upright legs and 24-inch pieces for the peaks. These will form the frame of the roof, offering enough height and strength. You will also bend the conduit as needed: create 90-degree bends at the peaks and 22-degree bends at the 24-inch marks on the uprights. Use a pipe bender designed for conduit to ensure clean, precise angles. Connect the conduit sections with 1-inch sleeves to secure the shape and stability.
In addition to conduit, gather your cutting and fastening tools. You’ll need a reciprocating saw to make clean cuts in conduit and lumber. A power drill equipped with deck screw bits and pilot hole bits is essential for assembling the frame, avoiding splits and ensuring tight connections. A staple gun is necessary to attach hardware cloth securely, keeping predators out. Use 3/4-inch self-tapping screws consistently for fastening, as they offer strong hold and ease of use. Be cautious to drill pilot holes before screw insertion—this prevents splitting in the lumber and keeps your assembly precise.
Build the Base Frame and Side Walls With 2x4s
You will build the base frame and side walls using 2x4s to create a sturdy structure measuring exactly 8 feet by 8 feet. Start by cutting two 2x4s to 94.5 inches for the front and back pieces, and two to 93 inches for the side pieces. Stand the 2x4s on their edges with the wide sides facing up. Overlap the corners inside to avoid overlength, then secure each joint with exterior-grade glue and twelve 3/8-inch wood screws.
Next, cut four 22-inch pieces for the corner uprights. Attach these vertical supports at each corner using toe-nailing or pocket hole screws for added strength. For the side walls, cut two additional 2x4s to 93 inches for the top rails. Position vertical posts every 24 inches from the end, securing them with 2-inch screws. This frame will support your 48-inch plywood and wire mesh panels, providing a stable base without requiring an extra roof peak later on. For the chickens’ comfort, consider that interior roosting bars are best positioned 2-4 feet high to allow birds to roost safely and easily access the nesting boxes. To ensure the wood withstands outdoor moisture, select naturally rot-resistant wood like cedar or redwood for the frame.
Create the Coop Roof Peak With Bent Conduit
To form the coop’s roof peak, you’ll bend two sections of 1/2-inch EMT conduit to a 10° angle using a conduit bender. Place the conduit in the bender’s groove, step on the foot pedal, and apply leverage until the arrow on the bender head lines up with the 10° mark. Precise bending ensures both sides are symmetrical for your roof assembly. After bending, connect the two halves with an electrical coupling and secure it with self-tapping screws to prevent shifting. Wipe off any Sharpie marks for a clean appearance. For added flexibility, install an adjustable angle connector at the peak to fine-tune the slope to your preferred angle. Extend vertical conduit pieces from the baseboard to this connector to adjust the roof height as needed. Using a handheld tubing bender allows for quick, simple bends and cost savings by reducing the need for extra connectors. Later, attach hardware cloth to the wooden baseboard with staples or screws to secure the coop walls. A similar focus on practical guidance ensures your tools and materials work efficiently for large homestead projects. Properly bent and assembled, this creates a sturdy, symmetrical roof peak that provides a solid foundation for the rest of your coop. You can also recycle organic waste from the coop into a top compost tumbler to fertilize the surrounding garden.
Frame the Doorway and Install the Kickstand Assembly
To frame the doorway, cut two 24-inch pieces of 2×4 lumber to create a square opening. Sandwich a 1/2-inch hardware cloth between the frame strips before final assembly. This prevents gaps and adds strength. Install hinges 3 inches from the top and bottom of the frame, ensuring a balanced support. Secure the hinges with screws that penetrate at least 1 inch into the wood for durability. For a smooth swing, aim for a 90-degree arc to provide easy access. To weatherproof the frame, apply a 1-inch strip of roofing tape along the outer edge and seal all screw holes with exterior wood filler to protect against moisture. Ensure the door frame includes a 1/2 inch gap around for easy opening and closing, as done in the structural construction of the tractor. For similar projects, selecting wide mouth mason jars can simplify storing hinges and small fasteners.
Attach Hardware Cloth, Tarps, and Weather Protection
Attach hardware cloth, tarps, and weather protection by cutting 1/2-inch mesh into 37 by 75-inch sections for the sides to prevent predators. Leave a 1 to 2-inch overlap past the edges of the tractor to create a skirt. Secure the mesh from the inside using heavy-duty staples every 8 inches, wrapping corners at 90 degrees and attaching with zip ties every 5 inches to ensure a tight fit. Overlap the hardware cloth on top and secure tightly with screws and staples to prevent any predator entry.
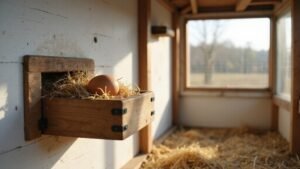
For tarp installation, cover about two-thirds of the arch with a weather-resistant material, wrapping extra around the back to enhance rain protection. Staple the tarp to the wood base and wire-tie eyelets to the hoops for added stability. Make sure the tarp extends one to two feet past the tractor edges to facilitate easy opening and closing like a hinge. Additionally, add a two-foot predator skirt along the entire perimeter, overlapping sections slightly and weighting them with PVC pipes to prevent movement. Check regularly for gaps larger than a quarter inch to maintain your shelter’s integrity. Cleaning the bedding area periodically helps prevent moisture buildup and ammonia odors, keeping the coop healthier for your birds. For filling the watering container inside the coop, consider using a Bloem Easy Pour model for its efficient, spill-free design. For the bunnies’ comfort, ensure the interior includes a proper nesting box placed securely away from drafts.
Mount Caster Wheels and Install Feeders for Final Use
Attach caster wheels and install feeders for final use. Use heavy-duty rubber or polyurethane casters with ball bearings to ensure smooth rolling on gravel surfaces. Selecting the best wheel for your chicken tractor, such as models with sealed bearings, can extend the lifespan of the casters on rough terrain. When choosing wheels for stability, consider that Western red cedar is often recommended for its natural rot resistance in outdoor projects. Secure axle brackets with bolts, washers, and nuts, and check the alignment with a level before tightening fully. Mount the wheels to provide six to twelve inches of ground clearance, which helps deter predators from accessing the coop. Elevate the chicken tractor to create space for attaching wheels, then double-check all connections regularly to prevent frame stress during movement. Many gardeners also rely on a reliable stand to keep their rain barrel stable and level during installation.
For feeder placement, hang tube feeders twelve to eighteen inches above ground to reduce rodent access. Position them at coop entry points to minimize spillage while allowing chickens to move freely. Use plastic gravity feeders capable of holding five to ten pounds of feed for their corrosion resistance and ease of cleaning. Lubricate swivel mechanisms periodically and inspect feeders routinely to prevent blockages and ensure a steady supply of food.