Struggling with frequent water refills for your chicken coop? A simple gravity-fed system can solve that, providing clean, steady water without the constant hassle.
By setting up a 5-gallon bucket with the right fittings, you’ll save time and keep your flock hydrated more easily.
Keep reading to learn how to build and maintain this efficient setup.
Why a Gravity-Fed Chicken Waterer Works Best
A gravity-fed chicken waterer works best because it provides a continuous flow of fresh water without the need for electricity or pumps. Water from an elevated reservoir naturally flows down through PVC pipes or tubes into the drinking cups, ensuring your chickens always have access to clean water. The height difference between the reservoir and the drinking cups maintains steady pressure, making water flow reliably. This system eliminates the long walks to the coop that previously totaled over 40 miles annually, reducing transportation waste. For optimal function, the reservoir should be placed at an elevation that mimics the right height for roosting bars to ensure consistent water pressure without causing spills. Placing the reservoir in a shaded, ventilated area keeps the water cool during hot months, preventing overheating and supporting your chickens’ health. Since the system refills automatically, you save time and effort, avoiding daily watering chores or concerns about power outages. This simple setup promotes healthier birds with less maintenance, making it an ideal choice for any coop. A brooder box can also be used to house chicks near the waterer for easy training. Maintaining proper temperature and humidity is similar to the careful incubator conditions needed for hatching eggs without an incubator.
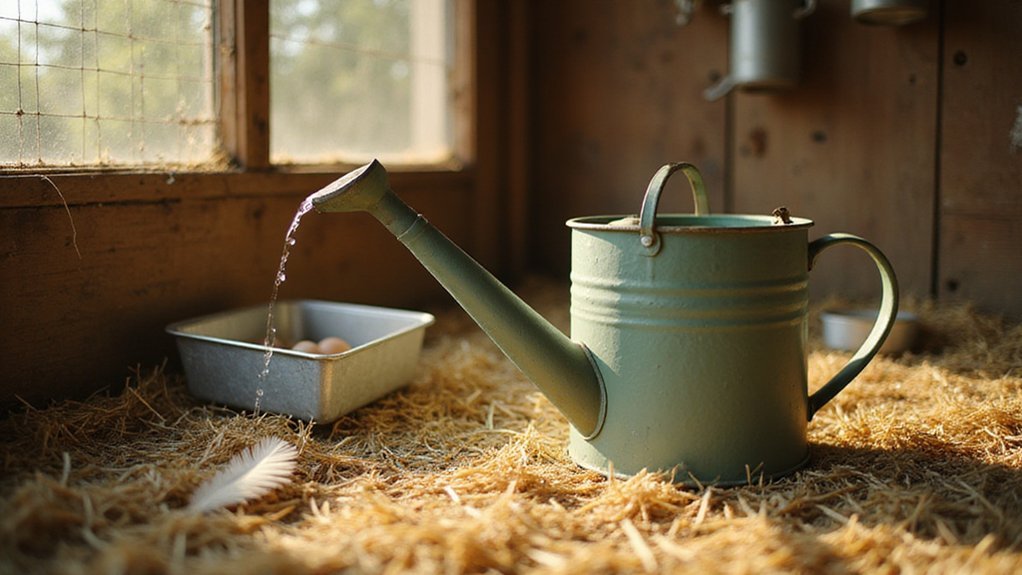
What You’ll Need to Build Your 5-Gallon Bucket Waterer
To build your 5-gallon bucket waterer, you will need a standard plastic bucket with an airtight lid, seven to nine poultry drinking nipples, and a roll of 1/4-inch PVC tubing. These supplies ensure a clean, sanitary water supply that prevents contamination, marking a significant improvement over traditional open troughs used by early poultry keepers. While glass or metal buckets are options, plastic is preferred because it is lighter and easier to drill. You will also require a power drill equipped with a 5/8-inch spade bit for installing the nipples and a 1/4-inch bit to create an air vent hole. Additional materials include waterproof PVC glue, silicone sealant, and bulkhead fittings to secure all connections. To collect any drips, place a metal or plastic saucer pan underneath, and elevate your setup on an old wooden pallet for easier access and drainage. This design mimics the elevated, protected water sources recommended in top chicken coop reviews for healthier flocks. Using a crescent wrench and pliers will help tighten these fittings securely during assembly. Similar to the rain barrel concept, a downspout diverter can redirect runoff into a secondary container for convenience. For an elevated garden setup, consider a raised bed garden kit to keep your plants organized and accessible. Gathering these items beforehand will save you time and prevent delays during assembly.
How to Drill and Install Poultry Nipples Step by Step
To drill and install poultry nipples, you’ll need to mark hole locations at least 2 inches from the bottom of your container, spacing each nipple 6 inches apart. Use a 3/8-inch drill bit for PVC containers or an 11/32-inch bit for thicker plastics. Drill at a low speed to prevent melting or cracking the plastic. Once the holes are made, clear away any plastic debris from each one. For the best long-term results, consider using cedar or redwood which naturally resist rot and moisture damage.
Wrap thread tape around each nipple’s threads 2 to 3 times, taking care not to cover the O-ring. Insert a rubber grommet snugly into the hole, then screw in the nipple until it is tightly secured. Only Columbus Aqua nipples are compatible with this method to ensure durability and a leak-free guarantee. Install one nipple for every 3 to 4 birds to ensure adequate water access. If your container is sealed, drill two to three small vent holes near the top to prevent vacuum buildup and allow smooth water flow. Properly drilled and installed nipples ensure reliable water delivery, combining ease of use with durability for your flock.
Where to Place the Waterer for Clean Water and Easy Access
Place the waterer at least 2 feet away from feeding bowls and manure zones to reduce the risk of contamination. Keep it well clear of roosting areas so droppings don’t fall into the water. Position it away from high-traffic paths to prevent active birds from knocking it over. Choose a spot that allows easy access for cleaning and refilling, and ensure multiple chickens can drink simultaneously without crowding each other. For optimal airflow, consider placing the waterer near top vent options to reduce humidity and keep the area dry. The heavy bottom design prevents tipping and stabilizes the unit during chicken activity. A dual-wheel wheelbarrow can help you easily transport heavy water containers across uneven coop terrain. When positioning the waterer outdoors, consider using a garden cover to shield it from direct sun and debris.
Mount the Unit at the Perfect Height for Your Chickens
Mount the waterer so the nipple actuating pin sits between 12 and 20 inches above the ground for adult chickens. This height allows the chickens to drink comfortably, supporting a head tilt of 45 to 55 degrees and a slight neck stretch. Proper placement prevents awkward drinking postures that could cause strain or reduce water intake. For chicks and pullets, set the nipple pin at eye level, roughly 4 to 6 inches high. Adjust the height for larger breeds, which may require the unit to be raised above 20 inches, and smaller breeds that need placement lower. Remember, the goal is to match the waterer height to natural drinking angles, similar to watering plants at the right level to promote proper root growth. Cup rims should sit lower than nipples to encourage natural drinking postures and keep your flock comfortably hydrated. Selecting a durable waterer is like choosing a top-rated compost bin that prioritizes quality and performance for reliable daily use. As with selecting the right container for composting, choosing a compost bin that fits your flock’s size and your space will streamline your waste management. A food dehydrator can also preserve herbs and vegetables from your garden, offering another way to support your flock’s nutrition.
Weekly Cleaning Routine for a Healthy Water Supply
To keep your flock healthy, you should flush the water lines weekly with a sanitizing solution to remove biofilm buildup. Use a commercial poultry water line cleaner or a mixture of water and approved disinfectant. This process helps prevent bacterial growth and ensures clean water reaches your hens. On Sunday, scrub the waterer interiors with hot water and a mild detergent to remove any residual dirt or buildup. Follow this by applying a disinfectant solution at a ratio of 1 part bleach to 10 parts water, ensuring thorough coverage. Rinse the waterer completely to remove any chemical residues. Allow it to air dry fully before refilling to prevent mold and bacterial growth. Replenish the water daily to prevent stagnation, which can promote bacteria and algae. Regularly check water nozzles for clogs caused by sediment or mineral deposits, which can restrict water flow. Monitor the water temperature constantly to keep it within the ideal range for your hens, generally between 55 and 75 degrees Fahrenheit. Test the water’s pH weekly, aiming for a level between 6.5 and 7.5, to maintain optimal conditions. Also, check for signs of ammonia or turbidity, as these indicate poor water quality that needs immediate attention. This routine is part of regular cleaning that helps prevent pests and mold buildup, maintaining a healthy environment. Following these sanitation practices consistently helps prevent contamination and provides your flock with a safe and healthy drinking source. For added convenience, you might consider repurposing a plant watering can to manually flush water lines between deep cleanings, as detailed in gardening guides for homesteaders. For large breeds, ensure the waterer height and access points are adjusted to accommodate larger birds comfortably, preventing spills and injury. When disinfecting equipment, always apply a coop disinfectant approved for use around poultry to avoid harming your flock.
How to Fix Dripping Nipples and Airlock Problems
To fix dripping nipples and airlock problems, start by ensuring proper sterilization of your equipment. Residual bacteria or debris can cause blockages that lead to airlocks, which in turn can cause dripping. Use a no-rinse sanitizer or boiling water to thoroughly clean all components.
Next, check the airlock itself. Sometimes, it gets clogged with yeast or sediment. Remove and clean it carefully with warm water. If it’s damaged or cracked, replace it with a new one, as a faulty airlock prevents proper gas escape or intake, causing pressure build-up and leaks.
For dripping nipples specifically, debris like pine needles or dirt can become lodged in the pin area or around the O-ring, preventing a proper seal. You can use basic DIY tools to disassemble and carefully clear any obstructions from the nipple assembly. Adding a childs watering can can help gently flush out any remaining debris from the nipple valve.
Adjust the fermentation temperature if it’s too high; excessive heat can increase CO2 production, overwhelming the airlock. Keep your fermenter in a room with a stable, appropriate temperature—typically between 65°F and 75°F (18°C to 24°C)—to maintain steady fermentation and prevent the buildup of excessive pressure.
Finally, verify that the lid or bung fits snugly but does not overtighten. Overtightening can hinder gas escape and contribute to pressure issues. Using an airlock cap that fits properly and ensuring there are no leaks around the seal helps regulate pressure and reduces dripping. Regular inspection and maintenance are key to preventing these common fermentation problems, and using a vacuum sealer for dry feed storage can also minimize airborne debris that settles into nipple valves.
When to Replace Nipples, Gaskets, and Buckets
Replace nipples when their pins show signs of wear, cracks, or buildup that impairs flow. Usually, a five-year interval is standard, but replace sooner if flow rate drops compared to a new nipple. Check for loose or worn pins, corrosion, or calcium scale accumulation that can clog or weaken the connection. Gaskets should be replaced when they become flattened, cracked, or start leaking around the seal, not from the tip. Press on gaskets to test their tightness; if they don’t regain their shape or fail to seal properly, replace them. For long-lasting performance, choose glass jars with lids designed to resist cracking and maintain a steady water supply. Buckets need replacement if cracks appear from overtightening, if lids lack air holes which hinder airflow, or if handles become weak or broken. Regularly inspect flow rates at multiple points along your line to detect any systemic wear. Tapping to dislodge debris and pressing gaskets to test tightness can help you determine immediate replacement needs before a failure occurs. Check water flow regularly, as clogged or damaged nipples may reduce delivery rates.
Why a Gravity-Fed System Saves Money on Electricity
A gravity-fed system saves money on electricity because it eliminates the need for electric water pumps. You’ll save approximately 15–30 watts per hour of operation, which can reduce your annual electricity costs by $50 to $100. Additionally, you avoid pump maintenance costs of $30 to $50 each year and prevent hidden water leakage repairs associated with pump systems. With no moving parts, your gravity-fed system can run indefinitely without breakdowns, removing the need for pump replacements every three to five years. This simplicity means fewer expenses and less hassle over time. The water is gravity-fed from the rain barrel through a garden hose connector to supply the cups automatically.