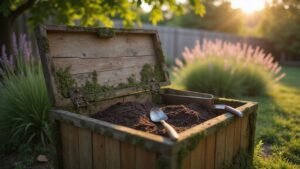
Thinking about turning your trash can into a compost bin? With just a few simple steps, you can create an effective system for turning kitchen scraps and yard waste into nutrient-rich compost.
By the end, you’ll be able to compost confidently right in your own backyard, reducing waste and nourishing your garden. Keep reading for your complete DIY guide.
Drill Ventilation and Drainage Holes for Your Trash Can Compost Bin
Drill ventilation and drainage holes for your compost bin using a 2 1/8-inch bit. Place the holes around the can’s circumference, 4 to 6 inches apart, both horizontally and vertically, to ensure good airflow. Add extra holes in the lower third of the sides and lid to prevent anaerobic conditions, aiming for at least 30 holes in total. For drainage, drill 20 to 30 small 1/4-inch holes across the base, clustering 5 to 6 near the center. After drilling, cut 4-inch square pieces of window screening and hot-glue them inside each ventilation hole to keep pests out while allowing airflow. Elevate the bin on bricks to enable air circulation underneath and improve drainage. This method utilizes an old plastic trash can as a cost-effective alternative to purchased compost bins. To further stabilize your setup, consider adding a sturdy rain barrel base to keep the bin level and elevated above standing water. For those also interested in attracting cavity-nesting birds, proper nesting box design ensures adequate drainage and ventilation, similar to these compost bin requirements. The same approach to airflow and pest prevention is critical for chicken coop ventilation to maintain a healthy flock.
Layer Browns, Greens, and Kitchen Scraps in a 3:1 Ratio
Layer greens, browns, and kitchen scraps in a 1:3 ratio, with greens making up about a quarter of the layers. This balance prevents odors and keeps the compost aerobic. Always cap greens immediately with browns because exposing them releases ammonia and attracts flies. Adding moisture with a watering can helps maintain the damp sponge-like consistency needed for active decomposition. For a more convenient setup, consider a kitchen compost bin that fits under your sink to collect scraps before transferring them to the outdoor pile. Homesteaders often place their compost system near a raised bed garden for easy access to finished material.
Just alternate thin green layers with thick brown layers, repeating the process continuously. This easy pattern helps your pile heat properly, breaks down faster, and avoids slime or stink. Keep the layers consistent to maintain a healthy, odor-free composting environment. Using multiple bins allows one pile to mature for 2-4 months while others are being filled.
Roll the Can Weekly or Stir With a Rebar Rod to Turn Compost
Regular turning is essential to prevent anaerobic conditions and maintain a healthy compost pile. You should roll your compost can weekly or stir it with a rebar rod every 7 to 10 days. To do this, secure the lid firmly with bungee cords, then roll the can on its side for 10 to 15 rotations. Alternatively, if rolling isn’t practical, insert a 1/2-inch rebar rod straight into the center of the pile and twist it in a spiral pattern to reach the bottom layers. Focus on breaking up the lower third of the pile, where compaction tends to occur. Unlike a pressure canner used for canning, a regular compost can doesn’t need to withstand high pressure. A Dollar Tree watering can works well for adding moisture to the pile when it becomes too dry. For a more hands-off approach, you can use a worm compost bin to let worms naturally aerate the pile.
Maintain this turning schedule: roll twice weekly during the first 2 to 3 weeks, then reduce to once weekly. After about two months, extend the interval to every 14 days. Consistent turning speeds up decomposition, cutting your total composting time from six months down to three or four months. Be careful not to stir too vigorously, as that can destroy essential air pockets, and avoid skipping turning for more than two weeks to prevent odors and slow breakdown.
Harvest Finished Compost When It Looks Dark and Crumbly
Your compost is ready to harvest when it appears dark and crumbly. It should have a deep brown or black color, similar to high-quality store-bought potting mix. The texture should be loose and powdery, without large chunks or wet, clumpy material. If it still looks chunky or damp, it’s not mature yet.
Microbial activity slows down significantly once compost is mature, so the pile stops generating heat and matches the ambient air temperature. Give it a smell test: it should smell sweet, earthy, and like forest soil. If it smells sour or ammonia-like, it needs more time.
You can also perform a simple bag test: place a handful of moist compost into a sealed bag for five days. If it still smells earthy afterward, it is ready for use. Before applying, sift out any remaining twig pieces or large fragments. To ensure your finished product stores well, consider using a mason jar sealer for an airtight container option. Once sorted, you can confidently use your finished compost to enrich your garden soil.
Use Your Compost to Feed Gardens, Lawns, and Potted Plants
Once your compost appears dark and crumbly, it’s ready to nourish your plants. Spread 2 to 4 inches of compost evenly over garden beds, keeping it at least a foot away from stems to prevent rot. For established plants, dig holes about 12 inches deep and fill each with roughly 2 quarts of compost to give roots a nutrient boost. When maintaining your lawn, mow short, core aerate to open up soil, then apply a thin layer of compost about a quarter inch thick. This helps improve soil structure and supports reseeding. For potted plants, mix equal parts compost and native soil or use sifted compost alone if sterilized. Apply a 1 to 2 inch top layer and keep it at least 2 inches away from plant stems, then water lightly to allow nutrients to seep down into the soil.