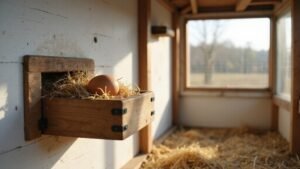
Wondering how to make a simple egg basket for your backyard chickens? You can build one yourself and save a good chunk of money—around 40 to 60 percent—compared to buying a ready-made one.
By choosing the right materials and size, you’ll end up with a sturdy, predator-proof container that keeps your eggs safe and organized.
Keep reading to get the full step-by-step.
Why Build Your Own Egg Basket Instead of Buying One?
Building your own egg basket can save you 40 to 60 percent compared to store-bought options. You’ll typically spend just $5 to $10 on materials instead of $35 retail, and buying in bulk can cut costs even further by about 15 percent. Choosing recycled materials like milk crates or old cabinets helps reduce plastic waste and eliminates the carbon footprint associated with shipping. For a truly eco-friendly setup, look for the best bin for compost to repurpose food scraps alongside your egg collection system. An open-weave design tailored to your chicken coop’s ventilation needs allows fresh airflow around your eggs, keeping them cleaner and fresher longer. For those sourcing commercial materials, top mason jars for wholesale offer similar bulk savings on durable storage containers. You can customize the height to prevent heavy breeds like Rhode Island Reds from breaking eggs during collection, or add adjustable dividers to minimize hen squabbles—both creating a more efficient and organized process. Plus, DIY baskets tend to last three to five years longer with minimal repairs, saving you money over time. Not only do you cut costs, but you also build a smarter, greener, and more durable egg collection system. For best results, pair your basket with a top-rated coop that offers excellent ventilation and easy access.
What Size and Shape Should Your Egg Basket Be?
The size and shape of your egg basket should match your typical harvest. A small ergonomic basket with a 5-inch bottom width works best for collecting 8 to 12 eggs, as it provides enough interior space without being bulky. For 15 to 25 eggs, opt for a medium-diameter basket to ensure all your eggs fit comfortably. Larger operations handling 36 eggs require a wide basket with a 12.875-inch top opening to prevent overcrowding. For optimal cleanliness and hen comfort, raise boxes off the ground when designing the overall nesting area to keep eggs cleaner and reduce mess. Ensure the basket is constructed from durable chicken wire to withstand frequent use and outdoor conditions.
Your basket shape is equally important. Tapered side walls help prevent shifting during movement, reducing the risk of breaking shells. Rounded corners distribute stress more evenly, also protecting your haul. A flat bottom ensures stability on uneven ground, and a 14-inch opening diameter allows easy access and quick collection. Avoid shallow baskets less than 10 inches deep, as eggs can easily roll out when you move. By matching your flock’s output to these dimensions, you can gather efficiently while minimizing breakage. Similar to how raised garden beds require the right soil composition, your egg basket’s design is key to a successful harvest. To further optimize your setup, consult expert recommendations on the best coops for Silkies to ensure your nesting area integrates well with overall hen housing.
Select the Right Wood, Wire, and Fasteners
Choosing the right materials for your egg basket is essential for durability and safety. Use ¾-inch exterior-rated plywood such as BCX or rot-resistant cedar, which resist moisture and heavy loads without warping. These woods are ideal for withstanding outdoor conditions and frequent use. For optimal predator defense, consider design features found in the best brooder box reviews for chickens. For bedding inside the basket, you can also look at top bedding options for a chicken coop to ensure comfort and cleanliness.
For wire, opt for 19-gauge galvanized hardware cloth with ½-inch mesh. This size effectively blocks predators, secures eggs, and allows sufficient airflow. The galvanized coating prevents rust and extends lifespan, making it a reliable choice for outdoor poultry projects.
Select fasteners that are galvanized or made from stainless steel, measuring between 1¼ to 1½ inches long. Space these screws about 6 inches apart along the edges to ensure strong joints. Avoid nails because they are less durable and prone to popping out over time. Incorporating corner brackets can also add rigidity, reducing stress at joints and enhancing overall stability. Make sure all fasteners are non-toxic and free from zinc or lead to keep your chickens safe. This combination of materials guarantees a sturdy, long-lasting egg basket.
Cut and Drill the Plywood Sides
You should mark, cut, and shape the two plywood side panels to match your egg template. Start by tracing a full-scale egg onto 1/2-inch plywood, making sure the bottom width is exactly 5.75 inches. Use a jigsaw to cut both panels identically, following the wood grain for cleaner edges. After cutting, sand all edges with 80-grit sandpaper to remove splinters, then smooth with 150-grit for a finer finish. Ensure the bottom edge remains flat for a snug fit. Pre-drilling holes into the half-inch plywood prevents splitting during assembly.
Next, drill the critical holes. Use a Forstner drill bit to create a shallow hole halfway through the top center of each panel for the handle attachment—avoid drilling all the way through. Pre-drill small nailing holes approximately 1.5 inches apart near the top edge to secure the dowel handle. A drill guide can help keep the holes straight and perpendicular. Check that both panels are identical before proceeding to the next step. For long-lasting durability, consider using pressure treated lumber for the coop’s base and frame.
Attach the Hardware Cloth Bottom Without Sagging
To prevent the hardware cloth bottom from sagging, you need to pull the mesh taut before securing it. Start by applying wire tension with your hand, stretching the mesh downward 12 to 18 inches while holding firm. Use a hammer claw as a lever to tighten corners and edges—not skipping this step is crucial. For consistent tension, place zip ties along the frame before final fastening, tightening them gradually to prevent dimpling. This process, much like rolling dough, requires uniformity and precision to ensure an even, tight fit across the entire frame. For optimal results, choose a canner with a durable pressure gauge that maintains consistent pressure for delicate tasks like hardware cloth tensioning and sealing. When selecting the metal mesh, consider the best cover for raised garden beds to ensure the material is galvanized and resistant to rust.
Next, lock the tension in place with solid fastening techniques. Use a pneumatic stapler set at 100 psi to drive 1-inch galvanized staples every 2 to 3 inches along the frame edge. Position the staples directly over crosspieces where wire sections connect, and avoid hand paths. Drive staples at a 15-degree angle to draw the mesh tighter as you go. Regularly check for sagging every 4 to 6 inches along the span—if you notice any, re-stretch and re-staple until the mesh becomes drum-tight. For wood duck boxes, this method ensures the mesh resists predator claws and remains secure over time.
Add a Dowel Rim for Extra Stability
Adding a dowel rim enhances the stability of your hardware cloth bottom. Use 1/2-inch diameter wooden dowels that are at least 8 inches long for each nest opening. To ensure a snug fit, drill 1/4-inch deep pilot holes into the basket’s rim edge before inserting the dowels. Apply wood glue to each dowel end and seat them using a rubber mallet, then clamp the rim tightly while the glue dries to prevent slippage. Securing the dowels in this way increases rim rigidity by roughly 40%, which helps prevent egg collapse during transport. This upgrade also reduces sagging and removes sharp edges that could hurt your birds. Match the dowel wood to your basket’s material for consistent weathering and appearance. Inspect the dowels monthly for wear or looseness, and replace any that are loose immediately to maintain long-term stability. This technique is similar to how the chicken coop walls were assembled by screwing into place and then trimmed flush for a precise fit. For additional protection against moisture, apply a light sealant to the dowels, mimicking the expert tips and advice used for watering cans to prevent wood rot. Properly securing these parts is much like framing a claymation set, where precise joinery prevents wobble under repeated use. For a durable upgrade, consider choosing dowels that match the top roost options for your chicken coop to ensure consistent material quality and performance.
Tie the Internal Cord to Lock Everything Together
Once the dowel rim is secure and dry, you can tie the internal cord to lock everything in place. Start by wrapping the anchoring wire around the circular frame at least four times to create a tight grip. Twist the end of the wire through its own loop to lock the knot, then pull firmly until it rests against the basket’s base to prevent slipping. For additional durability, work harden the circular frames using a planishing hammer to prevent distortion from handling. A plastic watering can with a reinforced grip is similarly designed to resist wear during heavy homestead use. For a long-lasting seal, it helps to evaluate vacuum sealer top rated models for their robust construction and consistent performance. Homesteaders should also consider the proper height for roosting bars to ensure their chickens roost comfortably and securely.
Next, weave the internal cord in opposite directions along the height of the basket. Maintain consistent tension as you go, securing the cord in place after each pass to avoid slack. Every time the cord descends, connect it to the frame to keep tension even and ensure stability.
Before tying off, apply a half-twist to the cord to tighten the structure further. Lock this twisted section with a separate thread wrap, wrapping it three to five times for a secure hold. Pull the thread tight until it snaps cleanly to avoid loose ends. Finish by trimming any excess wire with sharp pliers, ensuring no sharp edges remain that could cause injury or snagging.
Seal and Finish the Basket for Outdoor Durability
To seal your outdoor basket effectively, start by cleaning it thoroughly. Remove all dirt, dust, and grime using a soft brush or vacuum. Wipe sticky spots with a damp cloth dipped in mild soap, then rinse and dry completely. Allow the basket to dry for 24 to 48 hours in a warm, well-ventilated area to prevent trapping moisture inside. For homesteaders wondering about energy use, note that this drying method consumes far less electricity than a food dehydrator would. You can also use the vacuum sealing process on the basket’s lid to ensure an airtight closure for long-term storage of dry goods.
Once dry, apply two thin coats of an exterior-grade spar varnish or marine urethane for maximum water resistance. Use a bristle brush or spray can, maintaining a distance of about 15 centimeters to ensure an even application. Be sure to coat the inside and bottom of the basket for full protection. If you want to add color, test your sealer on a hidden area first to see how it reacts. For decorative touches, consider adding liners or felt pads on the base. Lightly sand the surface between coats with ultra-fine sandpaper to achieve a smoother finish. Work outdoors, wear gloves to protect your skin, and allow the final coat to cure completely—this can take several days—before using the basket outdoors. This method prioritizes a quick alternative for projects requiring speed, similar to the shellac finish described for pine needle basketry.
Test Your Basket for Weight, Balance, and Egg Fit
To test your basket for weight, balance, and egg fit, start by placing a single large egg (51 g) in the center and lifting the basket by the handle. Ensure that the basket supports this weight without any part of the structure cracking or deforming. Next, verify the balance: the handle should align with the basket’s center of gravity. When lifted, the handle should stay level; if it tilts to one side, your design is off-balance. Add larger eggs, such as jumbo (66 g) and super jumbo (72 g), one at a time, and check for cracks or other damage to the eggs. To maintain stability, distribute the eggs symmetrically across the basket, avoiding uneven loads that could cause the handle to twist or the basket to tip. Finally, place the fully loaded basket on a flat surface and observe whether it remains upright without tipping over or deforming. A well-tested basket supports the weight evenly, stays balanced, and holds eggs securely, ensuring safe transport and minimizing the risk of breakage.