DIY Chicken Feeder Kit: A Complete Guide
Struggling to keep your chicken feed clean and accessible without wasting it or attracting pests? Building your own PVC chicken feeder can be simple, cheap, and highly customizable.
With just a few basic materials, you can create a durable feeder for under $10 that competitors’ store-bought models often cost $20 or more to buy.
Keep reading to learn how to make one that suits your flock perfectly.
Why Build a DIY Chicken Feeder Instead of Buying One?
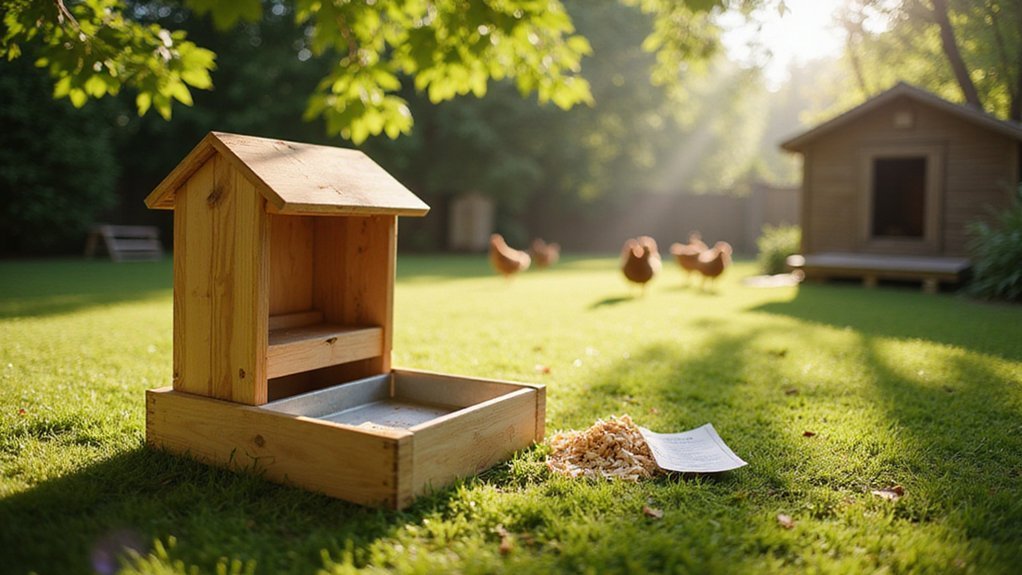
Building a DIY chicken feeder for under $10 using recycled materials is a clear way to save money. You avoid paying for premium brand markups and shipping costs, which can add significantly to the price. By customizing hole placement, you prevent spillage and minimize waste, making your feeding system more efficient. When comparing costs, store-bought feeders typically range from $30 to $50 for similar capacity, but by repurposing old containers, scrap wood, or PVC pipes, you can keep your expenses near zero. For further savings, consider reviewing top picks reviewed to see if any store-bought models offer features you cannot replicate at home. Applying similar principles of dehydrating fruit can help you preserve surplus produce for your flock as a healthy treat. For the stand itself, using a sturdy base design helps prevent tipping and keeps the feeder elevated.
This approach also allows you to tailor the size and position of access holes to suit your birds, reducing the chance of ground waste and contamination from debris. As a result, your flock benefits from fresher, more accessible feed, which can lower ongoing feed costs. Building your own feeder gives you control over design, helping you maximize feed efficiency and cut operational expenses over time. Instead of overpaying for rigid, off-the-shelf options, you can create a smarter, budget-friendly solution that fits your flock perfectly.
Materials and Tools for a 5-Gallon Bucket Feeder
To build a 5-gallon bucket feeder, you’ll need a food-grade bucket, a 2-inch hole saw, a drill, 3/4-inch wood screws, silicone sealant, and a galvanized pig pan. Use a heavy-duty plastic bucket rated for outdoor use to ensure durability against weather. Check that the bucket has safety certifications like FDA approval, and avoid reusing containers that previously held paint or chemicals to prevent residual odors from spoiling feed. A razor knife helps smooth cut edges, while a marker allows you to precisely outline where to cut. When installing screws, add washers to support internal wooden supports which promote even feed flow. Apply silicone sealant around the feeder ports to create a waterproof barrier and prevent moisture from entering. A tight-fitting lid protects the feed from rain and rodents. Make sure the feeding pan sits just above the hole openings to facilitate controlled feed dispensing. The gravity-fed design dispenses feed without spilling or waste, as feed flows down gradually from the bucket. For those using a pressure canner to preserve tomatoes, high heat processing ensures safety by destroying harmful bacteria and sealing jars properly. Using pressure treated lumber for the internal wooden supports can resist rot and extend the feeder’s lifespan in damp conditions. A vacuum heat sealer can also preserve leftover feed or scraps for long-term storage.
Which PVC Feeder Design Works Best for 5–20 Chickens?
A PVC feeder designed with continuous 3-inch pipe and angled cuts works best for 5–20 chickens. This setup provides a reliable flow of feed, accommodates scalable flock sizes, and keeps costs low. Using 22.5° and 45° cuts prevents feed blockage and ensures smooth descent. A 39-inch reservoir can hold 10–15 pounds of feed, enough for 1–2 days for small flocks. For 5–8 birds, four feeding holes spaced 8.5 inches apart are ideal. Larger flocks require adding more units—two feeders comfortably serve 12–16 chickens, and three can handle 18–20 without crowding. This design minimizes feed waste by 15–25% and promotes better flock behavior by reducing competition. For optimal health, position the feeder near roosting bars at the right height to encourage easy access without spillage. Regular maintenance involves rinsing the pipe interior, which takes less than two minutes, and weekly access through a screw-locked lid prevents mold growth in humid conditions. For homesteaders using this design, a lightweight cylindrical body makes the feeder easy to move and refill during daily routines. Adding a cap at the bottom ensures that old feed can be easily cleared during cleaning.
Step-by-Step Guide to Assembling Your PVC Chicken Feeder
To assemble your PVC chicken feeder, start with a 4-foot length of 3-inch PVC pipe. Cutting the pipe to this length helps ensure the feeder is durable yet manageable to handle. Mark the cut line with a permanent marker, then cut through the pipe using a PVC cutter. Afterward, smooth the edges and remove any burrs with sandpaper for a clean fit and safety. Before applying any primer, clean the pipe ends with a rag to remove dust and debris, just as you would prepare a raised garden bed frame for assembly.
Apply purple primer to the ends of the pipe and the inside of the fittings to ensure proper adhesion and chemical compatibility. Wait a few seconds until the primer has soaked in. Then, coat both surfaces with PVC cement and press the fittings—such as the 45-degree elbow and the street 90-degree elbow—onto the pipe. Hold each joint for 10 to 15 seconds to allow the cement to set properly. Wipe away any excess glue immediately to keep the joints clean and secure. As an expert tip, the primer and cement work best when you use consistent hand pressure to bond the joints, much like securing a watering can handle for durability.
To make feeding ports, mark a 2.5-inch half-circle on the pipe, which will serve as the opening for chickens to access feed. Drill four alignment holes around this mark to prepare for assembly. Smooth out the edges of the cut areas with a rasp to prevent splinters. For positioning, slide the 90-degree elbow onto the bottom of the pipe without using glue. Mount the entire feeder securely using pipe straps, which can be adjusted to keep the ports 8 to 16 inches above the ground, similar to how you might use chicken wire fencing to create a secure barrier at a proper height.
How to Add a Viewing Window That Won’t Leak or Jam
To add a viewing window that won’t leak or jam, you should use 3mm to 4mm thick Plexiglas for durability. Cut the Plexiglas at approximately 2,000 RPM using a jigsaw, ensuring your outline is at least 15mm larger than the frame to prevent jamming during installation. To achieve water resistance, apply a 150,000 cps silicone sealant along the edges and insert a 12mm rubber gasket. Attach the window securely with rivets spaced 25mm apart, and use hot glue at 180°C to reinforce the seal for long-term durability. This feeder is made from rust-proof, weather-resistant metal to withstand all seasons. Incorporate a 15mm plastic lip around the window and a 12mm feed flow slot below it. This setup helps maintain a steady feed flow and prevents spillage or leaks. Regularly clean the window weekly to prevent build-up and replace it every two years to ensure smooth operation and a leak-free design.
How Do You Mount the Feeder Without It Tipping Over?
To keep your chicken feeder upright and spill-free, you need to secure it properly using a combination of chain support and base stabilization. Start by hanging your feeder from a sturdy beam with steel harness chains rated to support at least 30 pounds. Make sure all ropes or bungee cords are tightened to prevent swinging, which can cause tipping. Position the feeder 12 to 18 inches above the ground for easy access by your chickens while minimizing mess and waste. Keep it at least 3 feet away from water sources to prevent contamination and water spillage. For a more convenient option, you can use a heated waterer to keep water from freezing during winter months, but place it well clear of the feeder to avoid moisture issues. For stabilization at the base, attach a wood block to the eyebolt inside your bucket to cover the sharp threads and lock the bottom in place. You can also build a PVC wye base or create a raised platform with perching rails for added stability. For a more secure option, consider using predator-proof materials to protect your setup from raccoons. Before allowing your flock to feed, test the setup with a firm tug on all supports to ensure everything stays secure. Proper support and stabilization will keep your feeder upright, prevent spillage, and make feeding time less messy. Additionally, a well-secured system can be adapted to garden structures using raised garden bed trellises for dual-purpose support. Adjusting the S-hook raises or lowers the feeder to maintain the proper height as chickens grow.
Common Mistakes That Cause Feed to Clog or Spill
Common mistakes in design, placement, and maintenance often cause feed to clog or spill, even if your feeder is well-mounted. One major issue is inadequate cover, which leads to rain entering ports and causing clumping within 24 hours. When feed moisture exceeds 12%, it increases feed density by 15%, significantly raising the risk of severe clogs. Placing feeders on uneven surfaces accounts for about 40% of spillage incidents, as this setup allows feed to spill easily. Ground-level placement also attracts pests, which contribute to 25% of container clumping issues. Poor maintenance, such as skipping weekly cleaning, allows mold to develop and block ports within just 7 days. Residue buildup reduces flow capacity by 45%, so regular scrubbing is essential. For similar food preservation tasks, using a high-quality vacuum sealer for meat can prevent spoilage by removing air that promotes mold and clumping. Applying principles from durable wood construction used in high-quality nesting boxes can help ensure your feeder withstands moisture and warping over time. A complementary technique involves using oven sterilization methods to sanitize jars before storing bulk feed. Lastly, using thin plastic feeders can cause warping under loads over 15 pounds, creating gaps that lead to spills. To prevent clogs, always position feeders under cover and ensure side cover is added for protection against wind-driven rain. Addressing these common mistakes helps maintain a consistent feed flow and reduces waste.
How to Tweak Your Gravity Feeder to Eliminate Waste
To eliminate waste from your gravity feeder, you should make specific adjustments to its height and add simple barriers. Start by positioning the feeder lip at the birds’ back height, which helps prevent scratching and spillage caused by overzealous foraging. Use an S-hook to fine-tune the feed level, ensuring precise adjustability. Raise the entire feeder 20 centimeters above the ground to minimize dirt, debris, and access points for bugs. For best results, consider using brooder plates to create a clean, dedicated feeding zone for young birds.
Next, attach a split irrigation hose around the edge of the pan to create a spill-preventing lip. This barrier catches feed that might otherwise fall to the ground. For additional protection, place plastic trays 4 to 6 inches wider than the base beneath the feeder. These trays catch any flung feed, reducing waste and mess. When building your setup, you might explore affordable chicken run ideas to keep the surrounding area secure and tidy.
If birds continue to waste feed by scooping excessively, install PVC elbow ports around the access points. These restrict the birds’ ability to scoop large amounts of feed at once. To further encourage efficient feeding, do not refill the feeder for 24 hours, which prompts ground scavenging behavior. Lightly mist the residue remaining in the feeder to encourage birds to finish what’s available. These tweaks can cut waste by roughly 35 percent, making your feeding more efficient and less messy. For a durable, low-waste design, consider using a metal can instead of plastic, as it avoids cracking and mice problems.