Want to raise chicks without breaking the bank? You can create a functional brooder for under $40 using simple materials like a plastic bin and scrap wood.
This DIY setup is easy to customize, affordable, and just as effective as store-bought models.
In this guide, you’ll learn step-by-step how to build a safe, warm space for your chicks with basic tools and materials.
Let’s get started so you can keep your little hens comfortable without overspending.
Why Build a DIY Chick Brooder Instead of Buying One?
Building your own chick brooder can save you between 50% to 70% compared to buying a commercial unit. With just $20 to $40 worth of materials, you can create a cost-effective setup that often incorporates reused scrap lumber or plastic bins, further reducing expenses by around 30%. This DIY approach not only cuts costs but also provides unlimited customization options. You can adjust the dimensions to suit different chick breeds or ages, position heat sources to match your room’s layout, and modify bedding depth according to local humidity levels. Additionally, you can optimize feeder placement to minimize spillage and add or remove ventilation holes as seasons change. Unlike commercial brooders, which come in fixed sizes and setups, your DIY brooder can evolve with your flock’s growing needs and changing environment. When researching commercial units, you might find that chicken coops for your flock often lack the flexibility a DIY brooder provides. A successful brooder must maintain a temperature of 35-38°C to mimic the warmth chicks need during their first weeks.
Grab These Materials and Tools for a Quick Build
To begin assembly efficiently, gather all necessary materials and tools beforehand. You’ll need a large plastic storage bin, either 27 or 38 gallons, for adequate space and durability. For the frame, select 2×2 or 2×3 boards, which provide enough strength without being cumbersome. Hardware cloth is essential for ventilation, while an 85- or 100-watt flood lamp with a metal reflector will serve as the heat source. For those repurposing materials, note that a compost bin often requires similar structural considerations for durability and airflow. Make sure to have a thermometer on hand to monitor temperature levels. For feeding and hydration, prepare a chick feeder and waterer suitable for young chicks. Comfort and cleanliness are key, so gather pine shavings for bedding, paper towels for quick clean-up, and chick starter feed to promote healthy growth. Consider that the same durability and airflow principles apply when selecting a tumbler for organic waste recycling. A wide-mouth mason jar works well for storing extra chick starter feed to keep it fresh and pest-free.
In terms of tools, a heavy-duty stapler secures hardware cloth and fabric, zip ties help fasten components tightly, and plumber’s strap provides sturdy support for the reflector. A multi-tool or saber saw is necessary to cut boards or straps to size. Sandpaper ensures rough edges are smooth, reducing injury risk. A drill makes assembly faster and more precise.
Always cut 4-inch pieces of plumber’s strap for reflector feet and trim all zip tie ends with wire cutters to prevent injuries. Collecting everything before starting prevents delays, ensures safety, and keeps your chicks protected during their early weeks.
Assemble the DIY Chick Brooder Frame and Hardware Cloth
To assemble the DIY chick brooder frame, start with four 2×3 boards cut to 36 inches for the legs. Mark the 12-inch point on each leg, then attach a 2-foot horizontal piece perpendicular at that mark using #9 screws. This creates a frame with a 24-inch clearance above the base, providing enough space for your chicks to move comfortably. Repeat this process for all four legs to ensure stability and level support.
Next, build the box perimeter. To do this, sandwich your hardware cloth between two 44-inch boards along the bottom and top of the long sides, securing it with 3-inch #9 screws. Then, repeat with 41-inch boards on the shorter sides. This method traps the wire securely, preventing chicks from escaping through gaps. Stretch the 4-by-3-foot hardware cloth tightly across the frame and staple it to the inside edges of the corners to keep it taut and secure. Fold any sharp wire edges inward with pliers to avoid injury. Remember to pre-drill holes before assembly to ensure stability, as required when working with scrap wood and similar materials. For a reliable seal on any future feed storage containers, you can follow the vacuum sealing process used for long-term food preservation. If you need to water your chicks outdoors, a quality watering can ensures efficient hydration without spills. Similarly, using a pressure canner for sterilizing water sources can provide an extra layer of safety for your flock.
For the lid, use 1×2 boards to form a sturdy frame. Cut a 39.5-inch section of hardware cloth, stretch it tightly over this frame, and staple it down. This design allows for adequate airflow while keeping the chicks protected and preventing drafts.
Wire the Heat Lamp, Vents, and Thermostat Safely
Wire the heat lamp, install the vents, and connect the thermostat properly to ensure safety and functionality. Start by attaching the electrical wires to the heat lamp: connect the ribbed wire to the brass fitting, which is the hot side, and the smooth wire to the silver fitting, the neutral side. Secure the wires with wire nuts and insulate connections with electrical tape to prevent shorts. Mount the heat lamp securely using a chain, positioning it approximately 20 inches above the litter to prevent hazards and allow for proper heat distribution, ensuring the bulb does not touch any flammable materials. When wiring the sockets, ensure the color-coding is followed, with the ribbed side as black for the hot connection. For long-term storage of spare bulbs and wire nuts, consider using mason jars to keep components organized and dry. For extra protection against moisture, select a mason jar sealer that fits the jar rim tightly. For consistent watering of nearby plants, you can also integrate drip irrigation from the raised bed garden.
For ventilation, drill two 1½-inch holes in the lid of your brooder, positioning them opposite the heat source. This configuration allows excess heat and moisture to escape, helping regulate temperature without creating drafts that could chill your chicks.
Finally, connect the lamp to a power strip equipped with a thermostat set to 95°F. Plug the power strip into a grounded outlet. Prior to introducing your chicks, verify that the system maintains the correct temperature by measuring at chick height, and test the setup at least 24 hours in advance. This proactive step helps prevent any unexpected temperature drops or surges after their arrival.
Set Up Bedding, Feeders, and Daily Care for Chicks
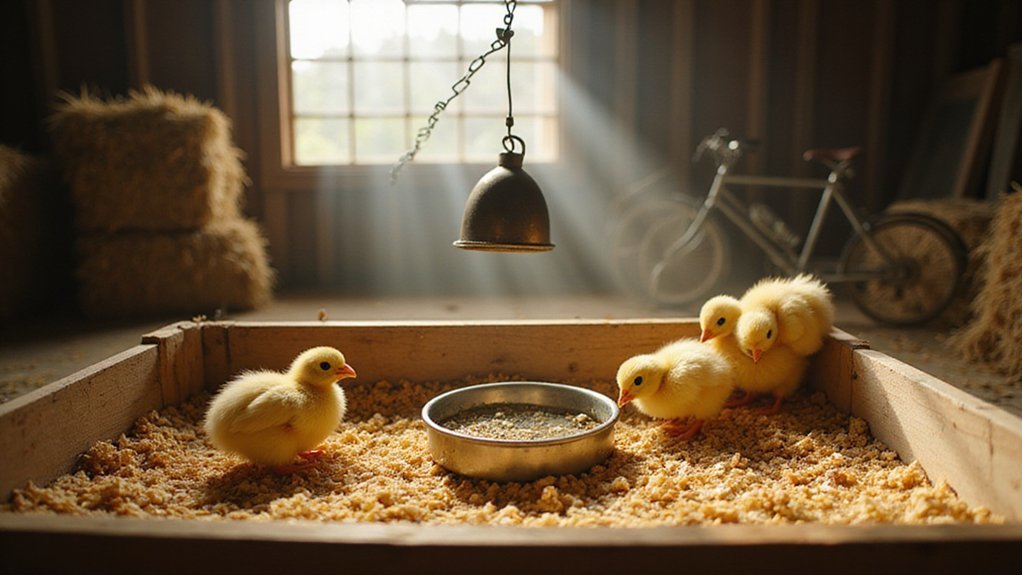
You should use large-flake pine shavings at least 2 to 3 inches deep for bedding. This depth provides enough cushioning to keep chicks comfortable and helps absorb moisture and waste, keeping the brooder dry and reducing odorous ammonia buildup. Avoid cedar shavings, as they contain oils that can be toxic to chicks, and steer clear of newspapers, which can cause leg injuries and become slippery when damp. Using pine shavings is preferable due to their low dust, fragrance-free, and safe nature. For added protection from drafts, you can use a garden bed cover to help regulate temperature around the brooder area. For a secure and reusable way to cover water and feed stations, consider using ball lids for mason jars. Additionally, using a watering can for daily chick hydration tasks can simplify refilling waterers without disturbing the brooder setup.
For the first few days, lay paper towels over the bedding to prevent chicks from eating or ingesting bedding materials. Spread the bedding evenly across the entire floor of the brooder, including under feeding and watering stations. This ensures a clean environment and promotes good hygiene.
Position feeders and waterers at the cool end of the brooder, away from the heat source, to encourage chicks to eat and drink comfortably. Fill the feeders with crumble mash, and use 1-quart waterers during the first week to meet their hydration needs. Place multiple feeding stations to prevent crowding and competition.
Clean waterers daily with a dilute bleach solution to prevent bacteria growth and top them up twice a day to ensure fresh water is always available. Spot-clean the bedding daily to remove waste and damp spots, helping to maintain a dry, healthy environment for your chicks.