DIY PVC Chicken Waterer: A Step-by-Step Guide
Wondering how to build a simple, affordable chicken waterer that keeps your flock hydrated? Instead of buying one, you can save over 75 percent by making your own with just a few PVC pipes and fittings.
With some basic tools and a bit of DIY know-how, you’ll have a sturdy, leak-proof system ready to mount and maintain. Keep reading for all the tips you need to get started.
Why Build a DIY PVC Chicken Waterer Instead of Buying One?
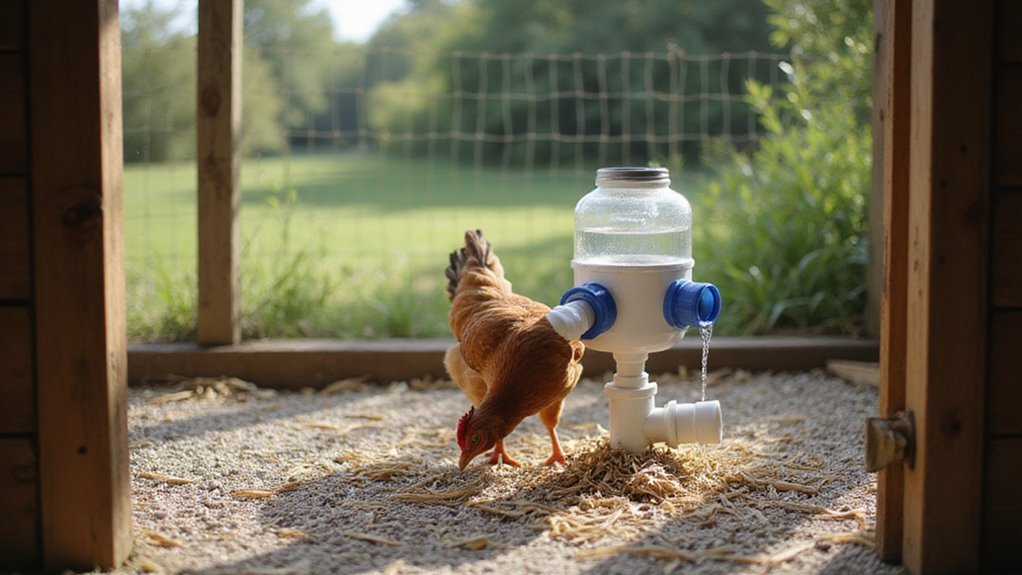
Building your own PVC chicken waterer is often more cost-effective than purchasing a pre-made unit. By using affordable PVC pipes and fittings, you significantly lower your initial investment compared to retail kits, which can be pricey. PVC is also highly durable; it resists corrosion and maintains its structure over time, meaning you’ll replace it less frequently. For added convenience, the design can include a drip line for automatic refilling, especially in hot climates.
Custom designing your waterer gives you control over water quality, an essential factor for broiler chickens that are especially prone to bacterial buildup. Easy access for cleaning is built into your design, making it simple to keep the water fresh daily. Additionally, creating a DIY system reduces plastic waste since you are repurposing parts instead of relying on disposable or mass-produced products. This approach further lowers your environmental impact. For flock health, choosing a well-ventilated design that matches the durability of top-rated chicken coops ensures your setup resists moisture buildup and contamination. To further support your flock’s comfort, consider how the height of roosting bars affects their resting posture and overall coop layout. Reviewing the best compost bin options can also help you manage waste efficiently alongside your waterer setup.
Lastly, building your own waterer ensures you won’t be affected by supply chain disruptions, guaranteeing your chickens always have reliable access to clean water. Overall, a DIY PVC chicken waterer is a durable, customizable, budget-friendly solution that enhances flock health and minimizes waste.
Materials Needed for a DIY PVC Chicken Waterer
Gather all the essential PVC components before you start cutting pipe. You will need 4-inch diameter PVC pipe sections, 2-inch spacer pieces, 90-degree elbow joints, and 4-inch end caps. Additionally, have 1/2-inch reducing tees, trap adapter fittings, and various barbed adapters and connectors on hand. These fittings ensure proper water flow and connection options for your waterer. Just as with raised garden beds, selecting quality materials is key to a successful project. For those managing garden waste alongside their flock, integrating a compost bin with worms can efficiently recycle poultry litter into rich soil amendments.
For a leak-proof seal, pick up PVC primer and cement, along with joint compound or silicone sealant to secure threaded connections. Use stainless steel hose clamps and pipe straps to keep parts firmly in place. You will also need a 5-gallon bucket, drain saucers, flexible vinyl tubing, and specific drill bits to create clean, precise holes. Using Teflon tape on threaded connections provides an extra watertight seal against leaks. For ducks, proper drainage is critical to prevent fouling, similar to the design priorities highlighted in wood duck nesting boxes.
Choosing quality materials like PVC primer and cement not only creates a durable, long-lasting waterer but also helps eliminate potential leaks. Investing in stainless hardware prevents rust and ensures longevity. Gathering all these items beforehand streamlines the building process and results in a safe, dependable water source for your flock.
Cut and Dry-Fit Your PVC Pipes for Perfect Alignment
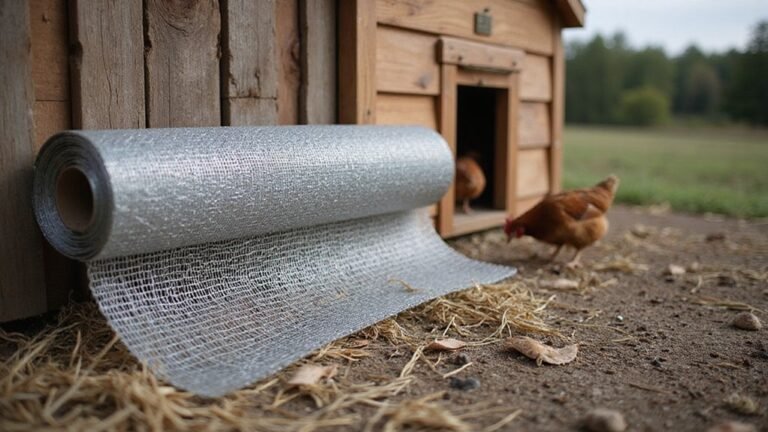
To ensure your waterer stays straight and leak-free, start by cutting your PVC pipes to precise lengths. Measure the distance between your rain barrel and the waterer location carefully, then cut the main connection pipe using a fine-tooth saw for a clean, perpendicular edge. For TEE joints and horizontal connections, cut multiple 4-inch sections to maintain uniform sizing. After cutting, deburr and chamfer each pipe end to smooth out edges, which helps prevent fitting jams and ensures proper alignment during assembly. This careful preparation resembles the precision needed when selecting the best nesting boxes for a secure setup. Just as you would choose a reliable composter, consider the tumbler for compost to streamline your organic waste recycling process. For example, using galvanized hardware cloth under the waterer can prevent pests from accessing the system.
Before applying cement, assemble everything dry first. Place the barrel and waterer in their intended positions to verify the connection span and barrel height. Test each elbow—both 90-degree and street elbows—to confirm they seat correctly. During this dry-fit phase, note that PVC fittings only seat 50-70% when dry, so mark your pipes and fittings for quarter-turn twists to make insertion easier later. This step helps catch potential misalignments early, saving you from leaks once you cement the joints. Repeat this process for all feeder tubes and nipple connections before permanently bonding the pieces together.
Install the Watering Nipples Without Cracking the Plastic
To install watering nipples without cracking the plastic, you should drill a 3/8-inch hole and position it 3/4 inch from the bottom of the bucket. This precise placement ensures proper nipple function and prevents stress on the plastic. Use a sharp nail to create a pilot hole first, which helps prevent the drill bit from wandering and reduces the risk of cracks. After drilling, smooth any rough edges with a file; sharp edges can concentrate stress and lead to cracking when the nipple is inserted.
When applying sealant, only put it on the male threads of the nipple. Leave the first one or two threads bare to avoid overflow and mess. Be careful not to touch the metal pin or the O-ring during installation. Insert each O-ring securely into its respective hole before screwing in the nipple. Screw the nipple in about 80% of the thread depth; screwing it in all the way can cause the plastic to crack. Avoid overtightening, which enlarges the hole and stresses the plastic. Use an installation tool to control torque and always support the pipe with a backup wrench to prevent unnecessary strain. Once installed, check for leaks immediately to ensure a proper seal.
Glue the PVC Chicken Waterer Reservoir and L-Shaped Frame
Begin by cleaning all surfaces with isopropyl alcohol to remove dirt and wax, ensuring strong adhesion. Lightly sand the glossy PVC sections with 220-grit sandpaper to improve bonding; skip matte finishes as they don’t require sanding. Apply a clear or purple PVC primer to chemically activate the surfaces, making sure both the reservoir and frame are properly prepped. While the primer is still wet, coat both pipe ends and fittings generously with solvent cement, ensuring an even layer for a leak-proof bond. Hold each joint firmly for at least 30 seconds to allow the cement to set. For non-PVC boards, use a suitable construction adhesive instead. Always wear gloves and safety glasses to protect yourself from chemicals. Allow the solvent cement to cure for 1 to 2 hours before adding water; epoxy adhesives require approximately 24 hours to cure fully. After applying the glue, immediately wipe away any excess with mineral spirits to keep the assembly clean and neat. Only proceed to add water once the joint has fully hardened to prevent leaks and ensure durability.
Set the Right Height for Your Flock’s Age and Size
Your waterer height should match your flock’s age and size to ensure proper drinking posture. For day-old chicks, set nipples at eye level, about 4 to 6 inches above the ground. As they grow, raise the nipples every 2 to 3 days by a few inches, aligning them with their increasing height. By days 2 to 3, chicks should tilt their heads at a 30 to 45-degree angle when drinking. During the pullet stage, adjust nipples to 6 to 8 inches high to encourage a 60-degree head tilt. For adult chickens, set nipples between 8 and 12 inches off the ground, or 18 to 24 inches for larger breeds. The ideal height is achieved when the birds stand comfortably at a 60 to 70-degree angle with necks slightly stretched—if they squat, the waterer is too low; if they hop up, it is too high. Using high-quality mason glass jars for your waterer ensures clear visibility of water levels and long-lasting durability. For optimal results, choose a waterer made with durable materials that offer both performance and longevity. Additionally, consider using a top wire rack to elevate the waterer above the coop floor, keeping it clean and accessible.
Mount Your PVC Chicken Waterer on a Wall or Fence Post
To mount your PVC chicken waterer on a wall or fence post, start by choosing a high corner away from perching areas to prevent contamination and spill hazards. Securely anchor a pressure-treated 2×4 brace to existing framing using galvanized screws, ensuring stability. Use plumber’s tape or stainless hose clamps to fasten the PVC manifold firmly to the board, then drive 3/8-inch galvanized screws through the board into the wall or post for extra support. To prevent spinning, drive two vertical screws halfway into the board and loop a string around them. Position the waterer so the top of the reservoir is above your tallest bird’s head, guaranteeing drip cups are at a comfortable drinking height. Test that the nipple system facilitates easy drinking for chicks by pressing each plunger to confirm water flow. Double-check that all mounting points remain tight over time to avoid shifting or loosening.
Pressure-Test Joints and Flush PVC Shavings Before Use
To ensure your PVC chicken waterer won’t leak or clog during use, start by pressure testing all joints. Fill the system slowly from the lowest point, keeping high-point vents open to release trapped air. Once water appears at all vents, close them and pressurize the system to 150 PSI, which is 1.5 times your typical operating pressure. Maintain this pressure for 30 minutes, checking for any drop greater than 5 PSI. A minor loss indicates a leak, so inspect all joints immediately to fix any issues before continuing.
Next, clean the PVC thoroughly to remove internal shavings from cutting. These shavings can clog valves and restrict water flow to your chickens. Run high-velocity water through every part of the system until clean water discharges freely at the outlet. This flushing step should be completed before you perform your final pressure test. Proper cleaning and pressure testing will help ensure your waterer remains reliable and clog-free during operation.
Daily Maintenance for Your PVC Chicken Waterer
Before refilling your PVC chicken waterer each day, start by emptying it completely and removing any visible debris, droppings, or floating particles. Check the water flow at each dispensing cup; any slow drip or stagnation can reduce water intake and threaten your birds’ hydration and overall health. Inspect the interior surfaces for algae growth or discoloration, as these can harbor bacteria that may cause disease. Clean any residue from the dispensing cups using a brush and mild detergent to ensure proper water flow and hygiene. Good coop ventilation helps reduce airborne dust that could settle inside your waterer, but daily inspections are essential to catching issues early. Also, verify that the bulkhead fitting and valve stem stay free of mineral buildup or debris, which can impair water flow. For thorough sanitation, periodically sterilize mason jars used for water collection or pre‑mixing solutions to prevent bacterial contamination. After cleaning and inspecting all parts, refill the waterer with fresh, cool water. Maintaining this routine daily guarantees your flock stays well-hydrated and healthy without interruptions, and monitoring pH levels with a tester helps ensure slightly acidic water supports digestion and hydration.
Fix Leaky Nipples and Clear Clogged Water Lines
To fix leaky nipples and clear clogged water lines, start by flushing the entire line to remove sediment or biofilm. Push the metal plunger inward while rotating it to clear each clogged nipple, or use a small wire to dislodge hardened debris. When inspecting the nipples, remove the leaking one and check the O-ring for cracks. If damaged, replace it and apply a thin layer of food-grade silicone sealant to the threads. Avoid over-tightening, as it can crack the housing; instead, snug the nipple just enough to create a proper seal. Before reinstalling, wrap Teflon tape around the threads for extra sealing. If the valve spring pops out during reassembly, gently push it back into place. Test the valve manually to ensure it closes tightly; proper angle and pressure are key to preventing future leaks. For persistent water delivery issues, consider using a solar charger for fence setup to ensure consistent pump operation. Leaks from the pin area are often caused by debris preventing a proper seal of the O-ring. To maintain the system’s overall efficiency, regularly inspect your setup using a bonsai watering can to ensure gentle and precise water application. For long-term storage of spare nipples and seals, mason jars with airtight lids provide excellent protection against moisture and dust.